Mike's
Woodworking Projects
Continued
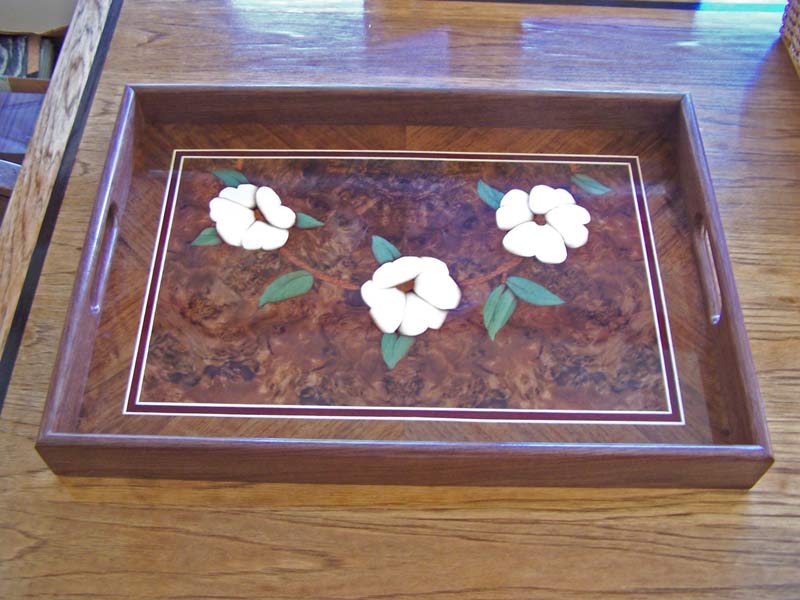
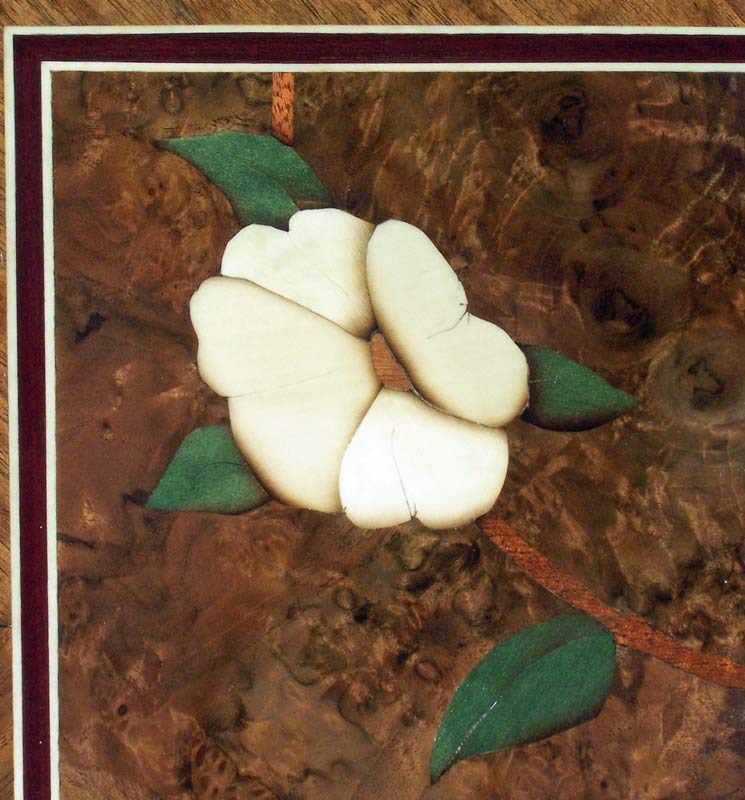
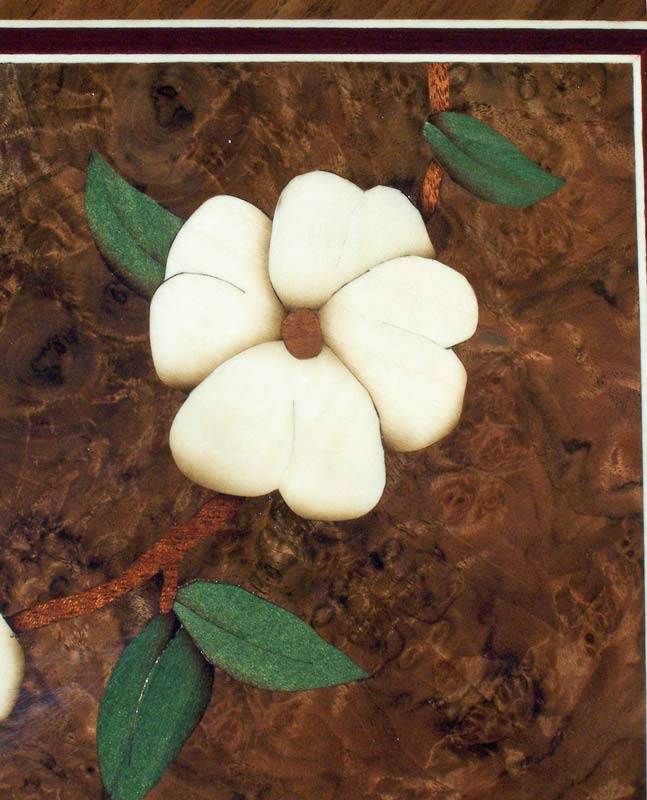
1/9/2013 Here's another tray I did recently
for a friend.
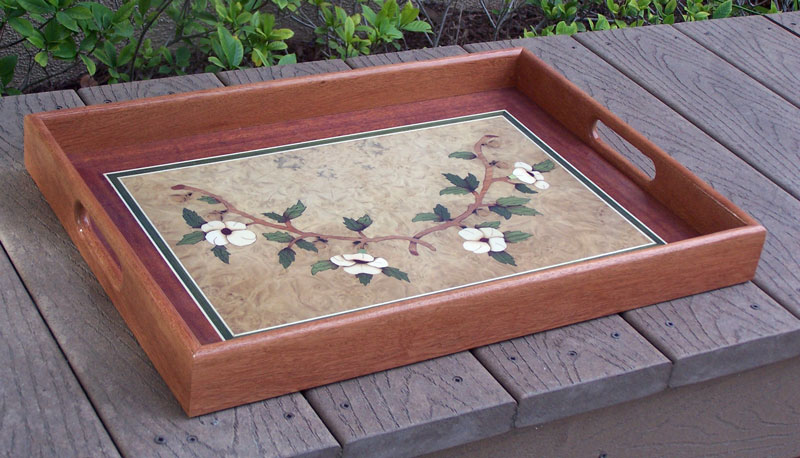
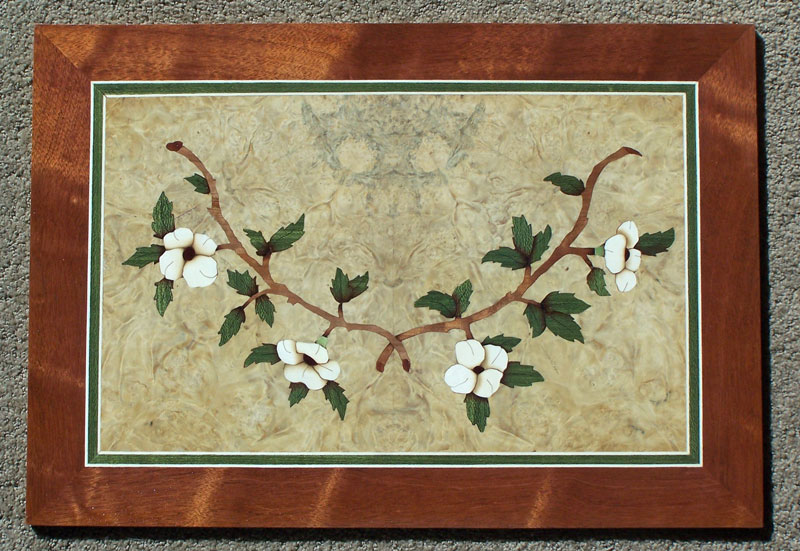
The tray has a mahogany border, sides and back. The
design is of dogwood flowers on intertwined branches. The center
(background) of the design is laurel burl. The dogwood flowers are holly
veneer, with a center of bloodwood. The branches are cherry and the leaves
are dyed green veneer. The banding is holly and green dyed veneer.
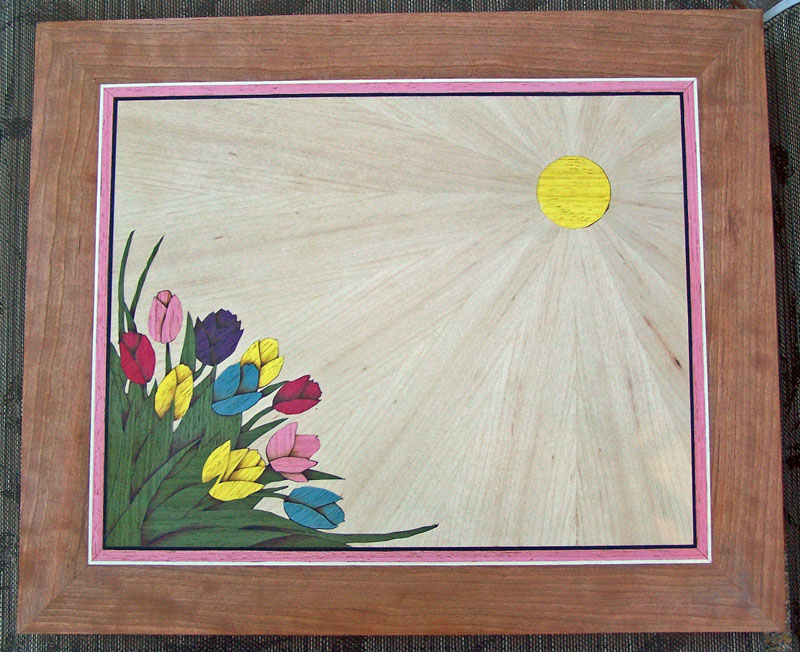
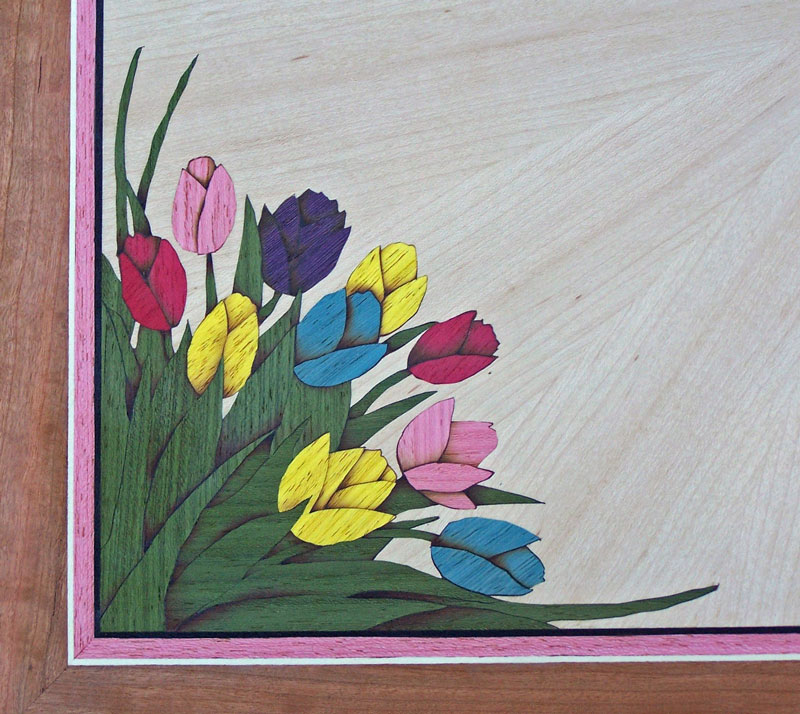
11/22/2012 This is part of a project I'm working on slowly. It'll be four "TV" type trays, each with a different marquetry top. I call this one "Tulips". I was really pleased with the design, with the flowers only in the corner, and the radials coming out from the sun. The pictures don't really do it justice - when looking at it directly, the colors are vivid and striking.
The second picture shows a close-up of the tulips.
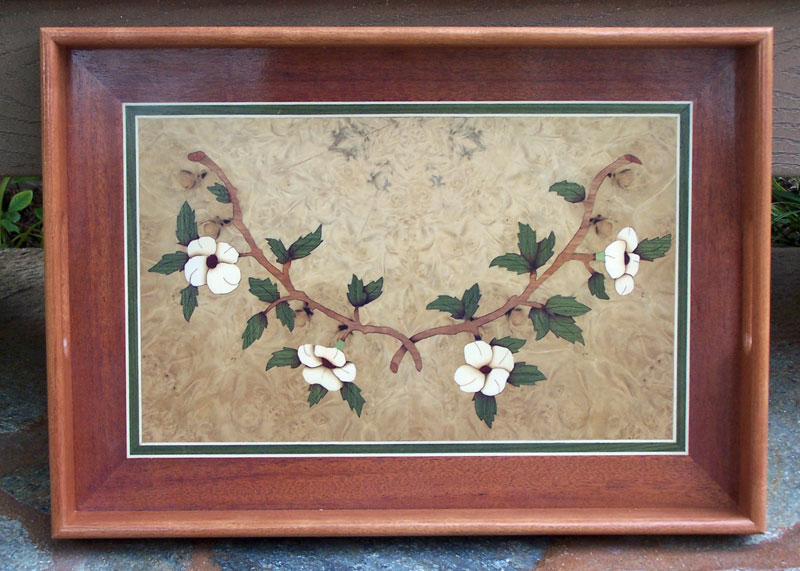
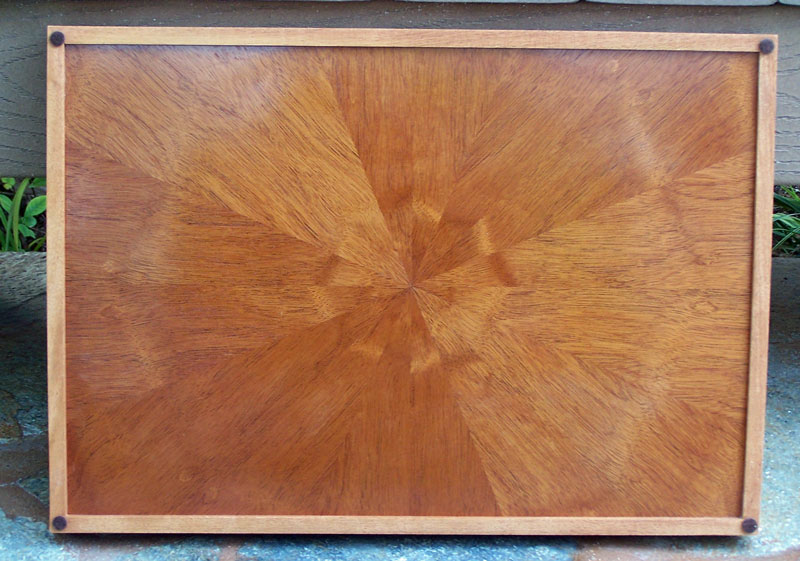
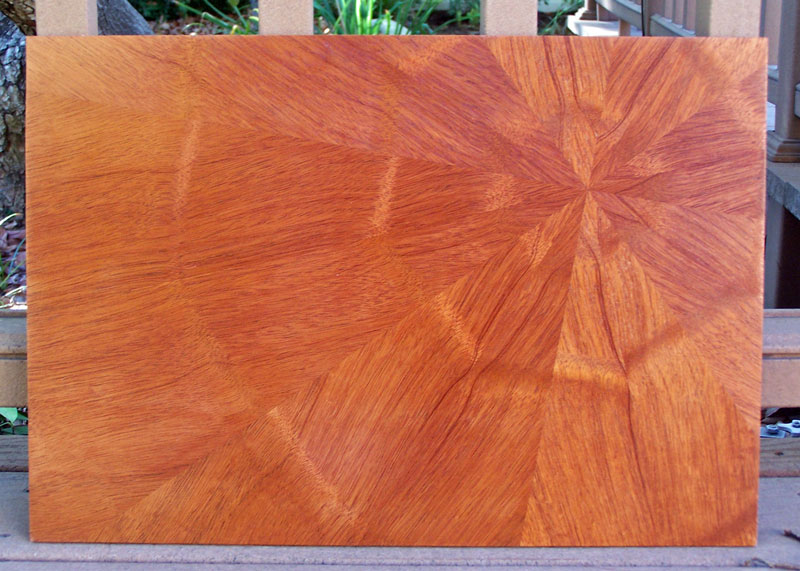
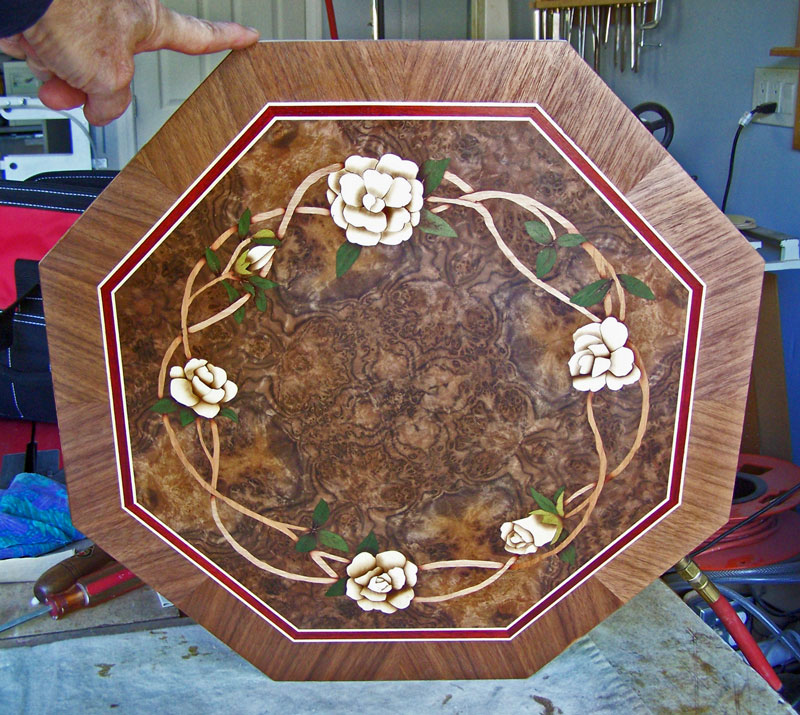
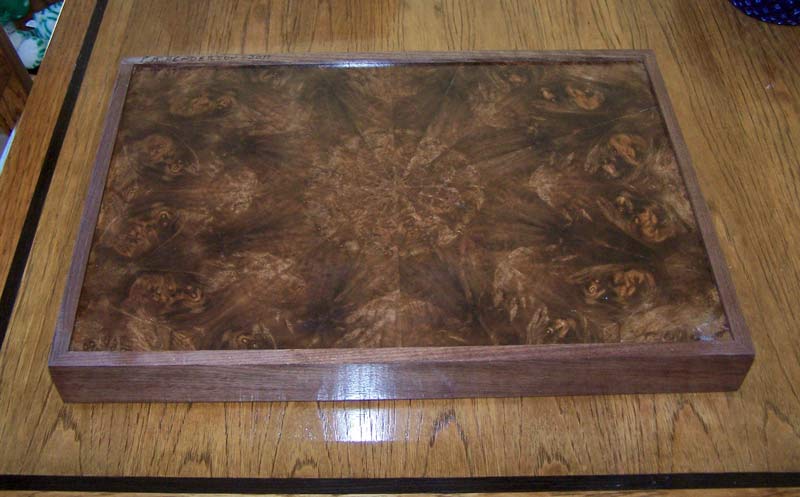
10/25/2012 Here's a tray I'm working on now (Dogwood flowers). The field is laurel burl laid in a half radial pattern, the border is mahogany, the banding is holly and green dyed veneer. The flowers are holly, the centers are bloodwood, the branch is cherry and the leaves are green dyed veneer. I especially like how the design stands out on the laurel burl background. I did the back in an offset radial match of drape mahogany.
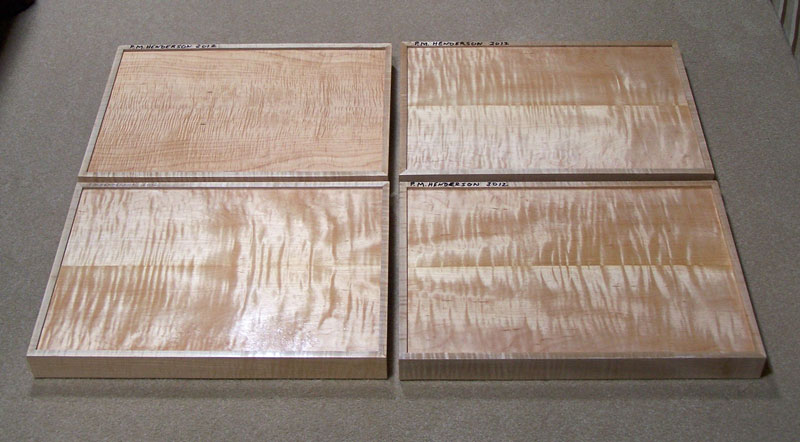
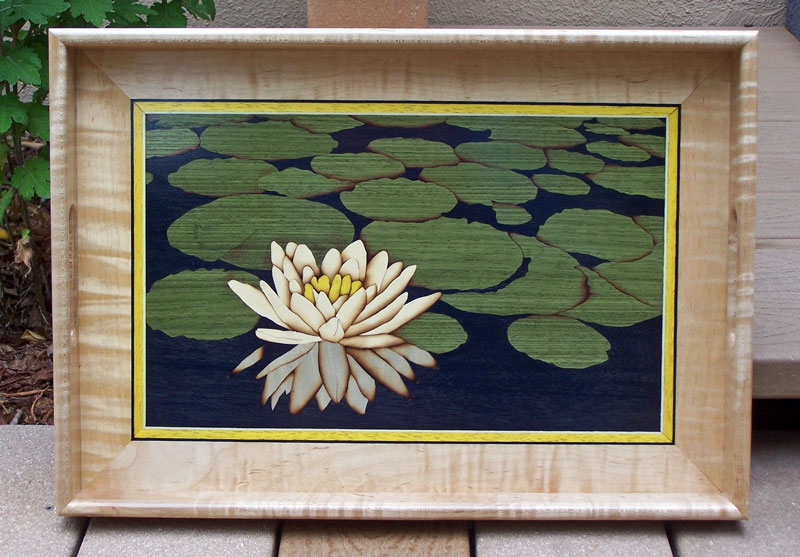
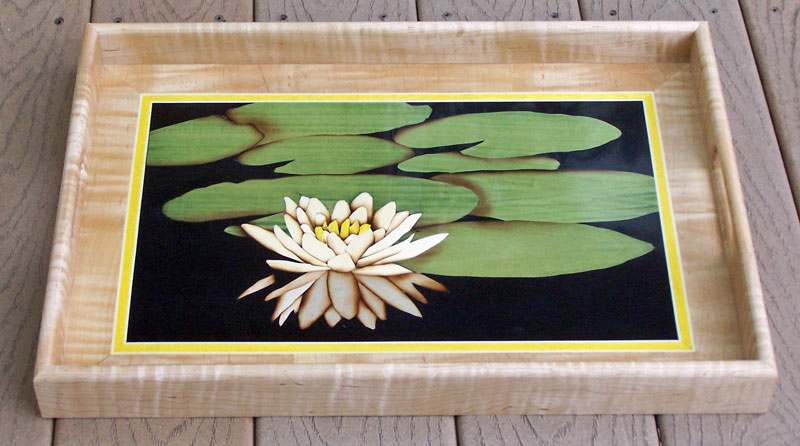
10/05/2012 I just completed five water lily trays - although I only show four in the pictures. I sold one, and delivered it, before I took the pictures. Three of the remaining trays are for clients, leaving me one for a sample. This design has been very popular. Whenever people look at my tray designs, they seem to always be drawn to the water lily design. I'm trying to figure out why so that I could do more designs that appealed to people. Maybe it's the strong contrast between the lily flower and the dark water.
I did the sides and border in "tiger strip" maple to suggest water movement. As the maple ages and changes color, the tiger strips will stand out even more.
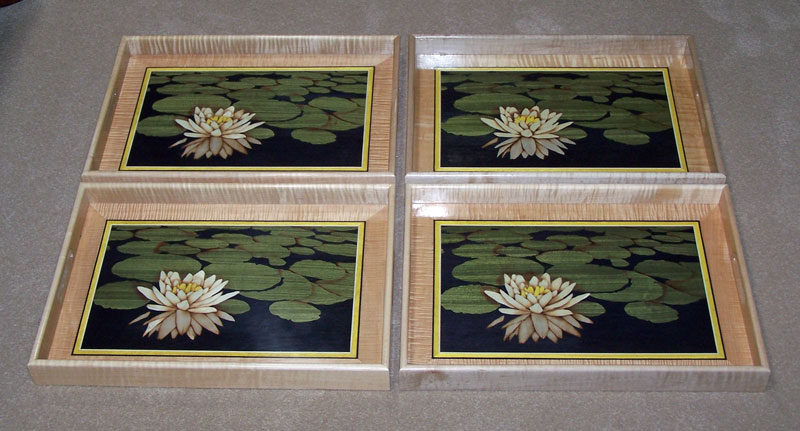
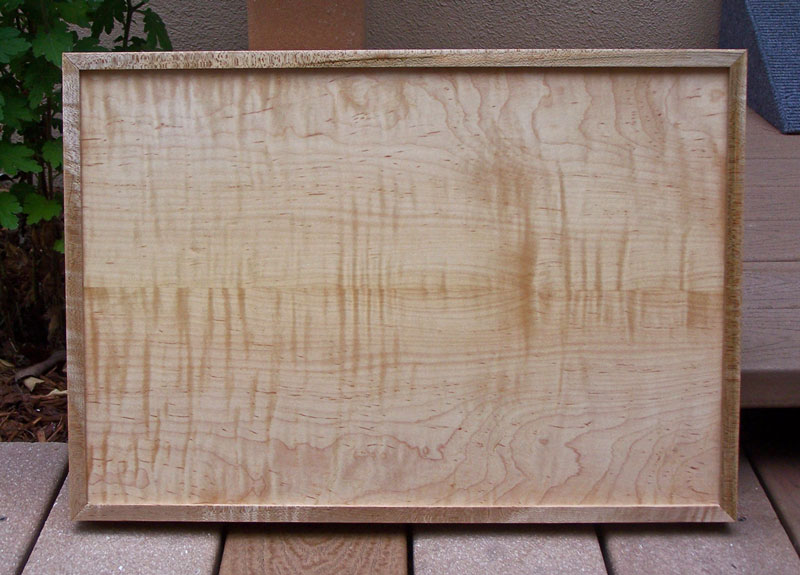
I did the backs in bookmatched tiger strip maple. Some people might call this "fiddle back maple".
I keep experimenting with the design and the materials. As long as people like the design and are willing to buy the trays, I'll keep making them. But for now, I want to do a few trays with different designs.
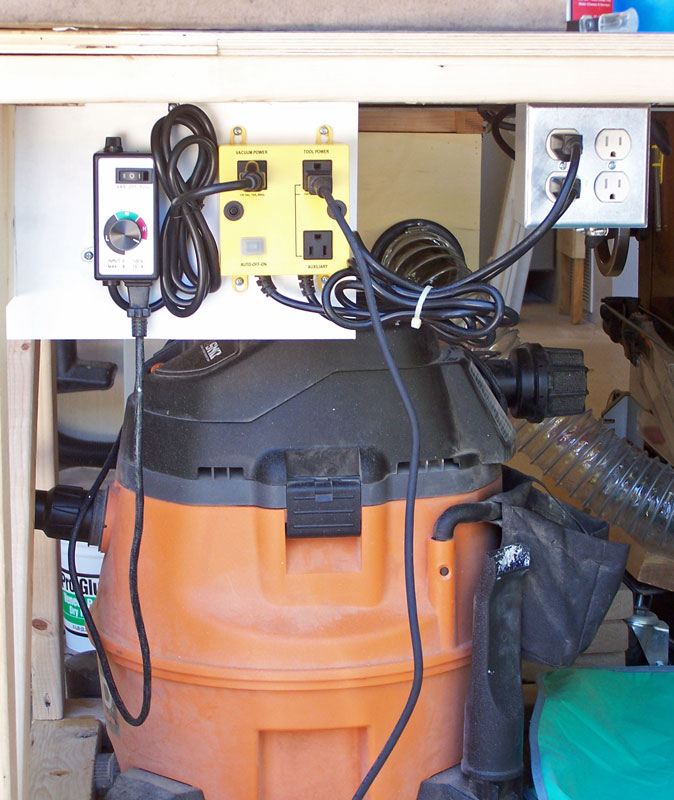
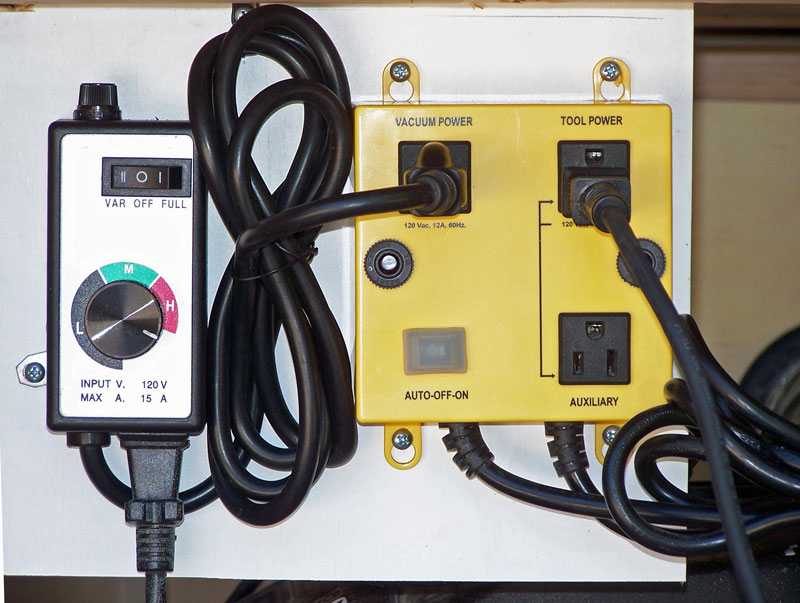
09/02/2012 I had discovered earlier that I needed to slow down my shop vac when using it for some sanding applications - so since I was doing all this work, I decided to get equipment to do that, also. I used a i-vac unit to turn the vacuum on when the sander is turned on. I prefer the i-vac to the i-socket unit because the i-vac has a switch on it that allows me to turn the vac on for cleanup work when not using the sander.
I also got a "router speed control" unit from Harbor Freight to control the speed of the vac so that I can reduce the suction when I want to. So far, it works very well.
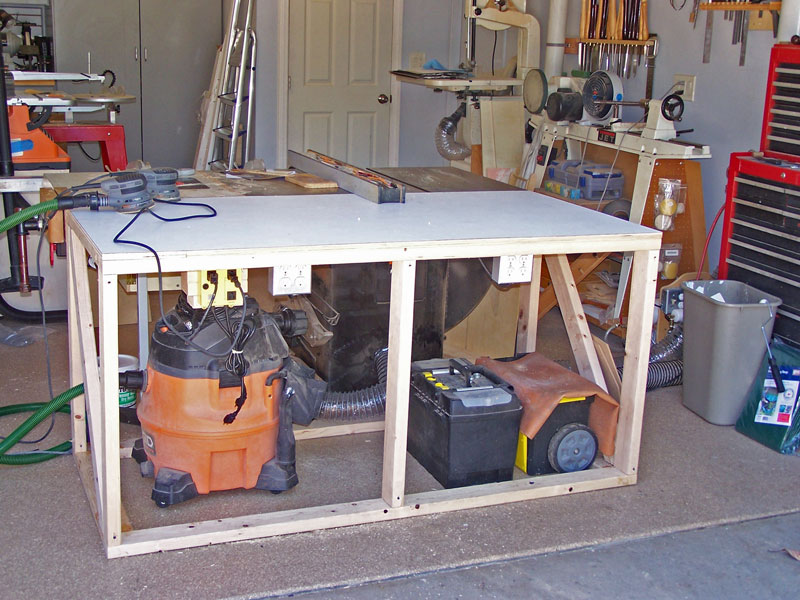
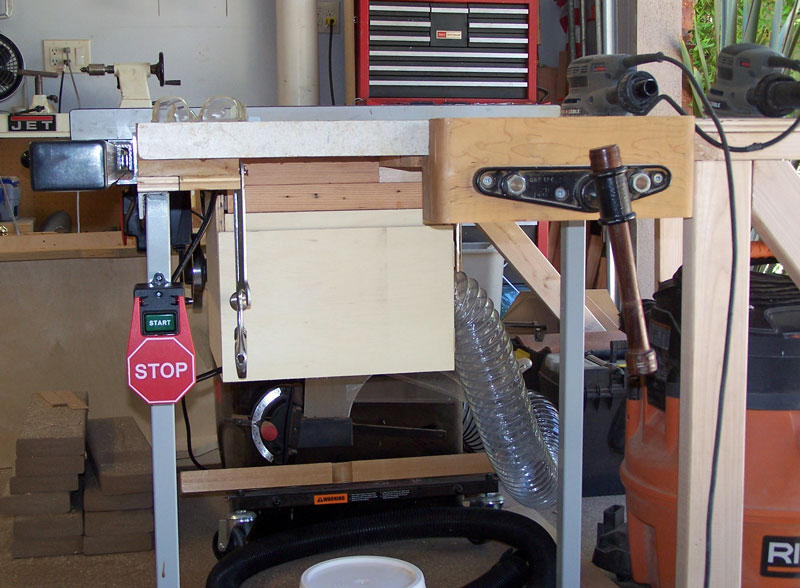
08/27/2012 As part of my dust collection work, I wanted to enclose my router and have dust collection on it. This caused me to have to disassemble most of my cabinet saw, so I decided to build a new outfeed table. My old outfeed table was built for my old shop, which was very small (10' by 11') - so the outfeed table had to fold down so that I could close the garage door. Anyway, here are some pictures of the outfeed table and the box to enclose the router.
This first picture shows the outfeed table. I built it out of 2x4's with a plywood top covered by Formica. I used water based contact cement to lay the Formica and it was difficult to work with - to get it to "grab". I was finally able to get good adhesion.
This pictures shows the box I built around the router. I added a safety switch and mounted it at knee height so I could turn the router off without using my hands.
And here's a picture of the router box with the door open.
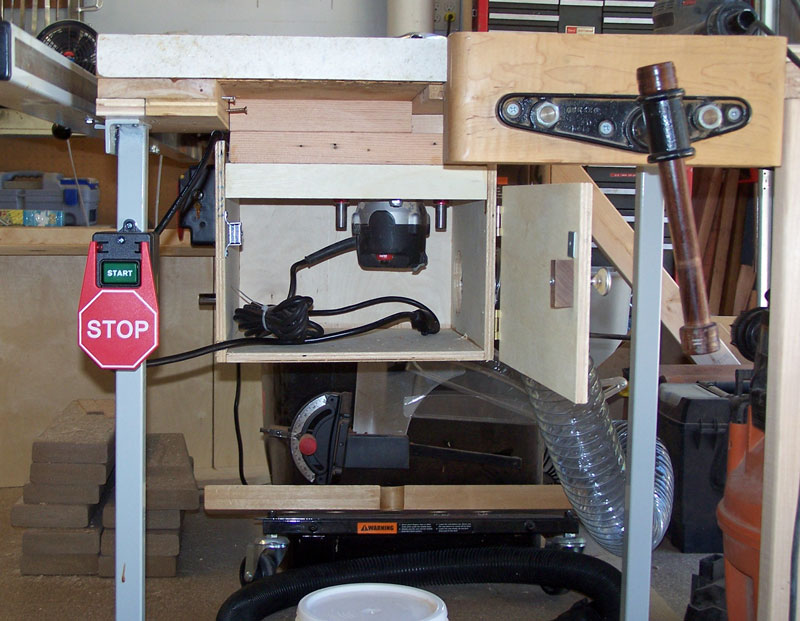
I haven't had a chance to use the router yet, but it has to be better than what I had before - which was nothing.
08-01-2012 I went to the OC Fair recently and found out that one of my marquetry trays won an Honorable Mention. Not bad when you consider they were the first marquetry projects I've done.
I'm finally working on getting my dust collection duct work done. You can see my system here.
07-07-2012 I submitted three of my marquetry trays to the woodworking contest at the OC Fair. I don't expect to win anything - the trays may not be of award quality - but maybe I'll get some people interested in buying one.
07-04-2012 Happy Fourth of July! Here are a few serving trays I recently finished. The first is a water lily with lily pads on a black background. The border and sides are figured maple. The back is a bookmatched fiddleback maple. I had done a water lily tray earlier but didn't like the lily pads - I felt they didn't give the proper illusion of depth. So for this one, I kept the lily design, which I was satisfied with, and re-did the lily pads in an attempt to better show depth. The background shows up completely black in person. This picture makes the black look washed out.
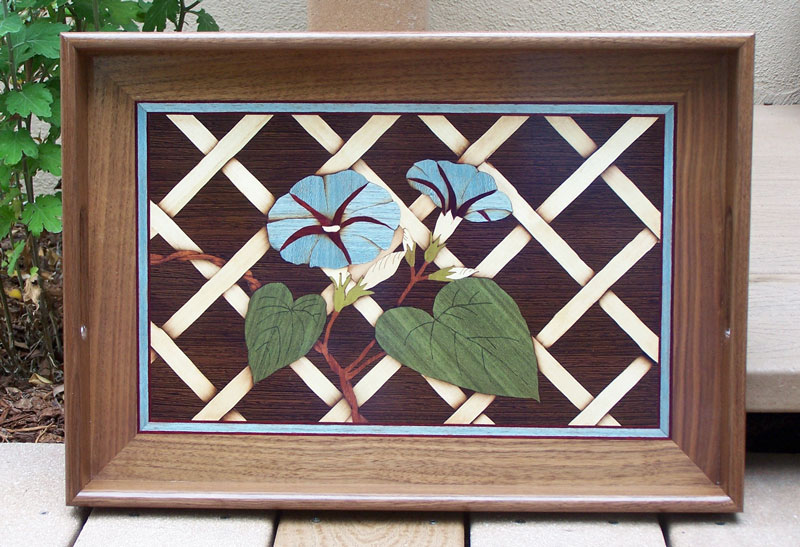
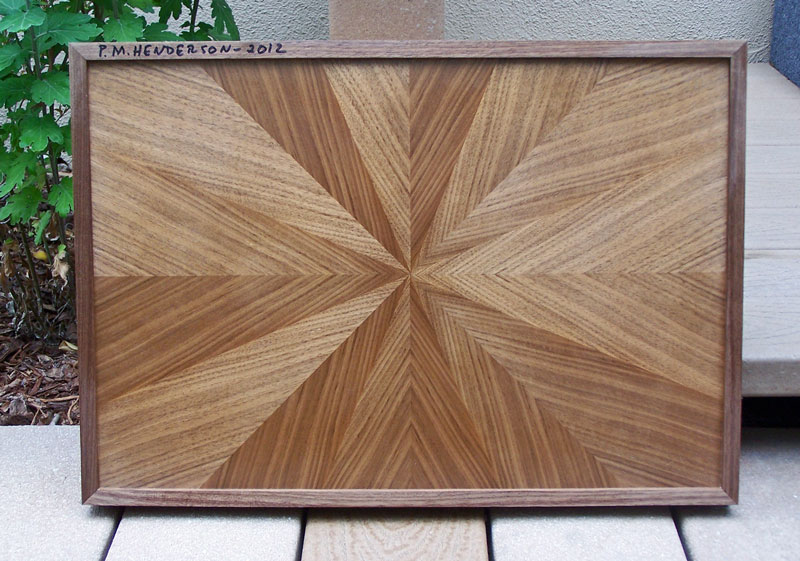
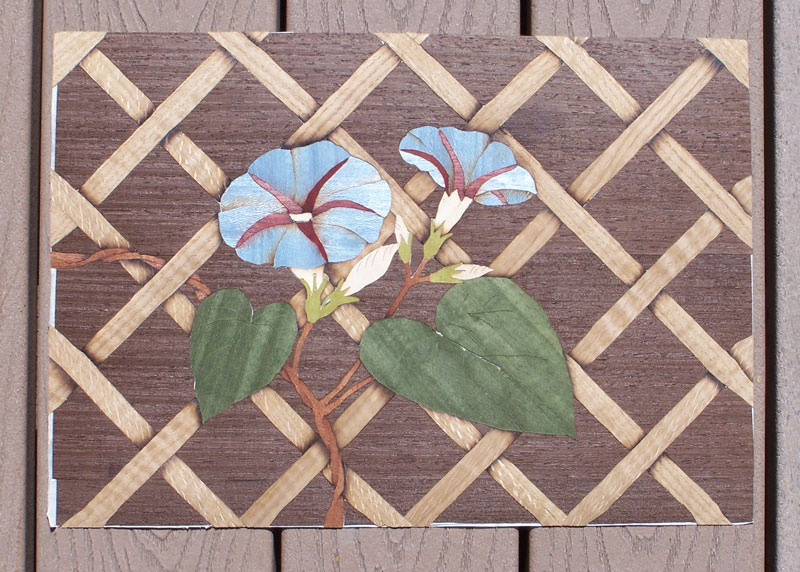
Next is a morning glory on a trellis. The background is wenge and the trellis is a bleached wood (don't remember the species). The border and sides are walnut. The back is 16 pieces of quarter sawn walnut, laid in a radial pattern to produce a herringbone effect.
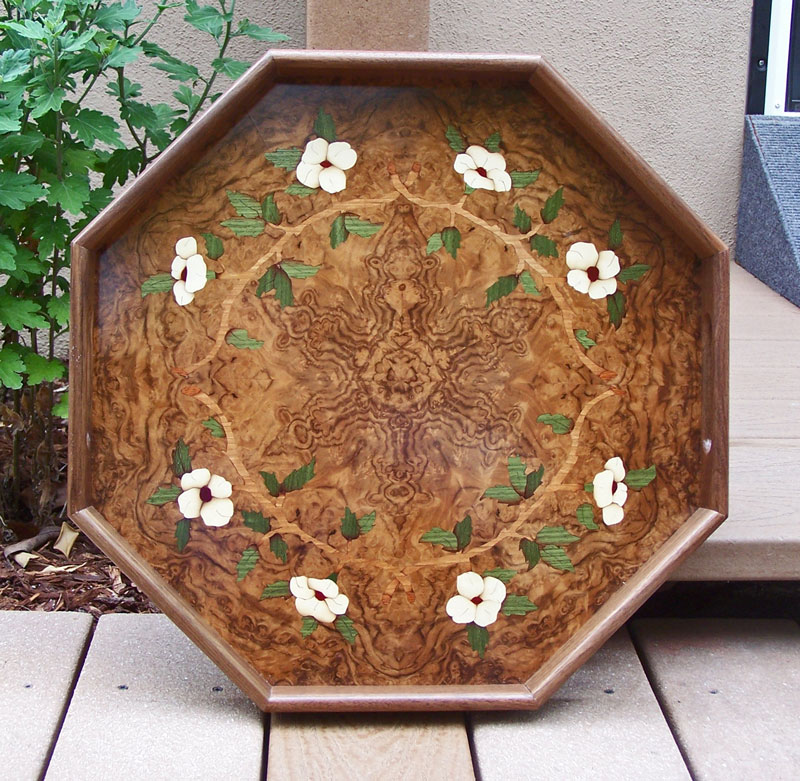
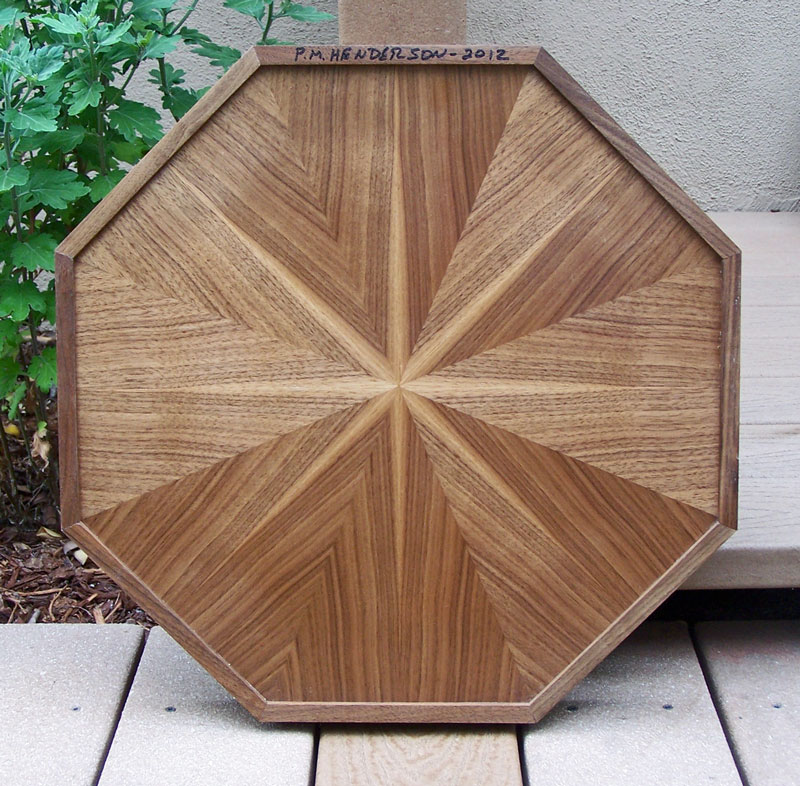
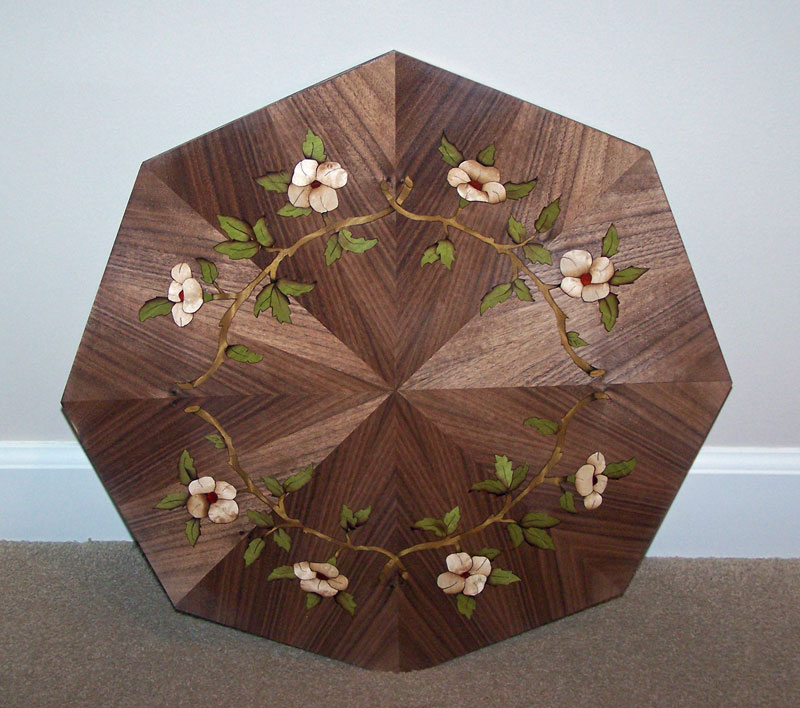
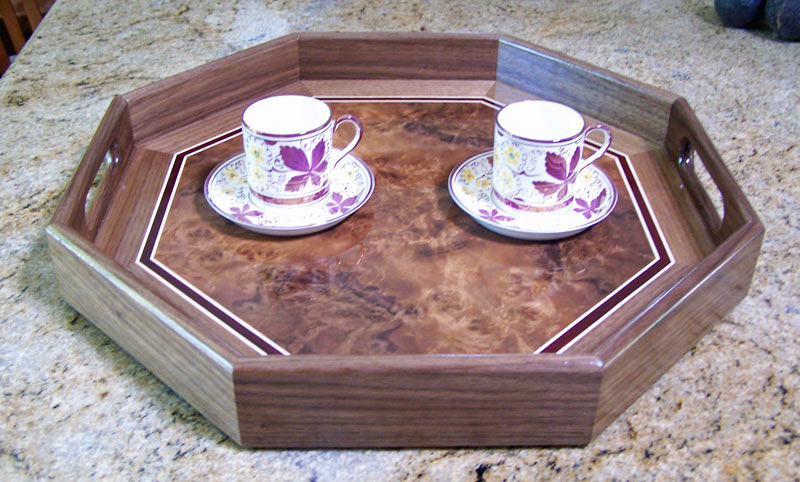
The last tray is an eight sided tray with a circular design of dogwood on the vine, set into walnut burl laid in a radial pattern. I should have used a darker green for the leaves so that they would stand out better against the dark walnut. But otherwise, it came out okay, even if it is busy because of the heavy design in the burl.
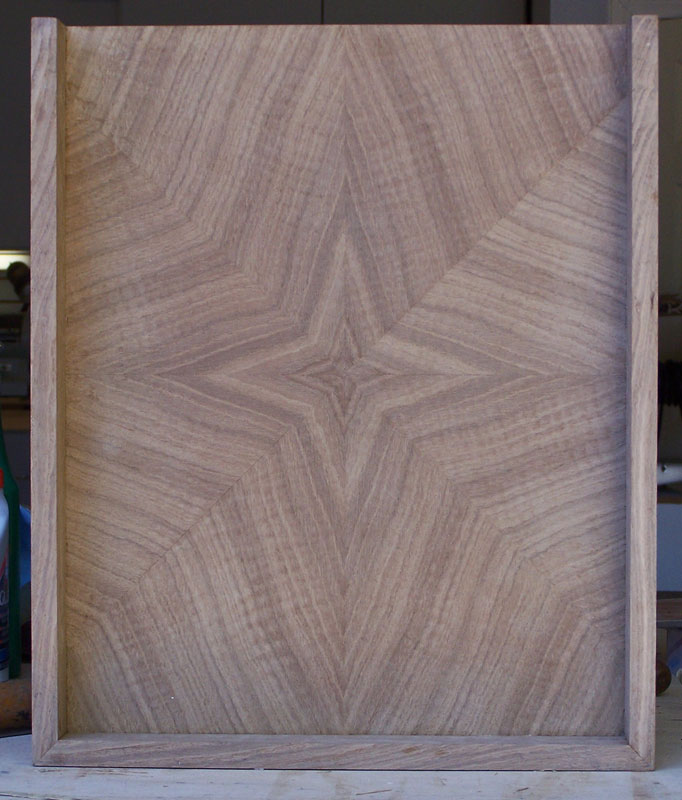
The back is quarter sawn walnut laid in a radial match to produce a herringbone pattern, but I took advantage of sapwood on the veneer to also produce a center star pattern. It's always nice to be able to use what would otherwise be a "defect" in the veneer to produce an interesting design.
06-14-2012 I have the two morning glory panels mounted and with a coat of shellac. They're not finished - I'll apply several coats of lacquer - but I thought I'd post the progress pictures.
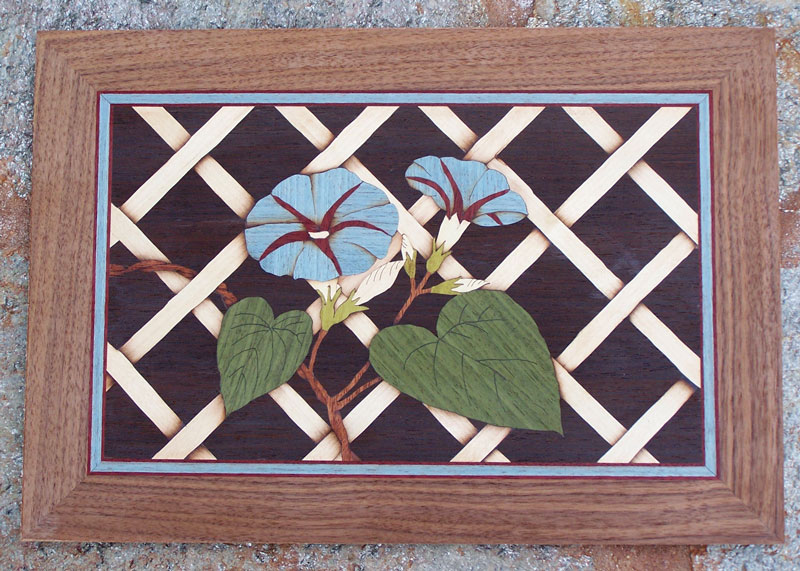
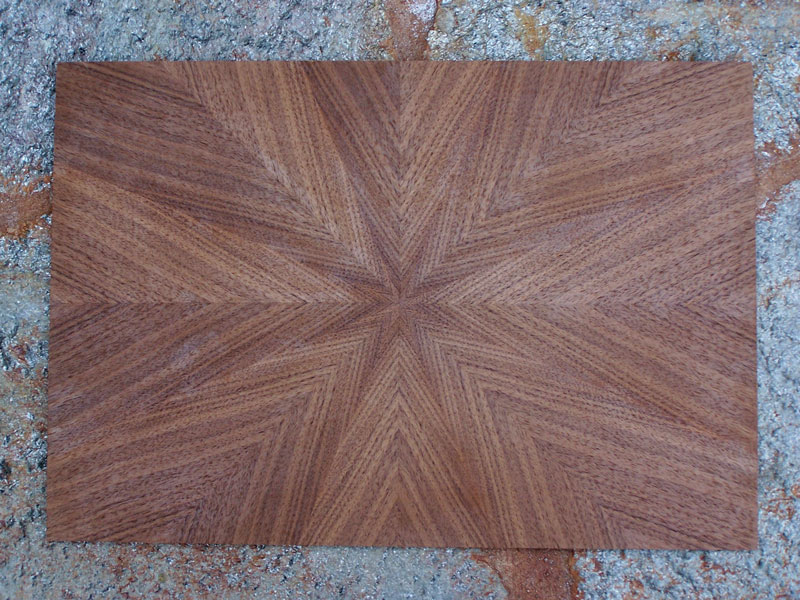
I'll also include a picture of the back of the first panel (the one with the lighter trellis).
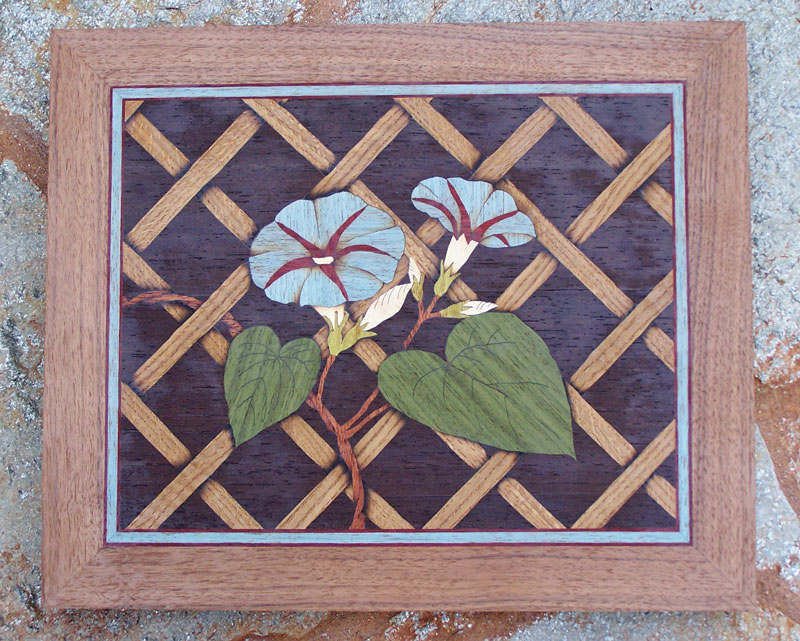
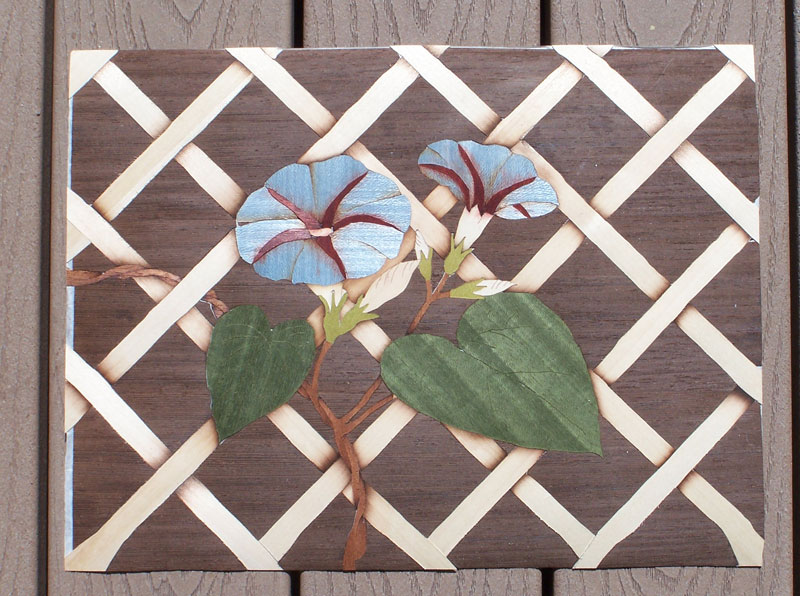
05-21-2012 This is the next marquetry panel for the project I have going on right now. I call this one "Morning Glory on a Trellis". I did two panels, one with bleached wood for the trellis and the other with oak for the trellis (which one do you prefer?). The background is wenge and will finish pretty dark. Anyway, this is just a progress picture - I'll post the finished panel when I get it completed.
04-13-2012 I'm doing a project right now that will require a number of marquetry panels. Here's one that I thought came out nicely. The field is figured white oak in a half radial pattern (I discovered that oak veneer can be quite difficult to work with). The marquetry woods are holly, cherry, mahogany, bloodwood and dyed woods. The banding is dyed (adobe) veneer and holly and the border is figured white oak. I want to do each panel in a different primary wood and in a different design - which is challenging me. I'll just have to see what I can come up with.

And here's the back of this panel. There's no finish on the back so it doesn't stand out as well as it should. I chose the cut to produce the "star" effect in the center.
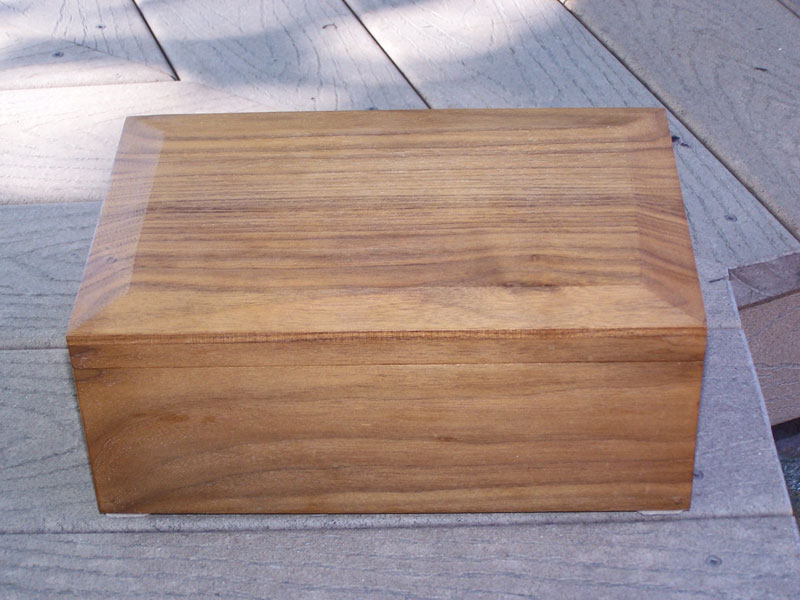
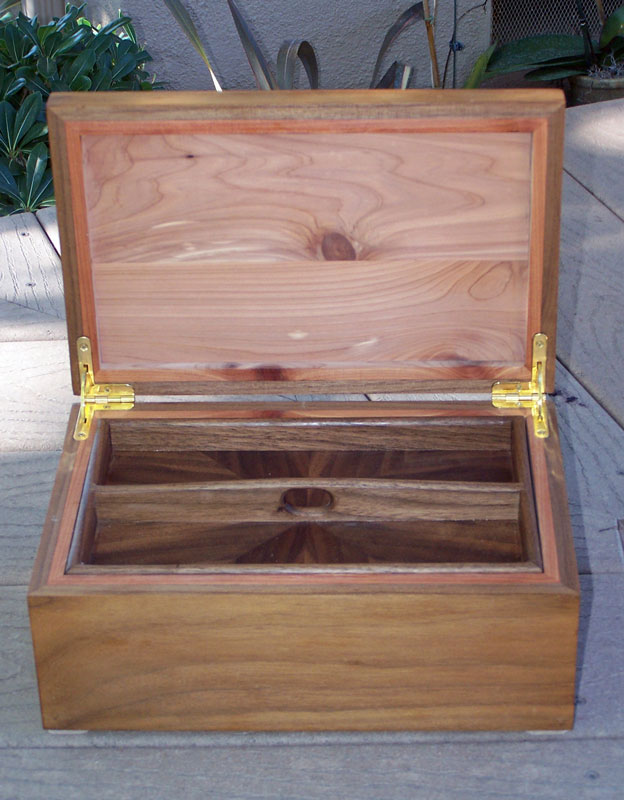
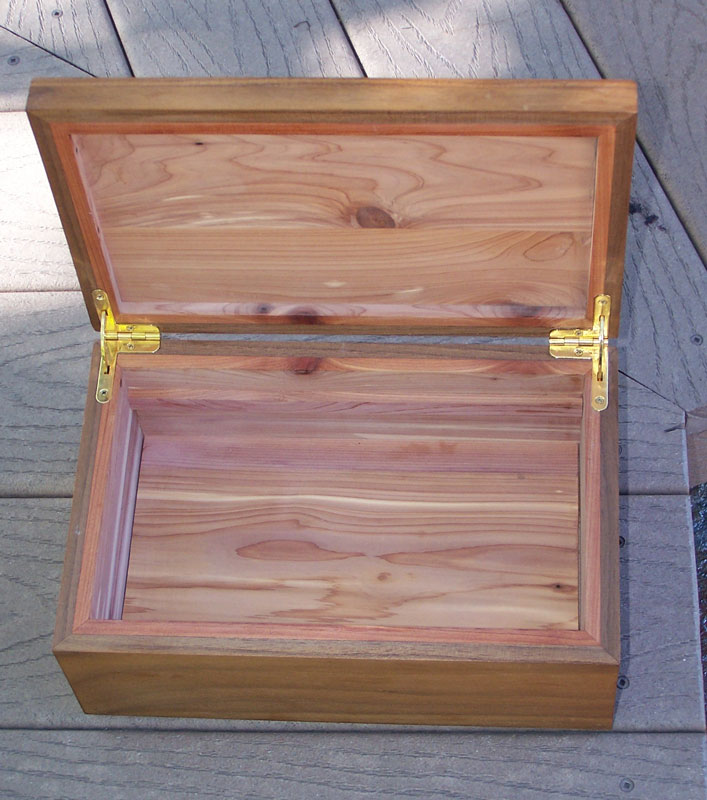
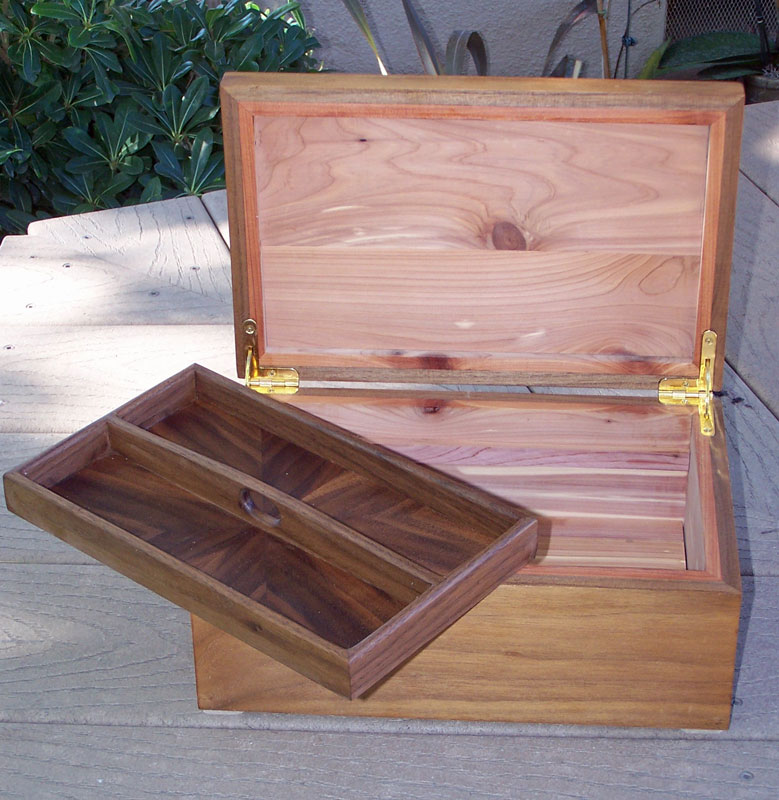
01-04-2012 My niece, Linda, asked me for a jewelry box so I made this box from wood I had in the shop. I never really thought about what's really needed in a jewelry box so I don't know if this will be a good jewelry box.
It's made from walnut with the inside lined with cedar. The tray bottom is claro walnut veneer laid in a radial match. The sides of the tray are walnut. I put a center divider in the tray to give something to grab on to to lift the tray out.
I built the box as a solid, then sawed the top off to make it into an lift top box. The joints are mitered with internal splines. The hinges are quadrant hinges which are always difficult to get installed.
[Since I posted this, I've receive a request for instructions on installing quadrant hinges. I'll try to take pictures next time I do a box and post it as a tutorial.]
[Update: I did do a tutorial on how to install quadrant hinges. You can see it here.]
12-20-2011 I had promised Judy that I'd do a couple of projects around the house. One was to build shelves for two storage closets. I made them adjustable by putting in panels on the sides with a bunch of 5mm holes in the panels, about an inch or so apart. The hard thing was to get those side panels shimmed so that they were parallel (and plumb) and parallel and square front to back. Walls in houses are just not straight and square. Below is a picture of one of the closets with the shelves installed.

I made the shelves from 3/4" Baltic birch and put angle aluminum on the front and back to reinforce them. They're about 52" long and about 22" wide so we can put a lot of weight on them. I made 8 shelves for each closet but we only used seven. The picture below shows the angle aluminum on the front of one of the shelves. There's another one on the rear of the shelf.
The top shelf is about at the top of the door so I had to make the shelf sort of U shaped so we could get things up on that shelf.
The shelves were finished with a primer, them sprayed with white latex (house) water based paint. I used an HVLP gun with a 2mm tip and thinned the paint a bit to get it to flow well. The finishing took quite a while because I had limited space for doing the finishing - so I'd spray a couple of shelves, then I'd have to wait until the paint dried. I did both sides of the shelves and I put three coats of paint on the shelves. But I was very satisfied with the finish.
The other project was to build four pullouts in one of the kitchen cabinets. I used the cutoffs from the closet shelves to build them. Nothing special, just ordinary box construction. The house projects are not finished yet - I have another house project in progress with a contractor. He's doing things that I'd find difficult or that I don't know how to do. More later, including pictures.
11-21-2011 Here's another tray panel I'm working on. It's my half of the partner project that I did while in Paul Schurch's class on marquetry. My partner had a panel like this but with a light background. This one came out better than I thought it would. The background is walnut in a 16 segment radial match (sunburst), the flowers are bird's eye maple, the branch is Chilean laurel and the leaves are dyed veneer.
Later, I'm going to do one with the same design, but with a light background, maybe maple, and darker flowers, maybe mahogany. I'm just starting the finishing process on this panel.
11-13-2011 I spent the last week in Santa Barbara taking a class in marquetry with Paul Schurch. The picture shows the panel I did in the class. I'll eventually make this into a tray and will post a picture when I'm finished. Overall, I enjoyed the class and was satisfied with the panel I made.
10-17/2011 Here's another marquetry tray I'm doing in preparation for my class in November. On this one, I did the drawing myself, based on a picture of a water lily flower I found on the web. There's several problems with this piece: the lily pads should show more depth, which I could have done by darkening the pads in the background, I should have used a darker green veneer for the pads, and I should have put a black strip between the yellow banding and the maple border, but I thought the flower and it's reflection came out well. Working with very light and very dark veneers is a challenge but I'm learning. I used some figured maple for the sides to match the figured maple in the border.
For the back, I did a bookmatch of tiger maple to match the rest of the figured maple in the tray. The figure will become more pronounced as the maple ages.
10-13-2011 I've been working on learning marquetry and am planning to take a class with Paul Schurch in Santa Barbara in early November. I preparation for that class, I bought Paul's DVD on marquetry and did the project covered by that DVD. His project was to do a top for a jewelry box, but I used his design for the bottom of a serving tray.
The materials are: Walnut burl laid in a half sixteen segment sunburst (the points are at the center of the upper edge), san shaded holly for the petals of the flowers, cherry for the center of the flowers, mahogany for the branch, green dyed veneer for the leaves, holly and bloodwood for the banding, and walnut laid in a 45 degree pattern for the border. The sides are 1/2" walnut.
Here's a couple of close-ups of the flowers.

For the back, I did a sixteen segment sunburst in walnut burl. Note the pattern towards the outside of the sunburst. To me it looks like the face of a big cat (maybe a cougar), but if you're a dog person, I suppose you could see a dog's face in it. Although I've laid a lot of sunburst, I had trouble with this one. The veneer was very old, in bad shape and didn't work well. And I don't have a lot of experience in working with burls in sunburst. But I learned a few more things from this project so that's what counts.
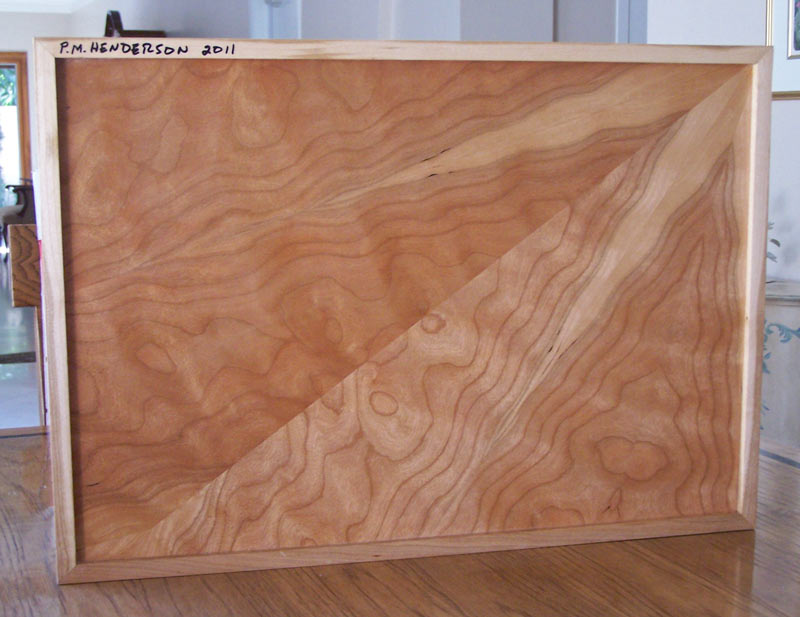
08-22-2011 Here's another tray I did for a friend. Seems like I'm stuck on trays right now. I did a twelve piece sunburst of bubinga in the center, with bloodwood as banding, and cherry as the border. The cherry is pretty light right now but will darken as time goes by.
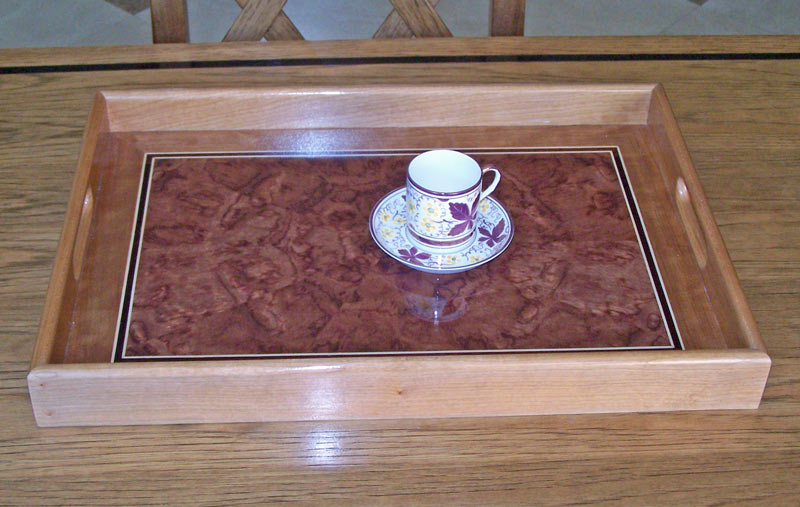
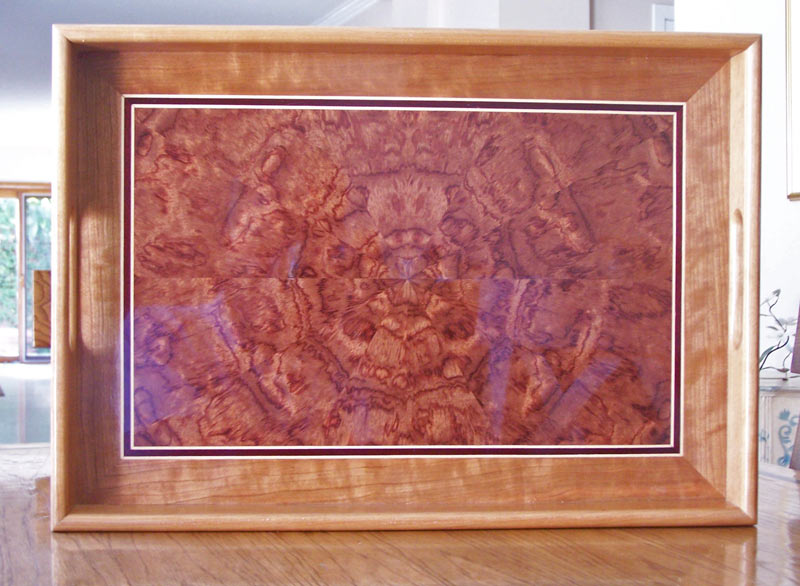
On the back, I did an experiment with a five piece match of cherry, with the points in one corner. While it looks okay, I think next time I'd do many more pieces to make it more interesting.
07/10/2011 I'm gradually starting to be able to get back in the shop. I still have a number of things to do around the house and in setting up the shop, but I am getting some projects done.
I teach veneering and decided to do a couple of tutorials on veneering, one basic and one advanced. In the tutorials I make two different types of serving trays, with veneered panels as the tray bottom. You can see these in the "Tutorials" section of this web site.

My projects continue here