Wahoo Game Boards
P. Michael Henderson
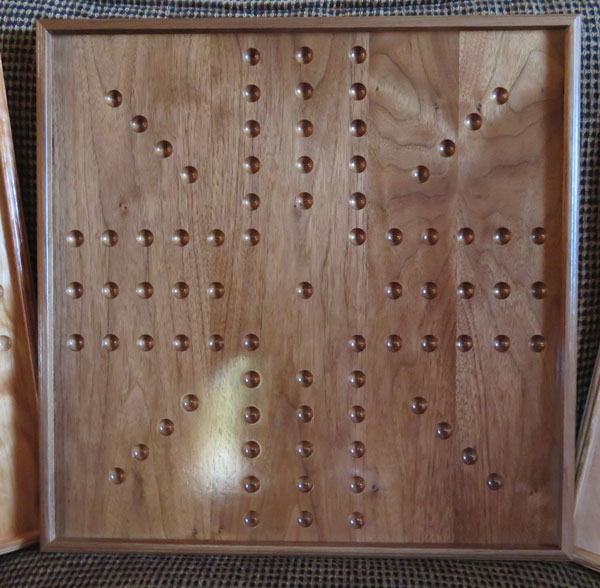
Some time back, I made a number of Wahoo game boards for Lynn and her family. I made six boards for her, and figured that would be enough for the family. However, recently she came back to me and asked for four more.
My problem is that I don't remember how I made the original boards, and I didn't keep any documentation on the layout and the process I used to build them. So I'm doing it now, even though ten or eleven boards should be the end of the building. Lynn provided one of the previous boards I had made so I could take measurements off it.
I made this batch out of 4/4 figured cherry. I had made a couple last time out of figured cherry and they were vey well received. I glued up the cherry and cut it to 17" by 17". The size is not that critical - it could be smaller.
I didn't thin the boards down so they're about 3/4" to 13/16" thick. I don't think that's a problem but they could be 5/8" thick.
Once the boards are cut to size square I began the layout. Refer to the picture below.
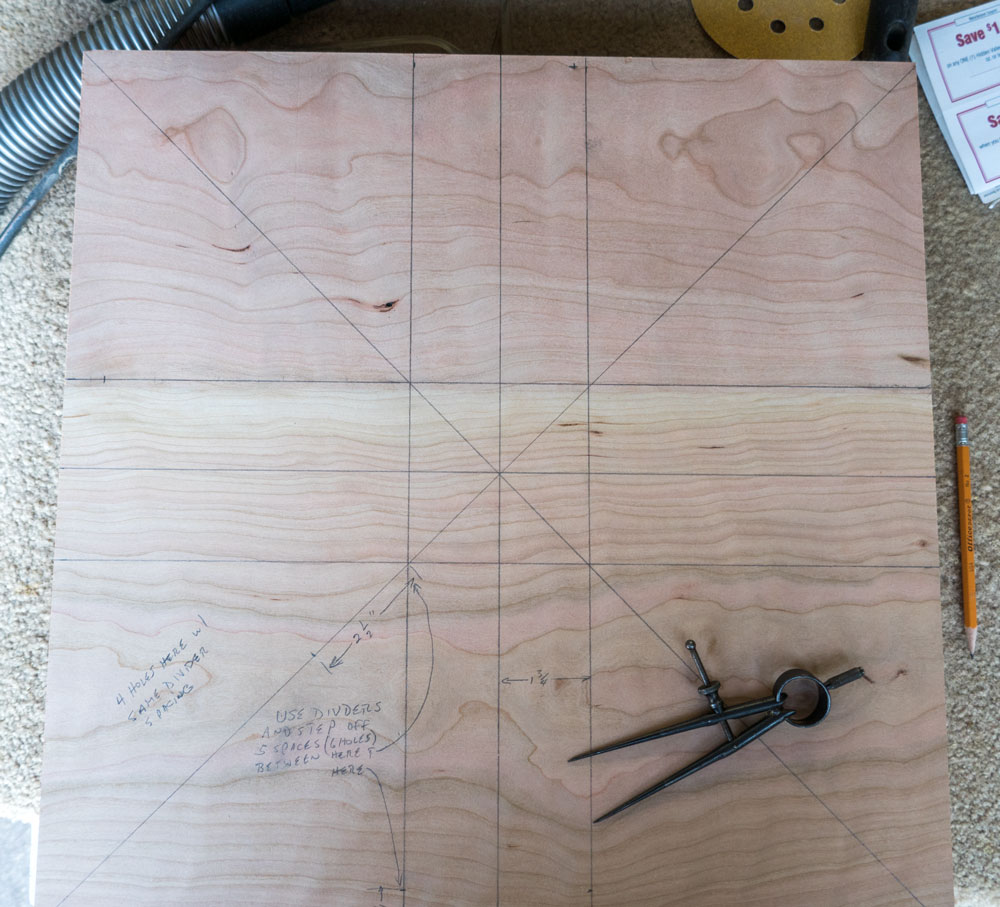
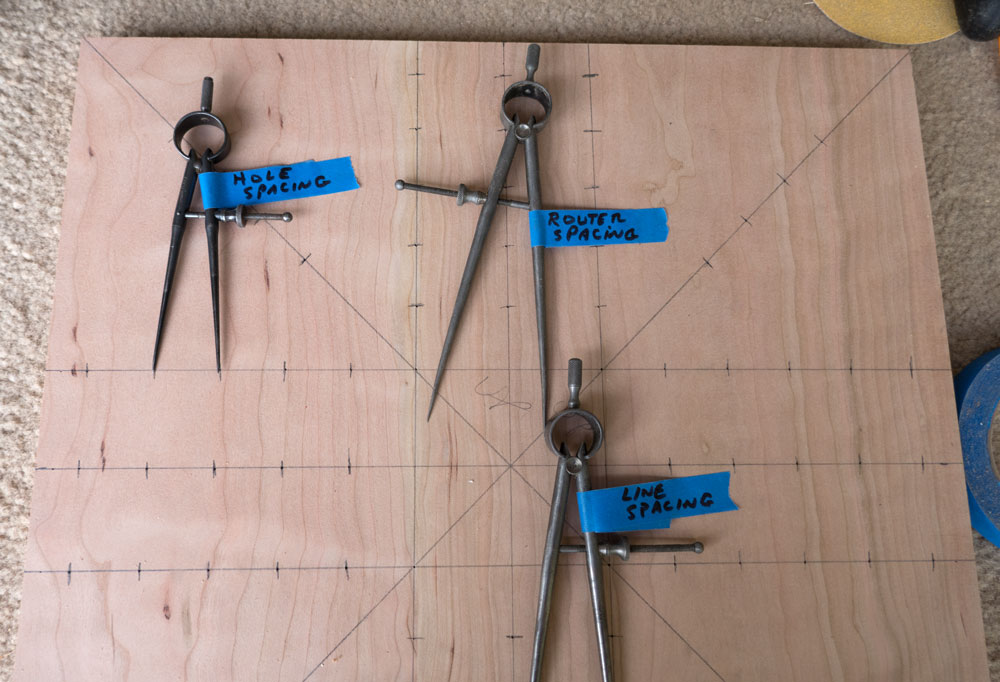
Begin by drawing lines from corner to corner to find the center. Then mark the mid point of each side and draw a line across both ways, through the center. Next, set a set of dividers to 1 3/4". You want to use a set of dividers so that you don't make a mistake in reading a rule. Mark off a line to each side of the last set of lines drawn (not the corner-to-corner lines). There will be an intersection of those lines with the corner-to-corner lines
Mark off about 3/4" from the edge of the board on one of those lines you just drew. Take a set of dividers and adjust it so that it takes five steps from the intersection to the 3/4" mark. This will give six holes. Lock that set of dividers and don't make any changes to the adjustment.
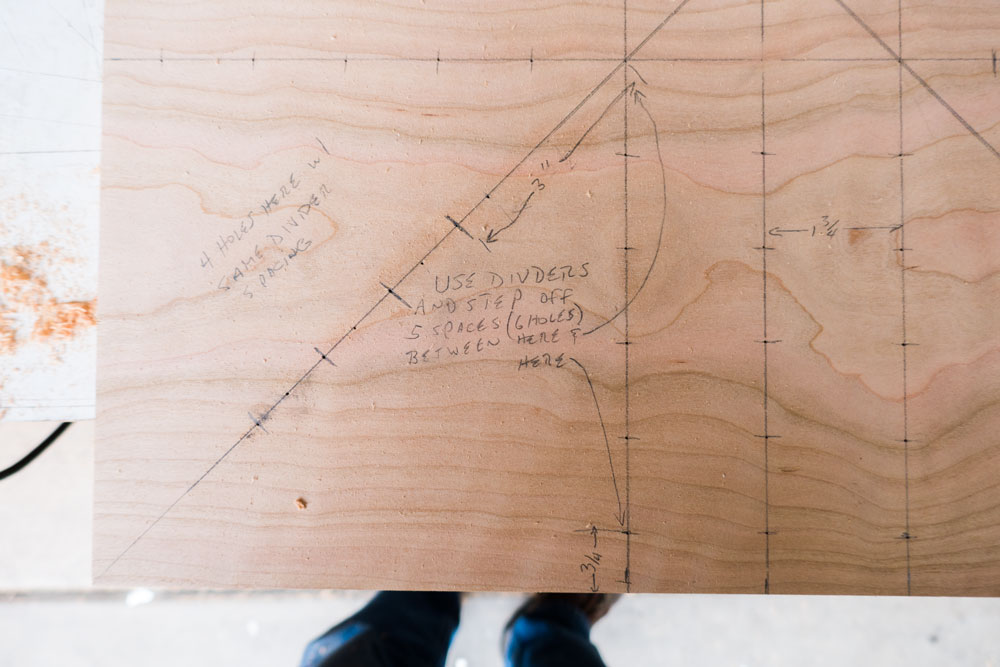
Then, on one of the corner-to-corner lines, make 3" from the same intersection point towards the corner. Use the "hole" dividers and mark off three spaces, four holes, as shown in the picture above.
Then go mark the rest of the lines same as these. I put a pencil mark on each landing spot of the dividers so I can see it better when I route the dimples.
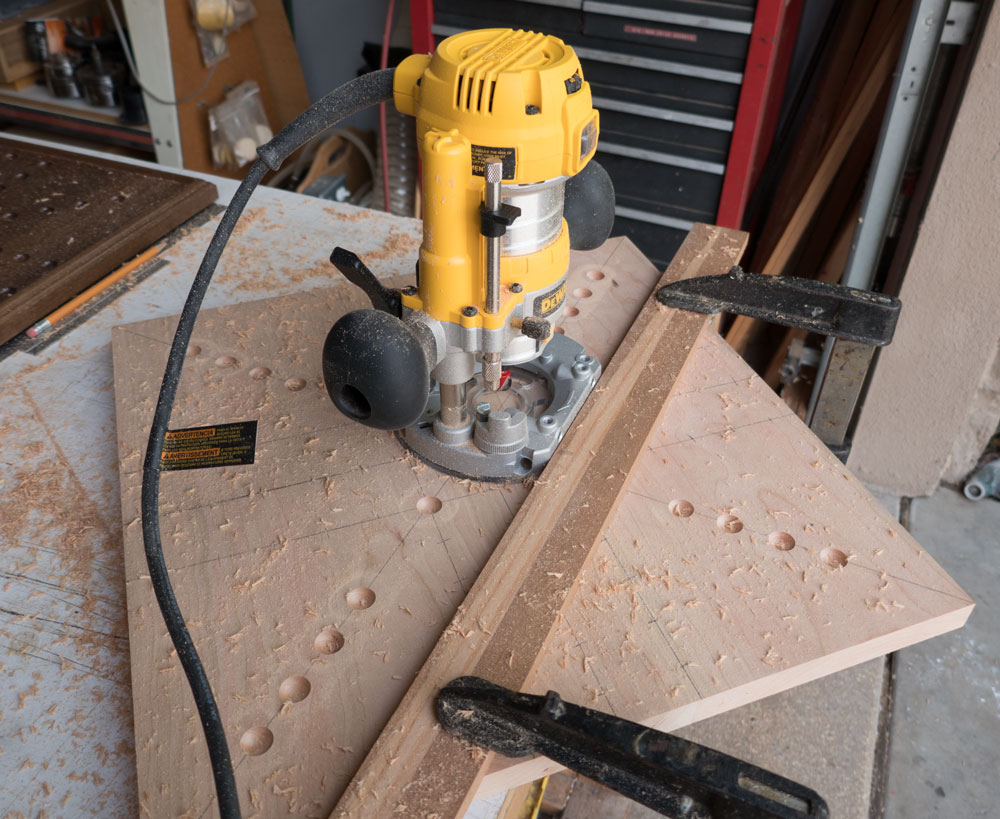
To route the dimples, I use a 5/8" cove box bit in one of my trip routers (1/4" shank). One issue is how deep to make the dimples. If too deep, it will be hard to remove the marble, and if too shallow, the marble may be firm in the dimple. I routed some sample dimples in scrap and chose the one that I thought worked best.
To route the dimples, I used a board as a guide so that the holes would be in a straight line. So the next step is to figure the offset from the side of the router base to the center of the bit. I measured and then adjusted based on a trial on scrap. I set a set of dividers to that distance so I could easily set up the guide board. There are eight lines on the board so there's a lot of setup to route the dimples
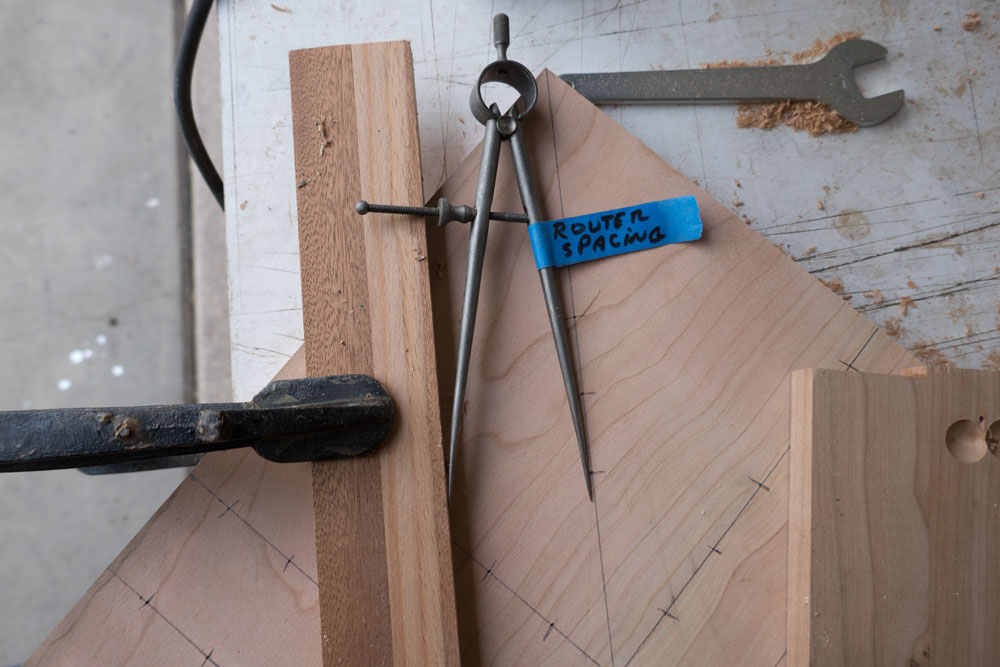
I wound up with three sets of dividers to do the boards, one to space the holes, one to space the lines, and one to space the router guide.
But back to routing the dimples. Here's what the setup looks like to route the dimples. Just repeat eight times for each board. When doing the non-corner-to-corner lines, start with the upper line and then work down.