
Building a Top-Frame Beehive
P. Michael Henderson
A local beekeeper, Janet, asked me to build her a top-frame beehive. While top-frame beehives are generally fairly easy to build, she and I worked on the design so that we could incorporate two Langstroth supers on top of the top-frame hive, with an excluder under each. This will allow harvesting comb that does not have any brood in it.
The design allows for placement of either one or two supers on the hive. This meant that the top of the top-frame hive should be in two parts so that a half-top could be used as a top for each super.
We also agreed to put a viewing window in the side of the top-frame hive so that the hive can be examined, to some extent, without opening the hive.
She was not sure of the best placement of the entrance so I'll put several entrances and she can experiment between them.
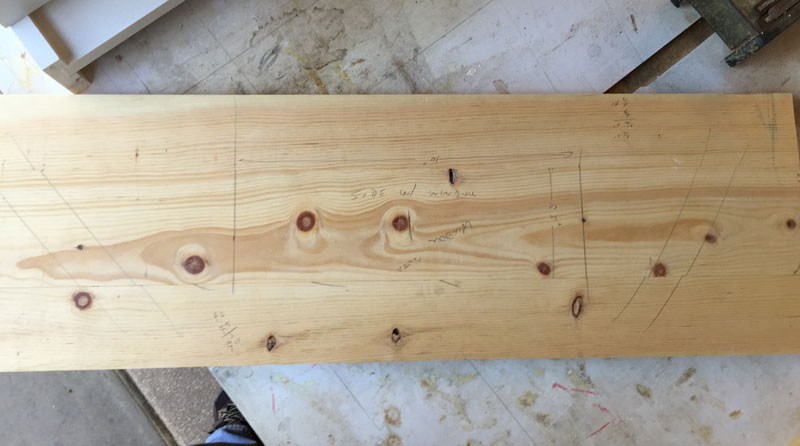
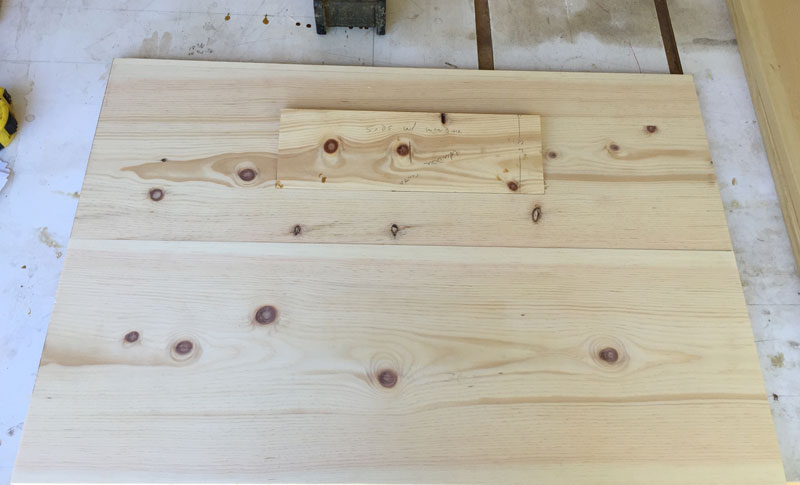
Here's the lumber I'm using. It's two pieces of #2 pine, 1x12, 12 feet long. They've been cut approximately in half for transport. As you'll see later, this was not sufficient and I had to purchase another piece of pine.
The first step is to cut the sides. The length will be twice the width of a Langstroth hive, when the Langstroth hive is built with 3/4" material. That's 32 1/2". Pine boards that wide are often not flat, so choose the flattest pieces of wood you have to cut the sides.
You'll notice that one side is cut longer than the other. That's because that side will be the side with the viewing window.

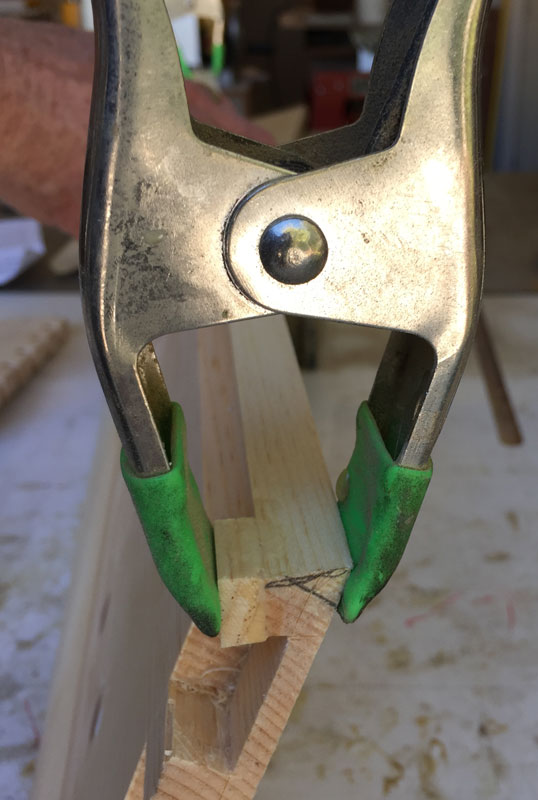
I laid out the viewing port - it's about 5" high and 14" wide. I just chose these dimensions without reference to anything - I just thought this would make a window big enough to see the bees. Turns out, the width of 14 inches was an unfortunate choice. When I went to buy the plastic for the window, one size is 14" wide. But since I need to inset the window in the rabbet, I need a piece of plastic that is 14 1/2 inches, so I had to buy the next size piece of plastic.

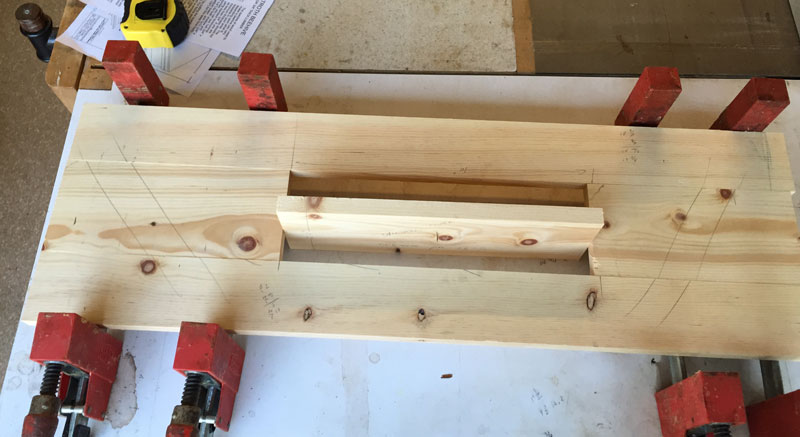
Then I ripped the board along the top and bottom lines of the window. Here's a picture of the three pieces after ripping.

You can see how they go back together in the next picture. I jointed each edge because this pine moves after you cut it. After jointing it fits together very nicely.
Then I took the center piece to my miter saw and cut along the lines. The middle piece will be the door to the viewing window.

Putting it back together, you can see that the middle piece is shorter than the two outside pieces because of the thickness of the saw kerfs.

Next step is to glue the pieces back together (not the door, of course) with waterproof glue. I'm using Titebond III. I'll space the center with the door.
Here's the actual glueup.
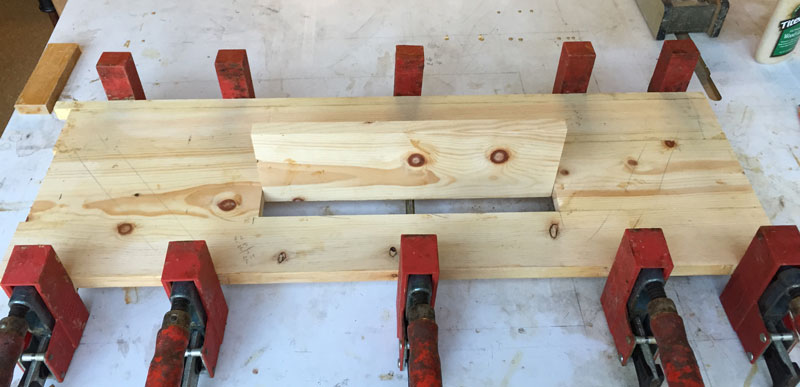
I added a thin piece of board to the width of this side to make up for the saw kerfs when I ripped the board. If I didn't do that, I'd have to trim the width of the other side and I prefer to get the maximum width from the sides.
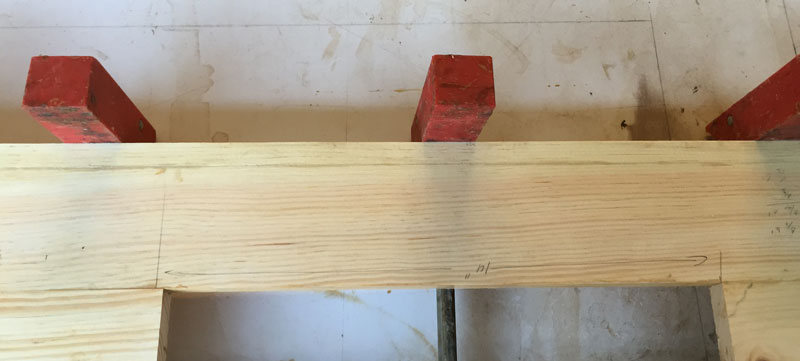
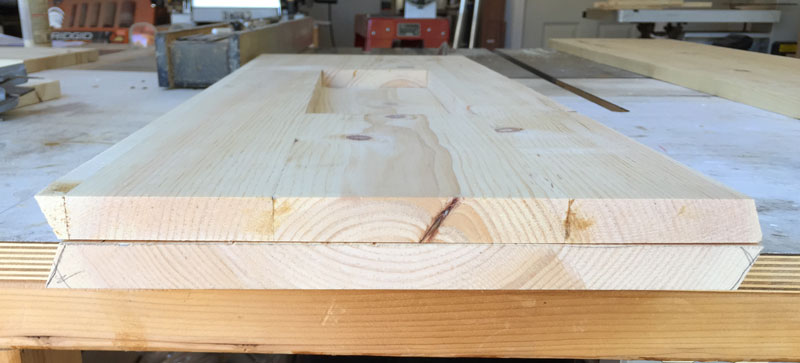
Here are the two sides, cut to length and width.
The angle of the sides is up for debate. I first thought I'd do 60 degrees, but when I laid it out, the bottom was too small (narrow). I decided to go with 67 1/2 degrees. The reason I chose that number is that my miter gauge has a detent at 22.5 degrees so when I cut the ends, I'll be able to use that detent.
The next cut on the sides is to "flatten" the bottom and top of the sides. To do that I tilted the blade of my table saw to 22.5 degrees and cut both sides of the sides.
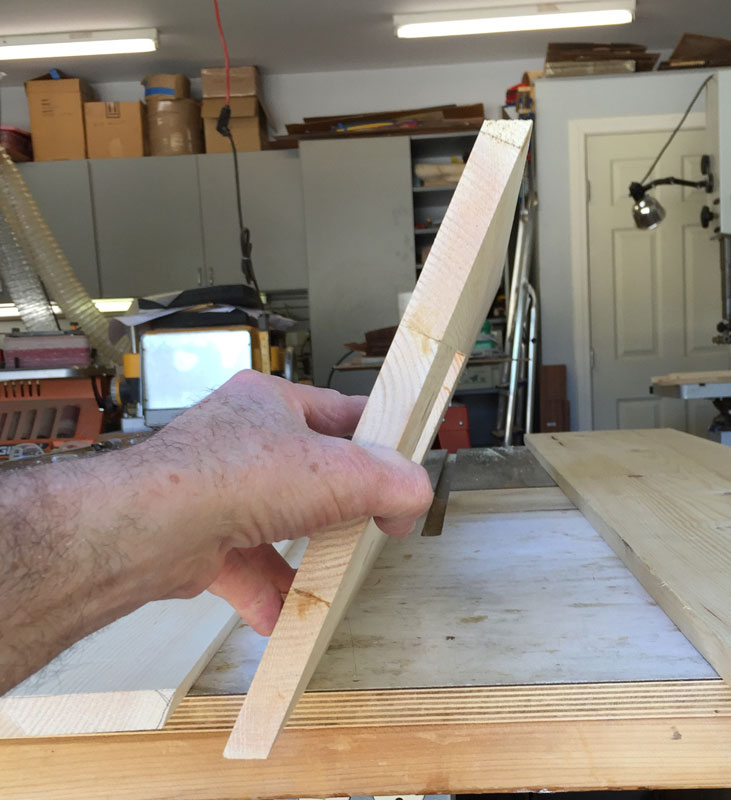
Here's what the side will look like at the 67.5 degree angle.
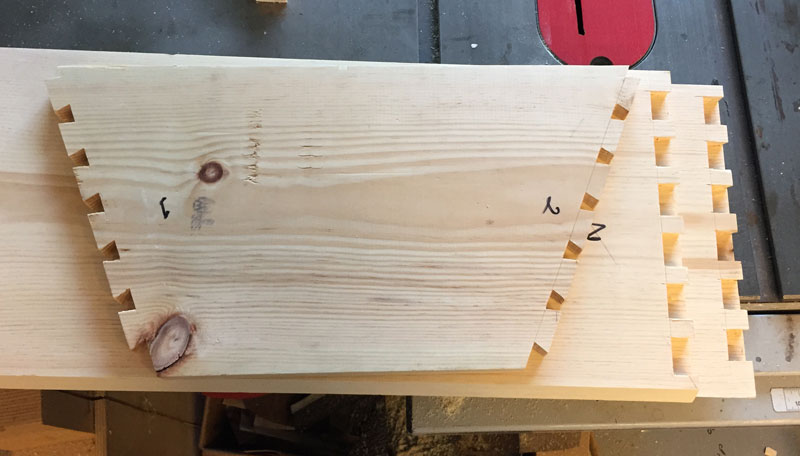
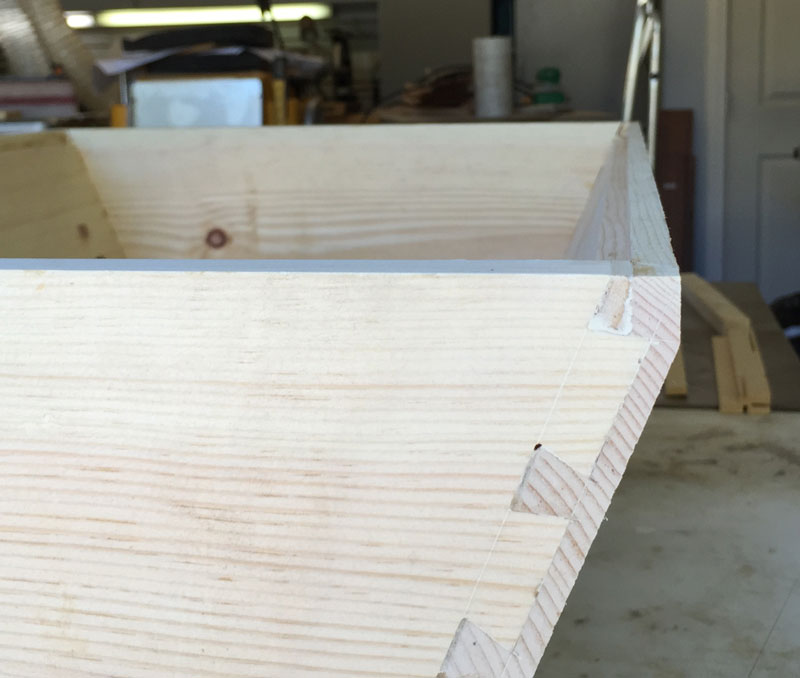
Then I cut the ends of the hive. The critical length here is 18 3/8 inches - 5/8 inch down from the top of the side. I'm going to do 1/2 inch dovetails so I have to add 1 inch at that measuring location. You can see that I've already scribed for the dovetails.
You certainly do not have to do dovetails to attach the box together. You can use screws, dowels or dominos - and maybe even other techniques. For screws, dowels or dominos, you do not have to add the one inch, as I had to for dovetails.
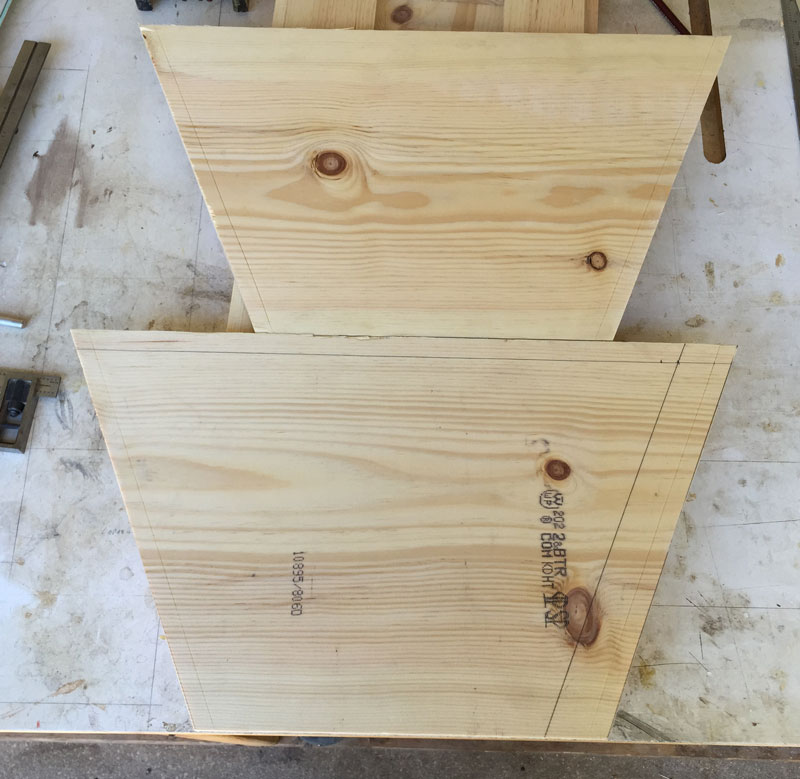
The sides were cut from the same 12 inch wide board so the length of the angled part of the side is more than 12 inches. You can see that in the next picture where I lay an end against a side - the end is too long.
So the end has to be trimmed to fit the side. This is an easy cut on the table saw.

Then it's time to make the dovetails. I'm using half blind dovetails here.
A trial fit up.
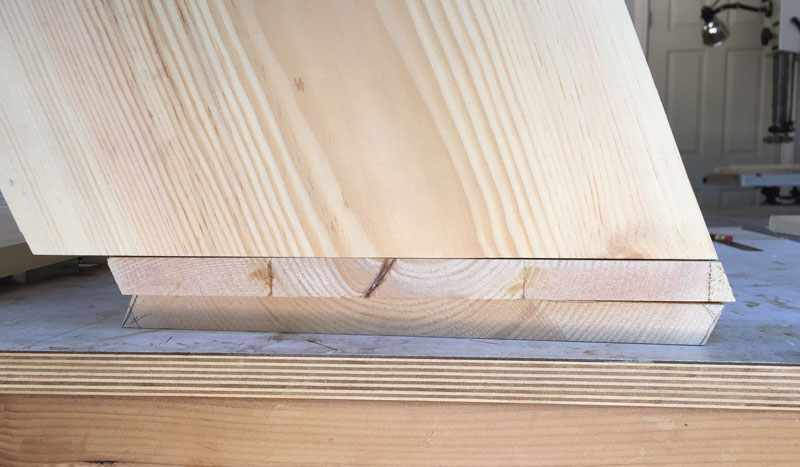
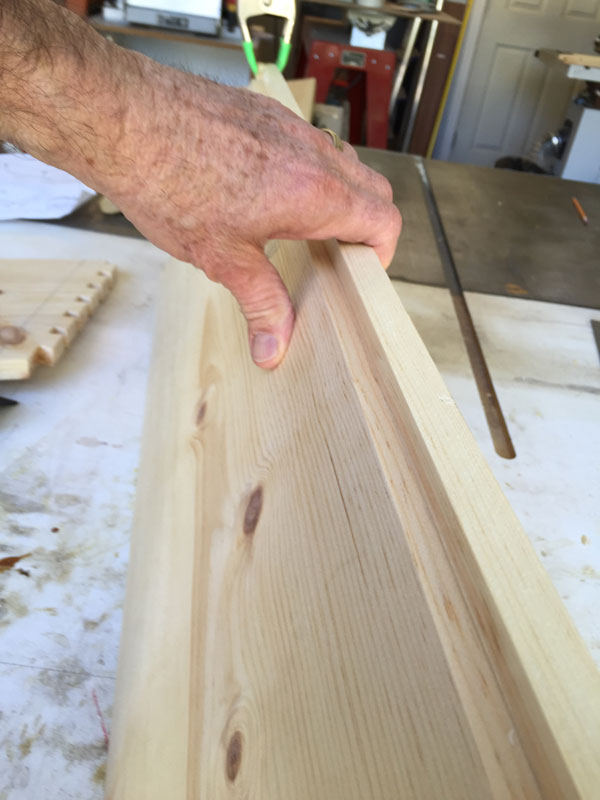
The next step is the cut the rabbet at the top of each side. I did this by tilting my table saw blade 22.5 degrees to make the two cuts. The top bars will ride on this rabbet.
I cut the rabbet all the way along the sides because a stop rabbet is too difficult. I have to close the ends of the rabbet so that bees cannot escape through the channels that would be left. After the glue sets, the glued in piece will be trimmed to the dovetail and flat with the face of the side.
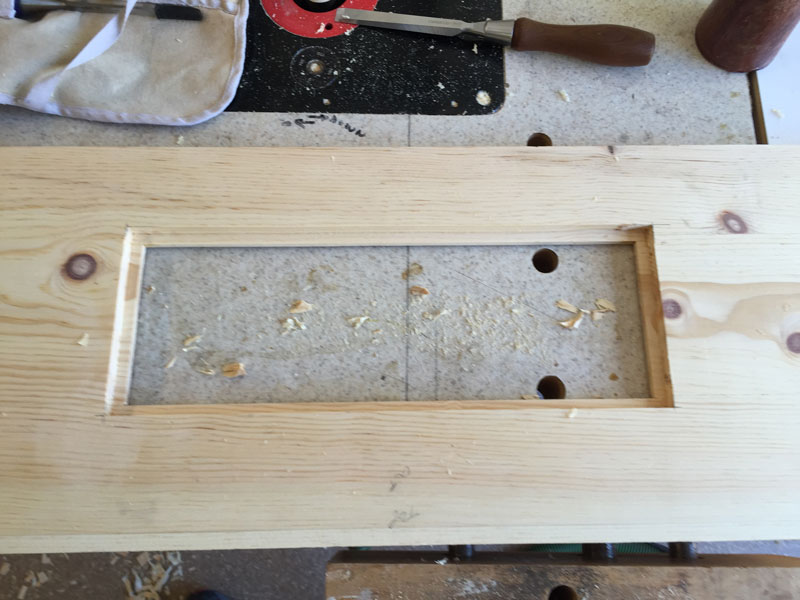
Before I can glue up the box, I want to prepare the window for the glass. I'd normally do a rabbet on the inside to set the glass, but this time I'm doing it from the outside. If the glass needs to be replace, it can be replaced from the outside. If it was let into the side on the inside, you'd have to empty the hive to replace the glass.
I use a rabbeting bit in my router table to cut the rabbet. This leaves rounded corners.
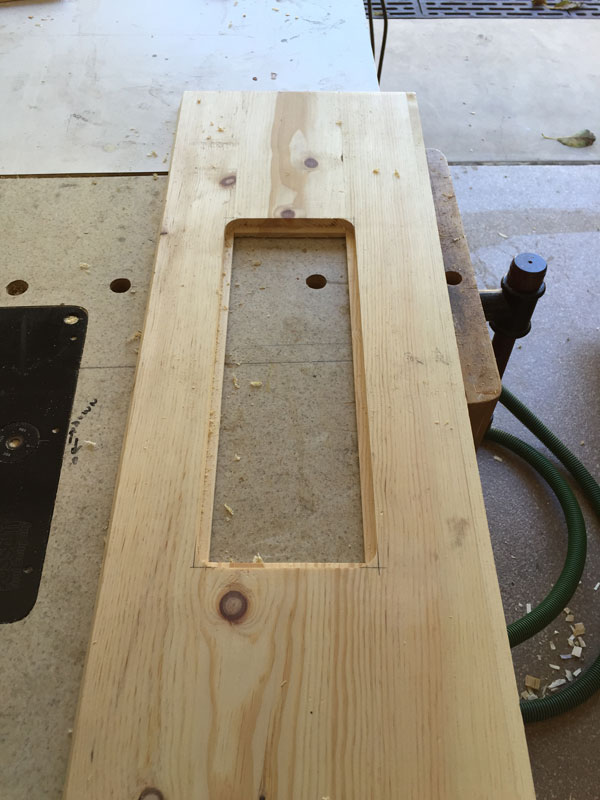
Using a chisel, I square the corners.
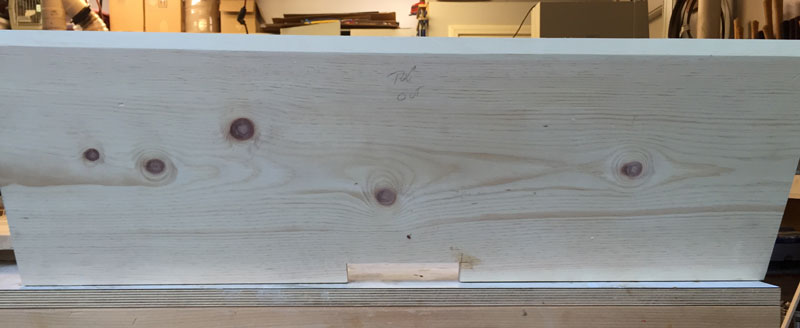
The other task before doing the glue-up is to cut the entry holes. Janet and I agreed that I'd cut one entry at the bottom of each end and one in the middle of the side opposite the observation window. I also gave her plugs to close off each entry so she could choose which one to use. She decided to go with the side entry. I forgot to take a picture before I assembled the hive but you can see the entries in the next two picture.
First, the end entry. I have to put a bottom on the hive and the landing pad will be part of the bottom. I made the entries about 5" wide and 1" high - plenty big enough for bees to get in and out. The bottom will be wire mesh so there will be lots of ventilation.

And the side entry.
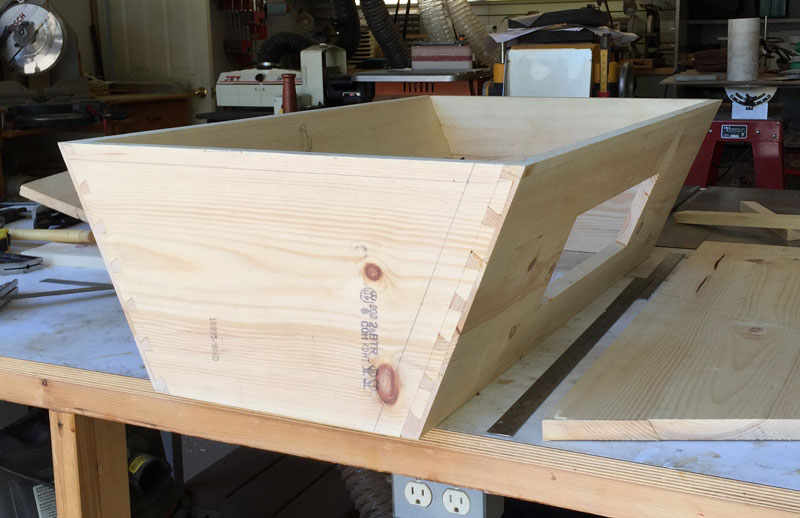
Here's the picture of the glue-up of the box part of the hive.
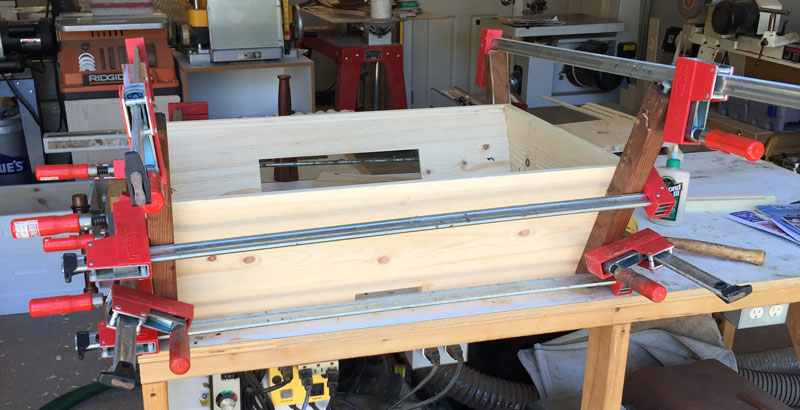
After the box is glued up, we have to trim the sides so that the width is the same as a Langstroth hive - 19 7/8". This is done so that the tops made for the top frame hive will fit the Langstroth supers. Having the sides stick out beyond the Langstroth supers does not add any strength to the box.
I cut the sides by turning the box upside down and making the cuts on the table saw. Just go slow (take a small amount at a time) and make sure the two sides are trimmed about the same.

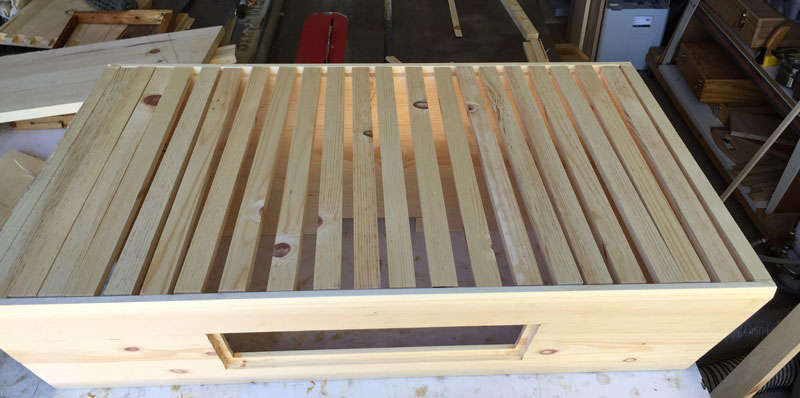
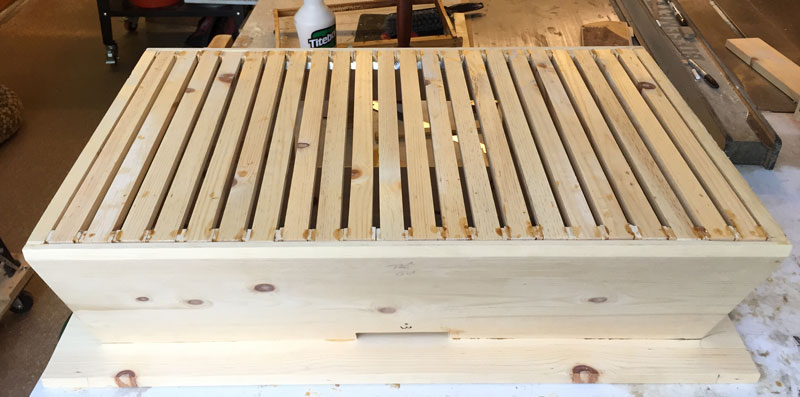
I made the top frames (or part of them) next. There are 21 top frames here, one more than the number in two Langstroth boxes. I need to glue spacers to the frames so that the bees can get up to the supers. I'll do that later.
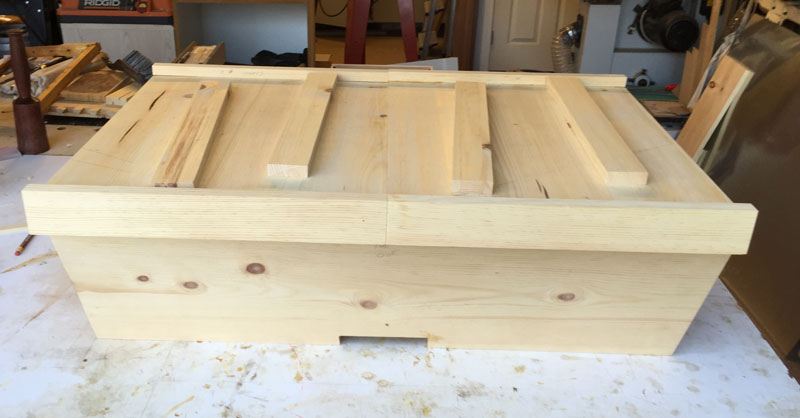
I next made the two tops. These consist of a panel, two ends, and two pieces screwed to the top and ends. You can see the wood in the picture. Two pieces already have the grooves cut into them. These pieces are 2 1/4" wide and the grooves are 1/4" deep. Make the panel long enough that you have some slop in the fit of the top to the box. You don't want it too tight. I left about 1/8" on each side.

Here, the ends are being glued to the top panel. I plan to put sheet metal on the tops. You can see that two tops completely cover the top frame hive.
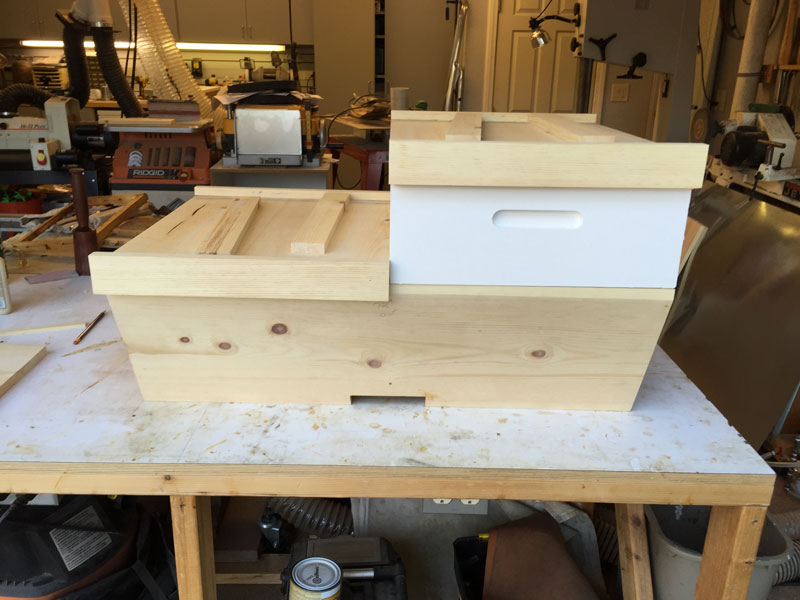
Here's a picture of the top frame hive with a Langstroth super on top of it. There would probably be an excluder under the super. You could put two supers on this hive, side-by-side.
Note that the main part of the top frame hive is about the size of two full size brood boxes. So a hive with two supers on it is the size of most Langstroth hives in the summer. And to view the brood frames, you only have to remove one super (at a time) to get to the brood frames. You could view the brood under one super during one hive examination, and do the other side on the next examination.
With a Langstroth hive, you'd have to remove both supers, and to examine the brood frames in the bottom brood box, you'd also have to remove the upper brood box. All of this disassembly is more disruptive to the hive.
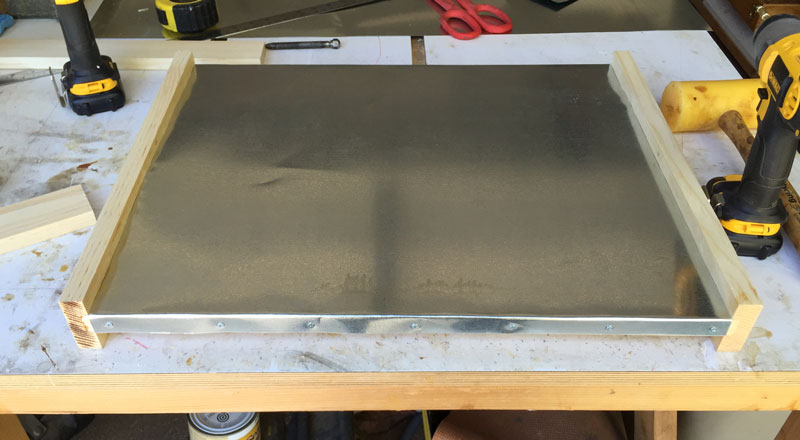
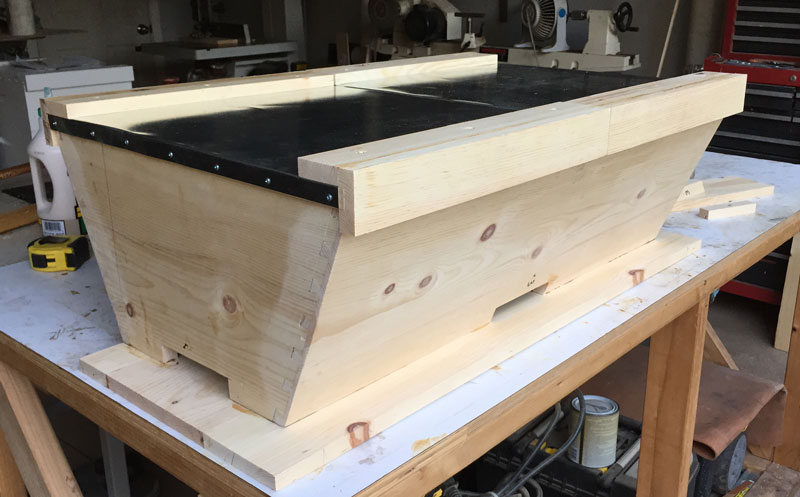
I started this morning doing some metal work. I need to cut and bend some galvanized sheet metal for the rabbets at the top of the hive. I do this by having the sheet metal protrude by 3/8 inch off my bench and bend it down with a soft hammer.

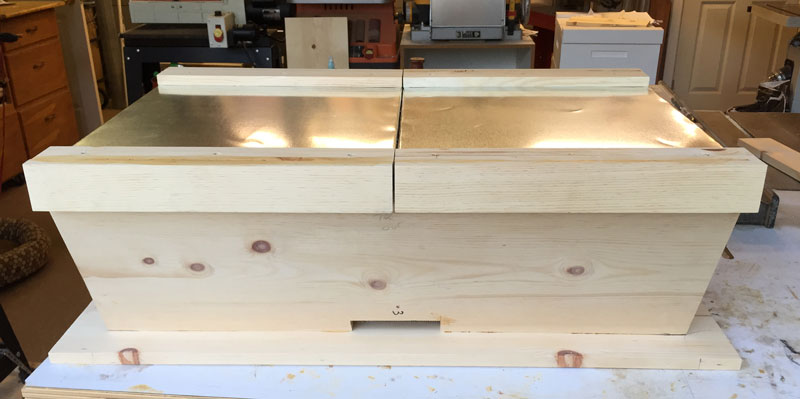
Here's one side of the hive with the sheet metal installed. I used #4 flat heat screws, 1/2" long.

Continuing the sheet metal work, I cut a piece of sheet metal for each top. I bent the sheet metal around the top.
Then I installed the battens on each end of the top. I did this because most commercial tops have these. The top would probably work fine without them. The battens are 2 inches wide.

Here are the two tops on the hive. A problem is water leakage from the joint between the two tops. Janet will probably have to put a board over the joint. I started to make one top with an overhang that would cover the joint but didn't. It might have been a good idea. Here in California we don't get much rain, however.
The tops would fit tighter if I didn't put the sheet metal on them, and that may be another alternative.
I also made the bottom. I cut the two long pieces and glued a piece on each end to make the bottom. Then I stapled hardware cloth with 1/8 inch mesh over the opening. The landing area is about 2 1/4 inch in front of the opening.
Next, I had to finish the top frames. These have a spline down the center and spacers at the end. The spline is to encourage the bees to attach comb to the frames and not to build cross comb. They also strengthen the top frames. The spacers are to allow the bees to get up into the supers when they are installed. This was a tedious task because I had to do 22 of them. Originally, I thought 21 would be enough but it took 22.

Here's a picture of the top frames installed in the hive.
And a picture of the hive.
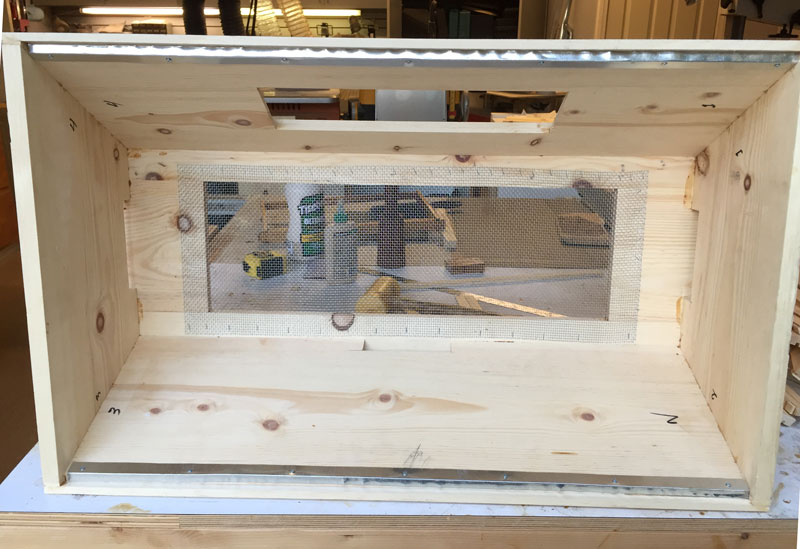
I installed the window today. I bought some plastic "glass" at Home Depot and cut it to size on my bandsaw. You can barely see it in this next picture.

I next installed strips to hold the plastic in place. Since it's unlikely the plastic will ever have to be replaced, I used miter joints at the corners. But if someone has the remove the strips, it's going to make it difficult.

I used 23 gauge pins to hold the strips in place - no glue. That's a 23 gauge pin nailer in the next picture.

After I had all four strips installed, I installed the hinges and latch. Here's the door closed. I didn't thin the door down to the point where it would be flush with the side because I felt the door would be too thin and might warp. So I had to build out above and below the door to attach the hinges and latch.
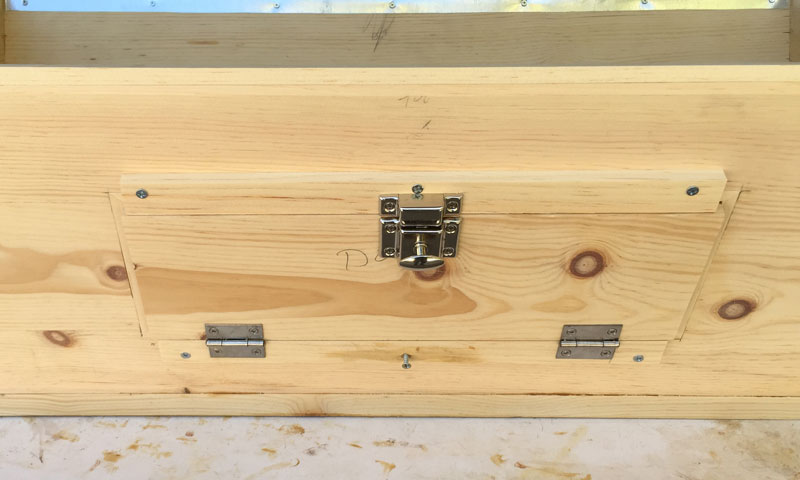
And here's the door open. You can see the bee entry on the other side of the hive through the window.

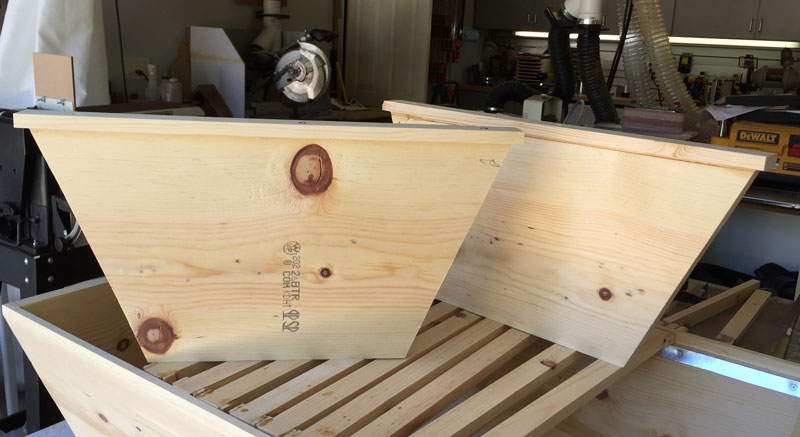
I also made two partitions for the hive. These would be used when you're starting out a hive and want to limit the volume of the portion that the bees occupy. You might give them 5 or 6 frames to work on and put these two partitions on either side (if you're using the center opening). If you're using one of the end openings, you'd only need one of these partitions.
This completes the build of the top frame hive. I'll try to get a picture after it has bees in it. In the meanwhile, you can return to my main page here.
[Update 10/2/2017] One problem with the way I did this top frame hive is that I didn't provide a way to close the bottom. Bees like a dark cavity and the screened bottom will let in too much light. I'd probably put in two sliders under the bottom so that the hive can be made dark, and you can pull the sliders out to see what's falling through the screen.