Cabinet
For Marquetry Trays
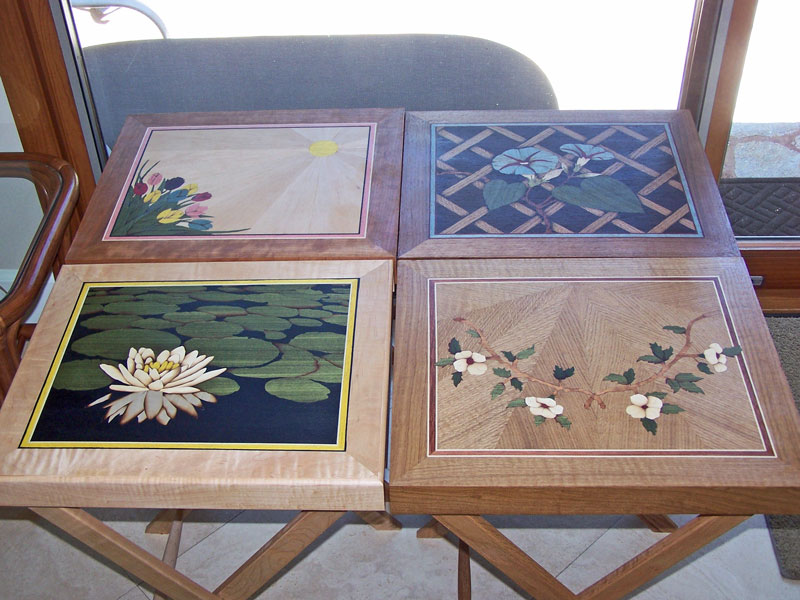
I made several marquetry trays over the past year or so and now need to have a cabinet to store them in. This page documents the project of building the cabinet.
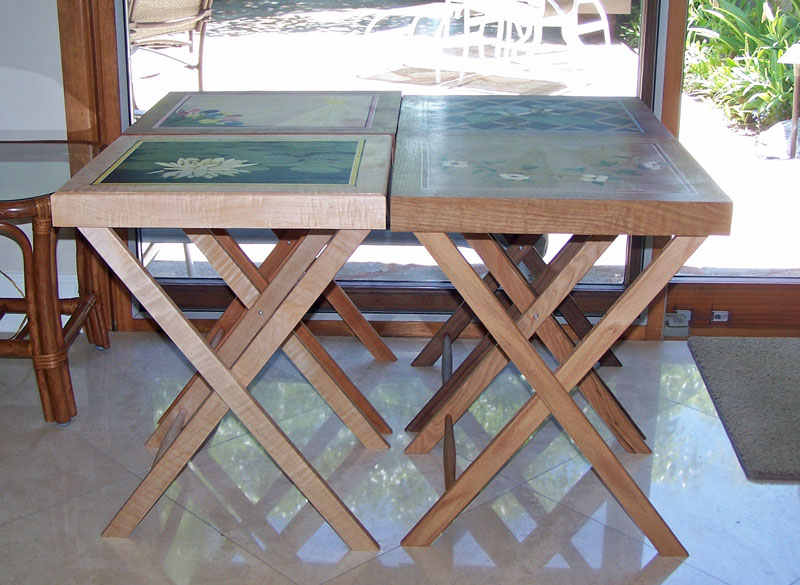
7/1/2013 When I made the party stands (pictures below) I knew that I wanted to build a cabinet for storing them. I didn't know exactly what I'd do but I had some ideas. Now that I finished the stands, it's time to start on the storage cabinet. My original idea was to build a cabinet that would also function as an end table on the side of a sofa. The cabinet would have a door, and inside would be "slots" which the folded-up stands would slide into.
Here's a picture showing the tray folded up. The view is from underneath the tray.

So when I finished the stands, I started talking with my wife, Judy, about the cabinet. She was not too excited about my idea. Her first objection was that it would be hard to take the stands out of the cabinet because there would likely be a chair close to the opening of the cabinet. Plus, since the trays would slide in lengthwise, a fair amount of room would be needed to slide them out.
So another idea was needed. Her first suggestion was a cabinet where the trays would slide in sideways, so that less room would be needed to put them in and take them out. No problem, I can do that. Then she started thinking about where she would put it, and there just wasn't a good place for it. She discussed the problem with a friend and they came up with the idea of making it a "TV cabinet". That is, a cabinet where the trays would be stored, with room for the TV electronics. The TV would either sit on top of the cabinet, or if the TV was mounted on the wall, it would sit below the TV.
Since the party stands can also be seen as TV trays, this made a lot of sense, so that's where I'm headed.
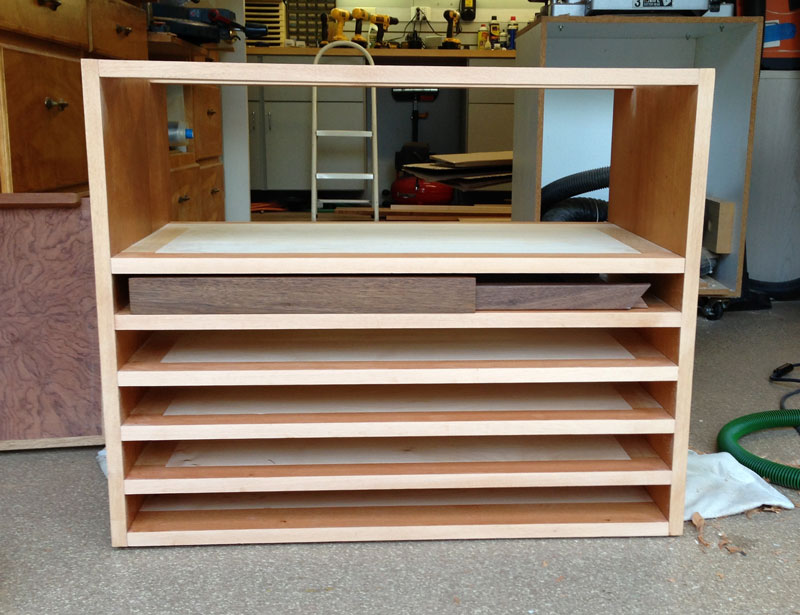
The cabinet will have storage room for four or five stands. Above that will be a backless drawer with a drop front which will house the electronics (a limited amount of electronics). The reason for the drop front is that you need to have access to the electronics for the remote control to work. There will be two doors that cover the bottom of the cabinet (where the trays are stored), and those doors will be flush with the drawer front. I'll do a single marquetry design that will cover the drawer and the two doors.
Size: The trays are about 15" wide, and when folded up, about 27 1/2" long. Judy said not to make the case too narrow - to "just" fit the length of the trays. She wanted it to be easy to slide them in and out. So I made the inside width of the case 30". While the trays are 15" wide, I went 18" deep for the cabinet. I thought narrower would look odd.
The height was determined in a strange way. I wanted it high enough to look good but not so high that a TV sitting on it would be way up in the air. When I went to buy the mahogany at the lumber store, they had some very nice boards but they were over 12' long (I bought two boards). Unfortunately, I can't carry 12' boards in my vehicle so I had to make a decision about where to cut the boards. I had them cut the boards at 8'. This left me two pieces that were about 52" long. I glued the two pieces together and then cut them in half. This left me with two sides about 25 1/2" long, after squaring everything up. I'll put on a separate top, and a base of about 4" so the final height will be about 30".
I also bought some maple for secondary wood.
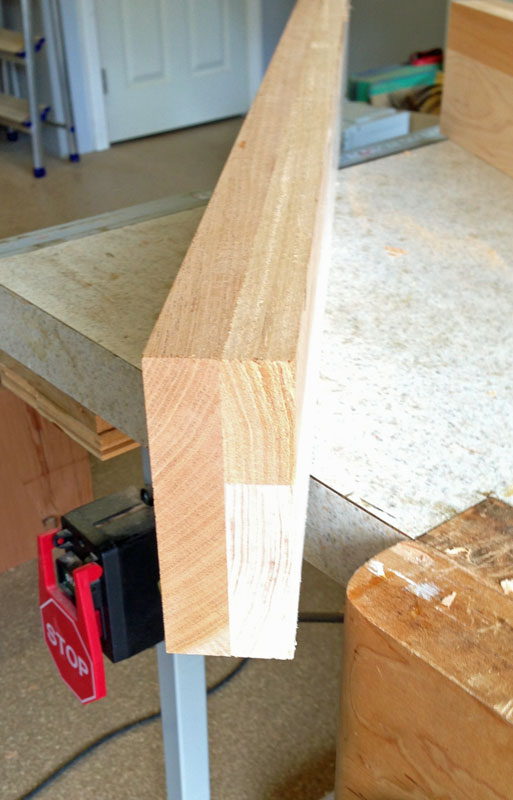
Construction: This is standard carcass construction. Since I don't like exposed joinery, I used half blind dovetails to attach the sides to the bottom and top stretchers to the sides (the real top will sit on top of the case and screws through the stretchers will hold it in place). Since the bottom will not be seen, there is only a narrow piece of mahogany in the front and the rest is maple.
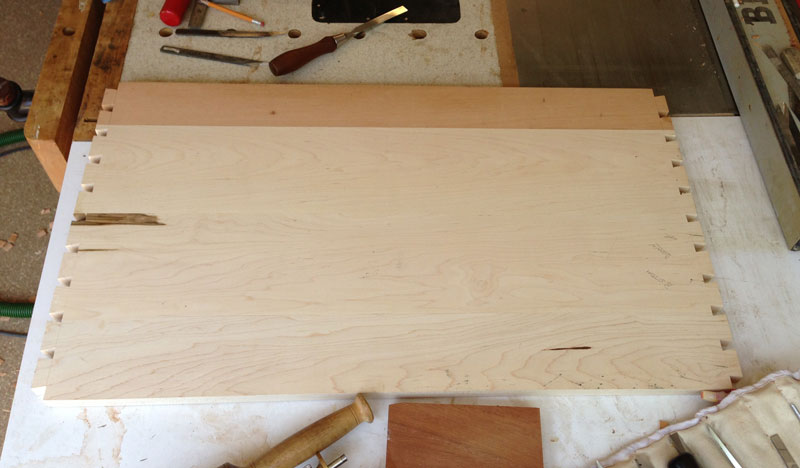
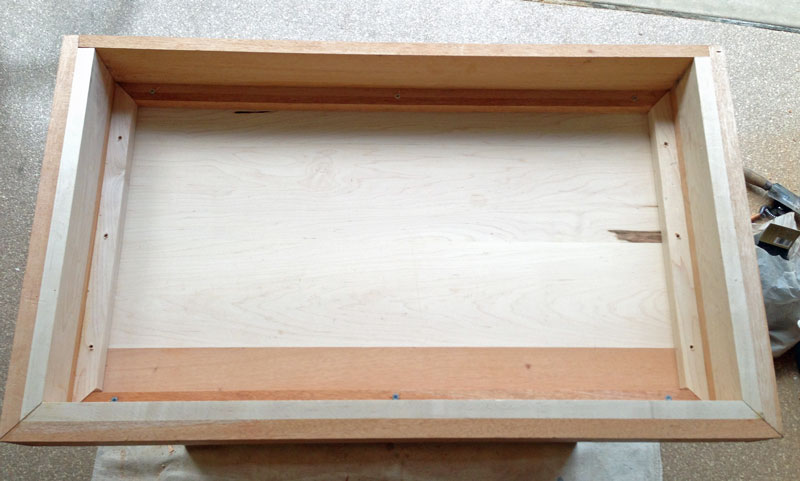
Here's a picture of the bottom with the tails already cut. You're looking at the bottom of the bottom in this picture. The dovetails will not be seen when the case is finished so they're nothing special - just plain, functional dovetails with normal size tails and pins.
Here's a view of one side with the tail sockets cut.
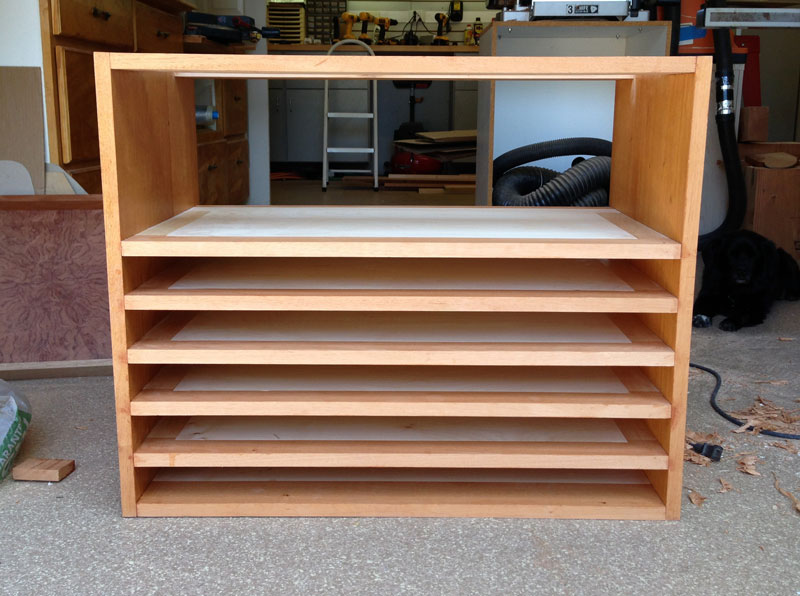
And here's the carcass with the bottom and the top stretchers in place. Next, I'll start making the blades for the tray compartments (one tray per compartment).
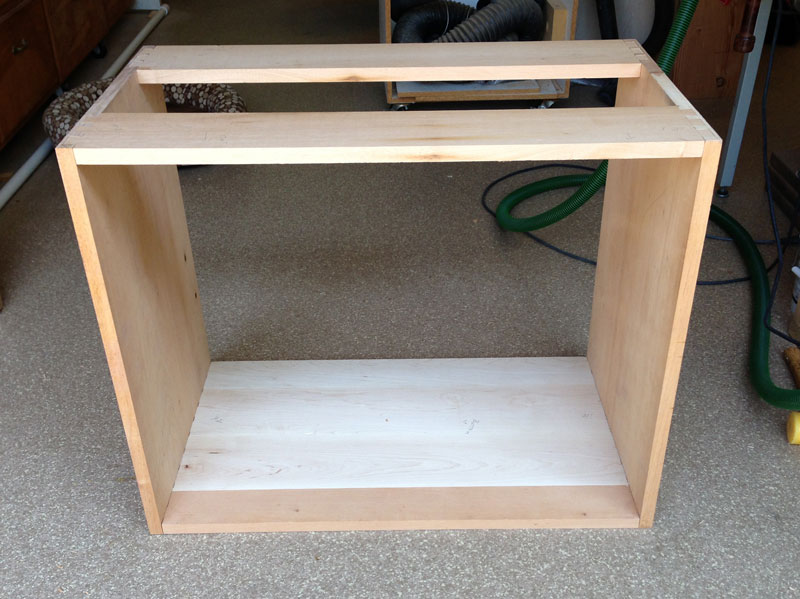
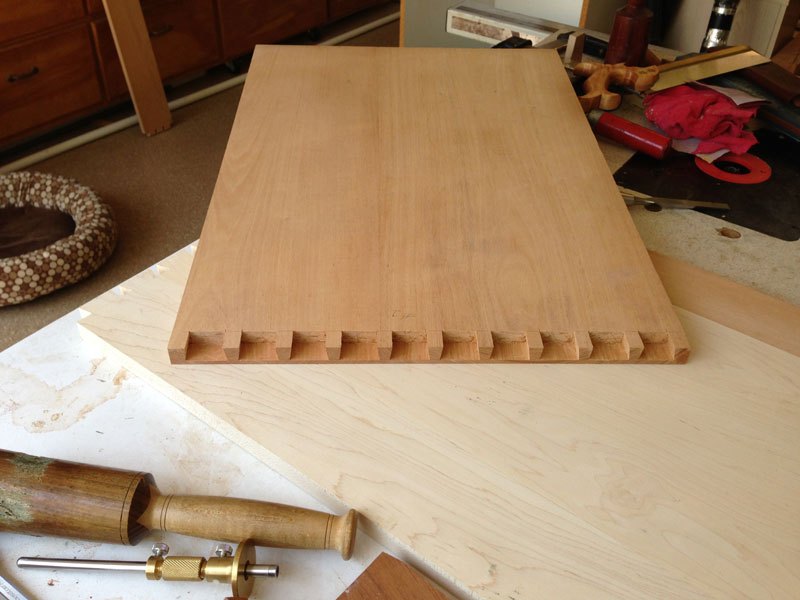
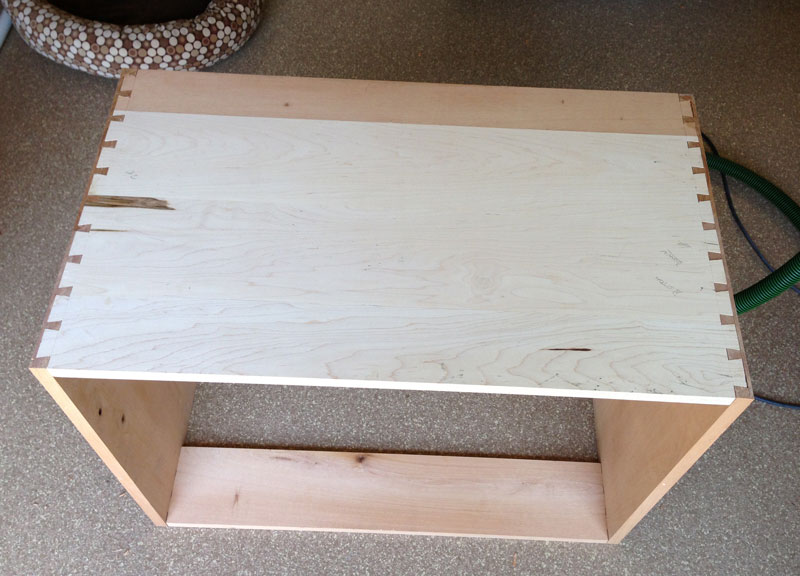
Here's a view of the bottom, seen from the back of the case, showing the half blind dovetails.
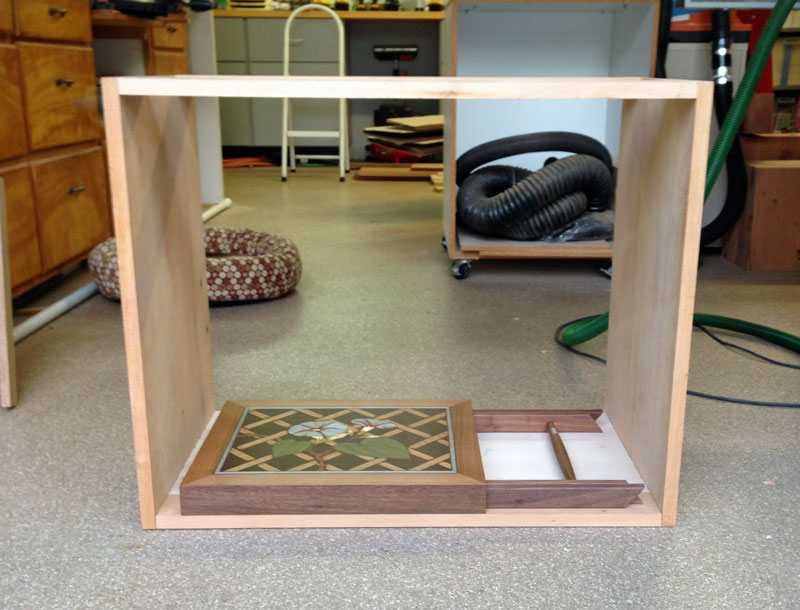
And, finally, here's one of the trays in the carcass just to show the fit. When complete, I'll put stops so that the trays can't be slid in too far - they'll always be flush with the front. Remember that the carcass will sit on a base about 4" high.
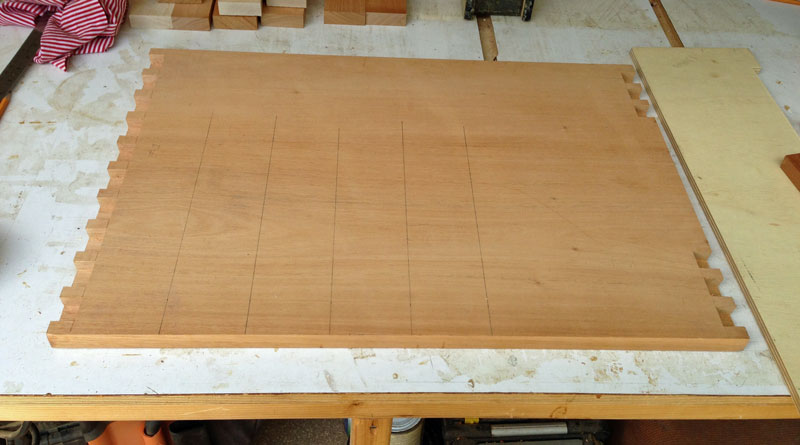
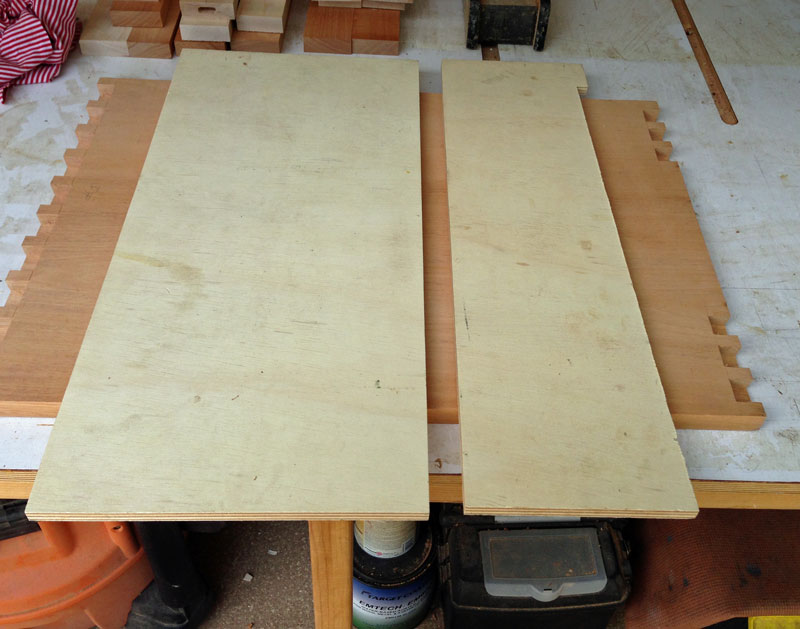
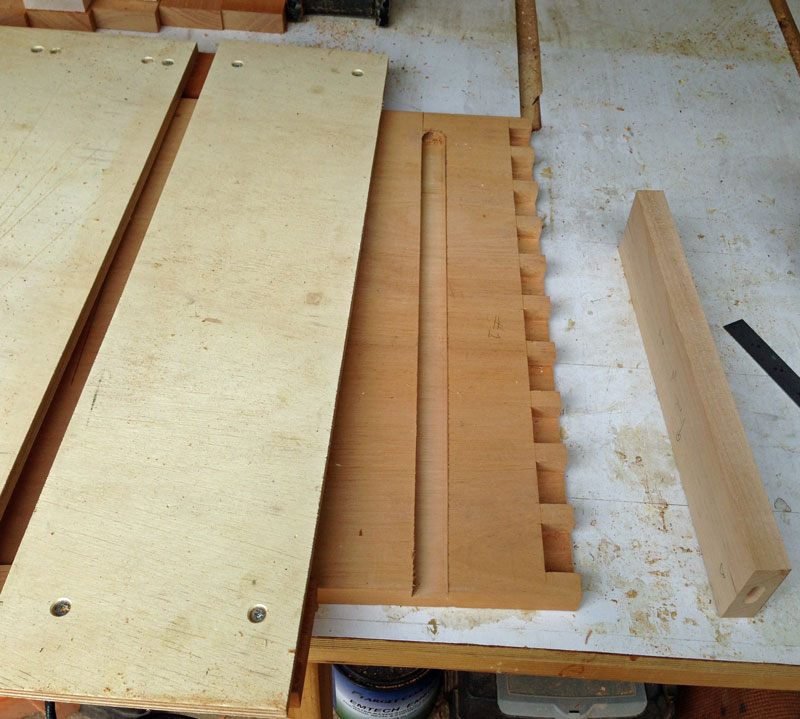
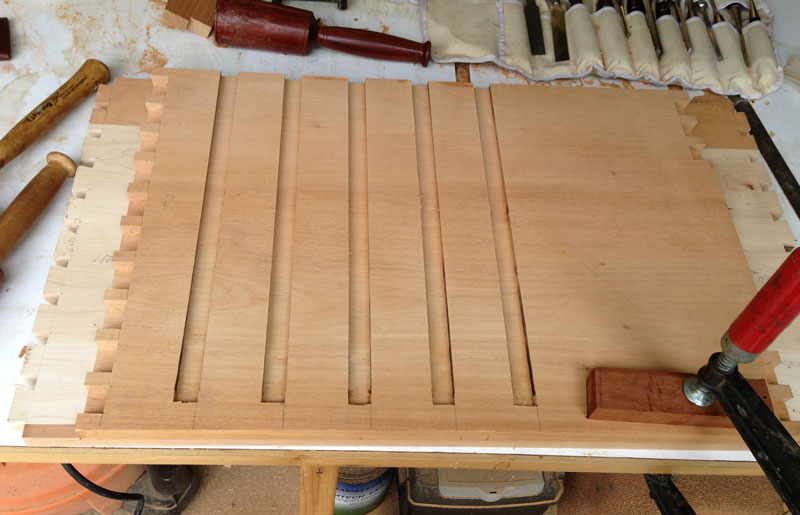
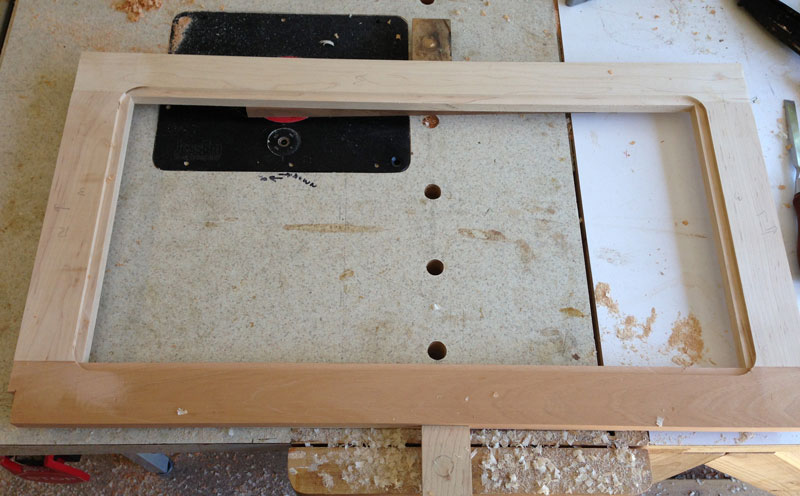
7/3/2013 Now that I have the basic cabinet built, it's time to do the blades (separators). I've milled all the wood for the blades - you will be able to see it in some later pictures. The first step in creating the dados is to lay out where the blades will go. I put the two sides next to each other to make sure the lines are in the same place on both sides.
I'm going to route the dados for the blades so I need a template that's the exact width of the thickness of the blades. I'll describe how I construct the template.
I take two pieces of scrap, here I'm using two pieces of plywood. You want them to be wide enough that you can clamp them without the clamps interfering with your router.
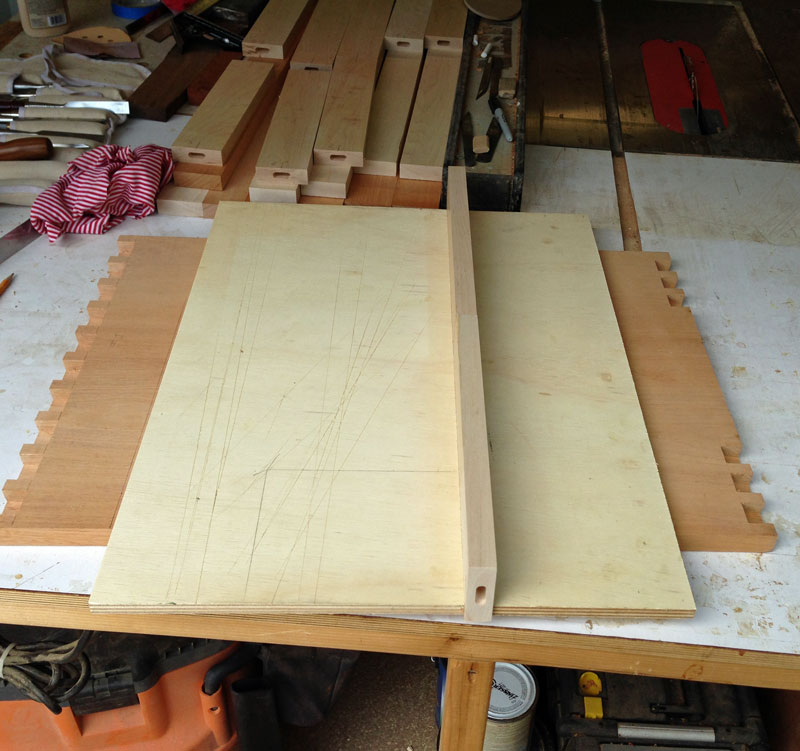
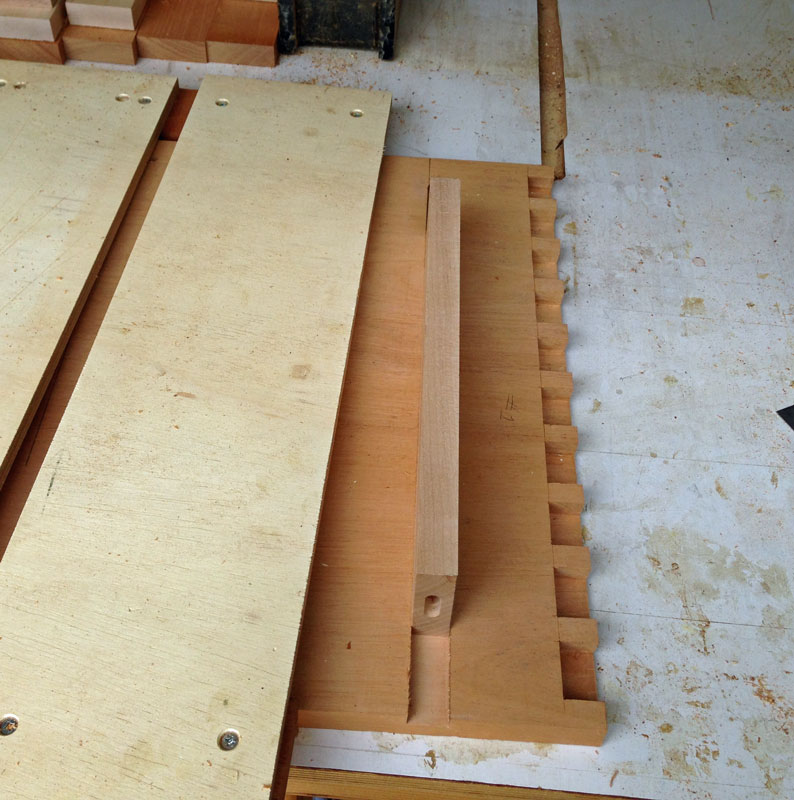
To get the proper width, I put two side pieces of the blades between the plywood.
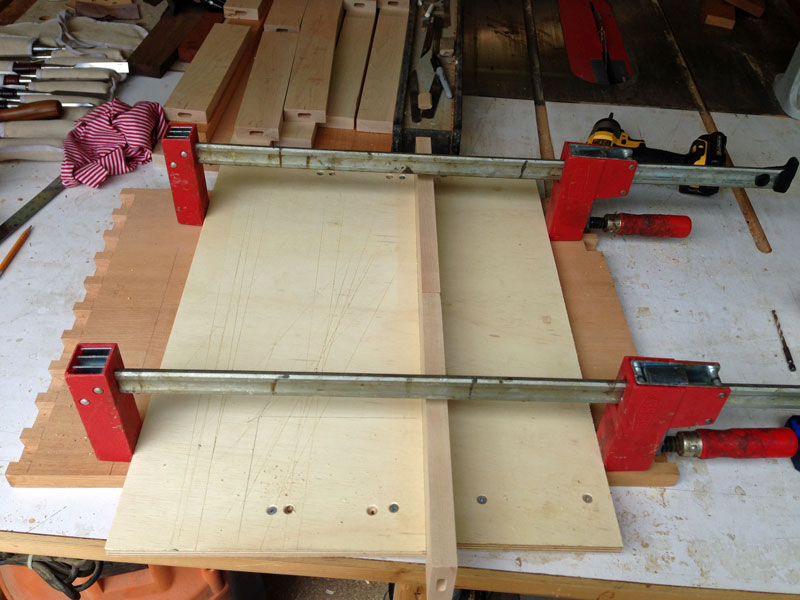
But the two pieces of plywood have to be held in the proper position while I use the template, so I put a piece of scrap under the plywood on each side of the work and screw the plywood down to the scrap.
I use clamps to hold the plywood tight against the blade stock while I'm installing the screws. Make sure the screws are recessed so they don't interfere with the router.
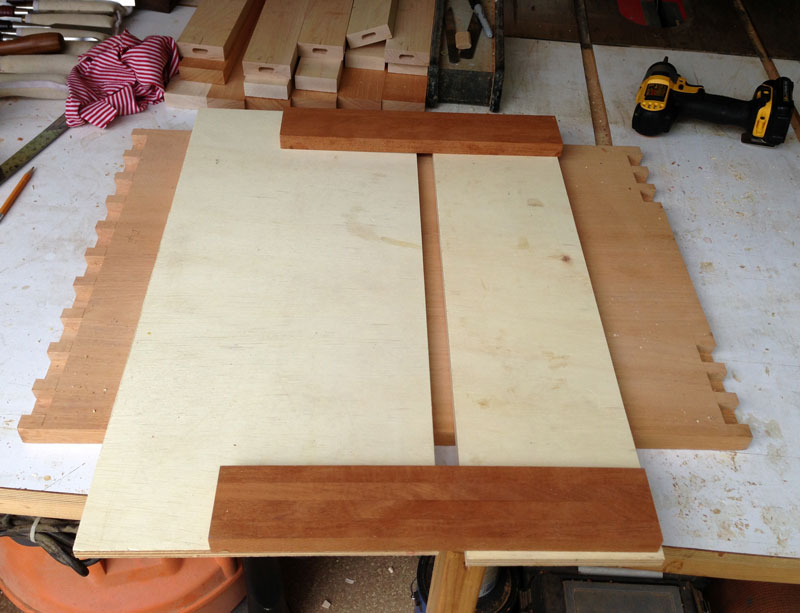
Here's a view of the bottom of the template. I do not press the two side pieces tight against the work when installing the screws. I want the ability to adjust the template, and I align the template to the lines I drew.
I use a top bearing router bit to route the dado. This bit is an Amana 45563. I cut the stock for the blades for a 5/16" dado so I want the dado routed just a bit deeper than that. When setting the depth of the bit, I have to use the thickness of the plywood (about 1/2") plus the 5/16" for the dado.
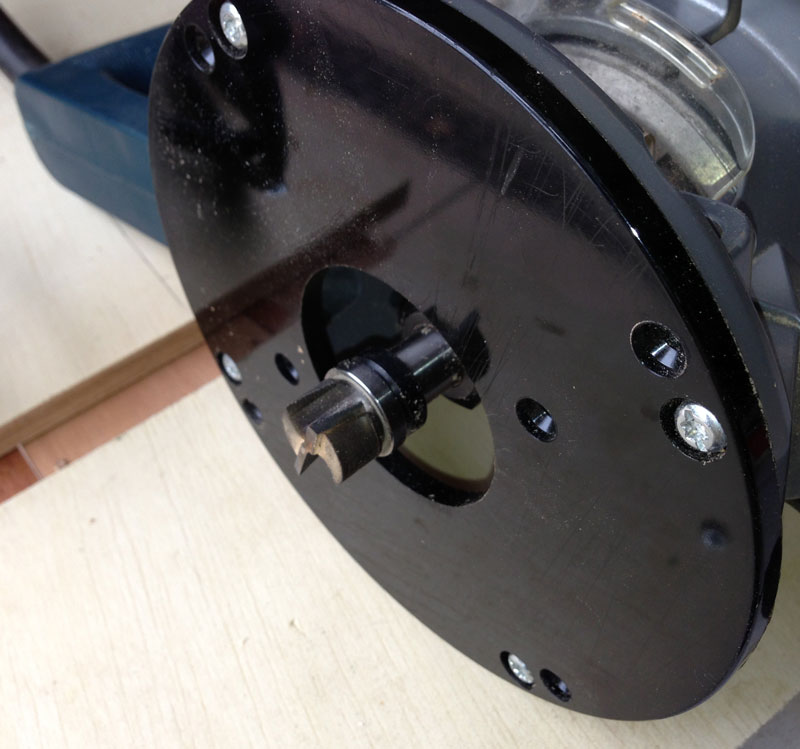
I align the template to the line on the work, clamp the template down, and route the dado, leaving 1" not routed on the front. The reason for leaving that 1" is that I don't want the dado to show in the front of the cabinet. If you don't mind it showing, you can route all the way through.
It looks like I have a good fit.
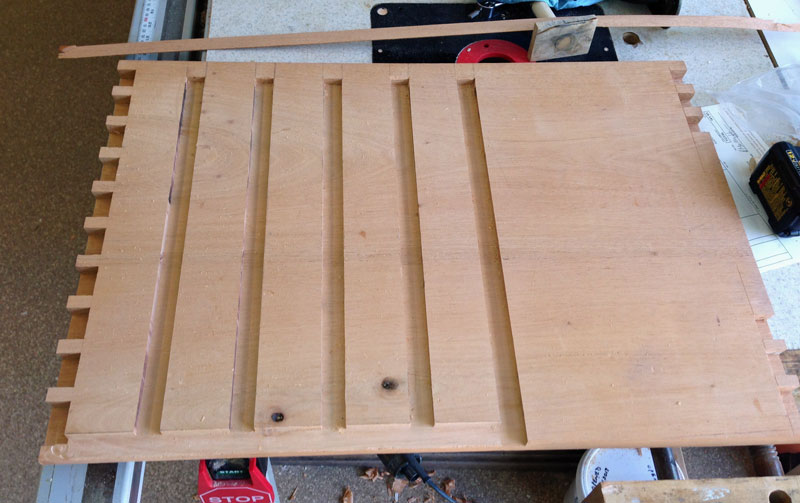
Here's all five of the dados routed on one side of the cabinet.
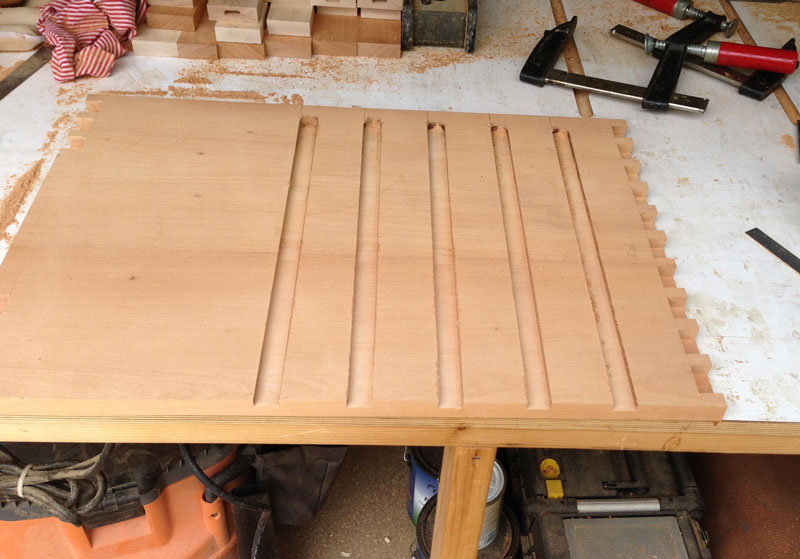
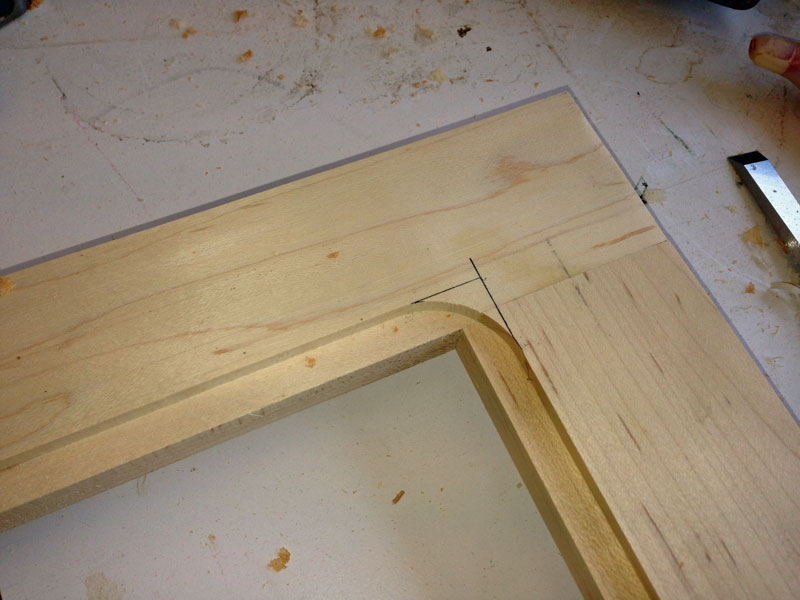
The router leaves a round end to the dado and I use a chisel to square it off.
Next, I cut the front piece of each blade 5/16" in, for a depth of a bit over 1".
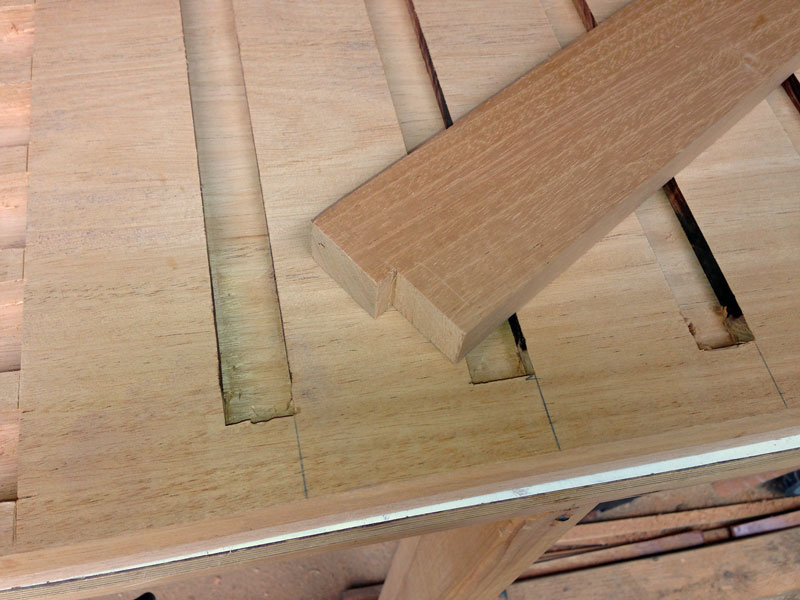
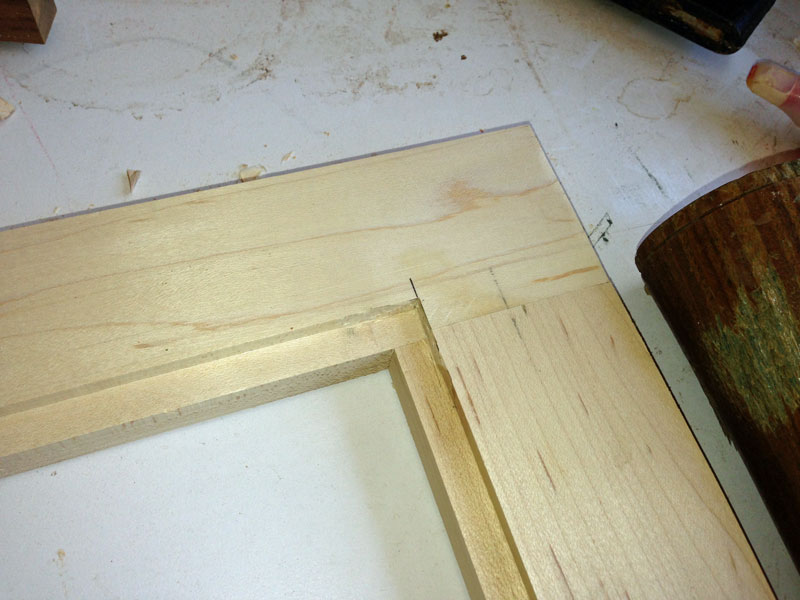
Fits pretty good.
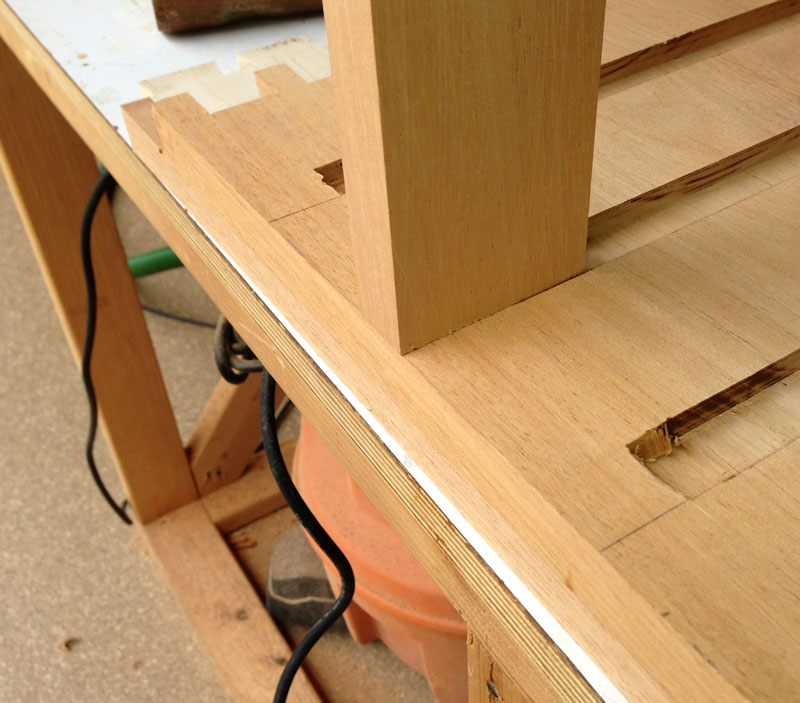
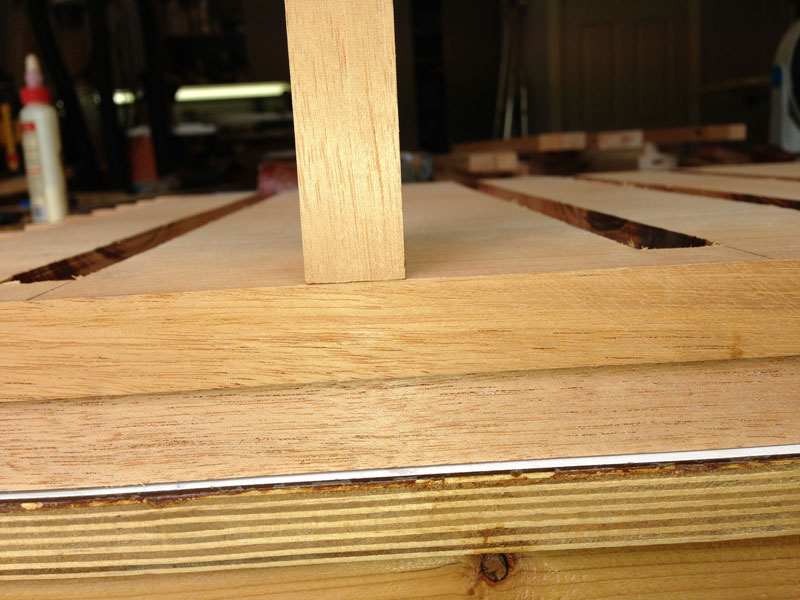
And seen from the front.
The next step is to glue up all the blades. I used Dominos to attach the pieces. In the old days, we'd cut mortise and tenon joints, but the Domino is much faster and provides very adequate strength.
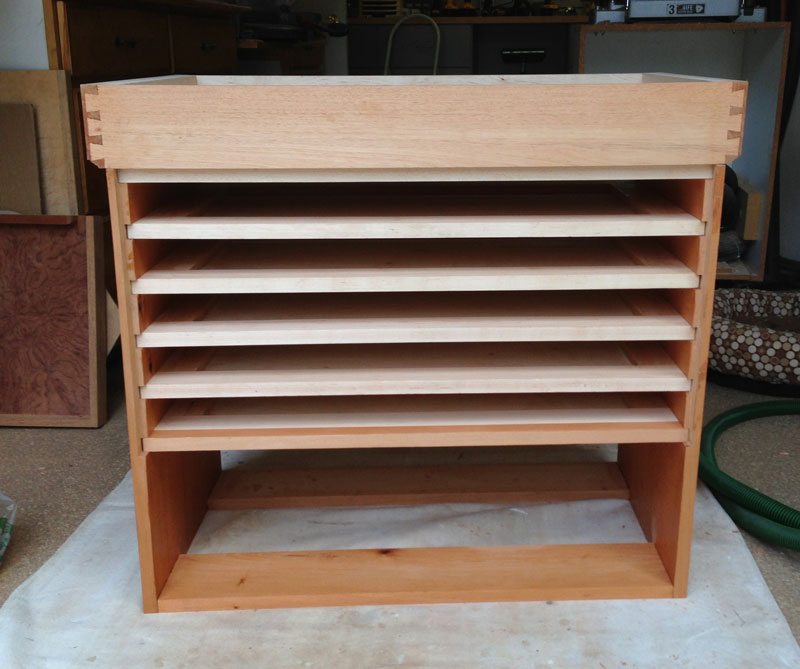
And here are the blades installed in the cabinet. I'll cut a rabbet around the inside of each blade and lay in a piece of 1/4" plywood so that the blade does not have a "hole" in it. This is the same as when people put dust shields in a chest of drawers. Judy requested this, thinking it would make it easier to slide the trays in and out.
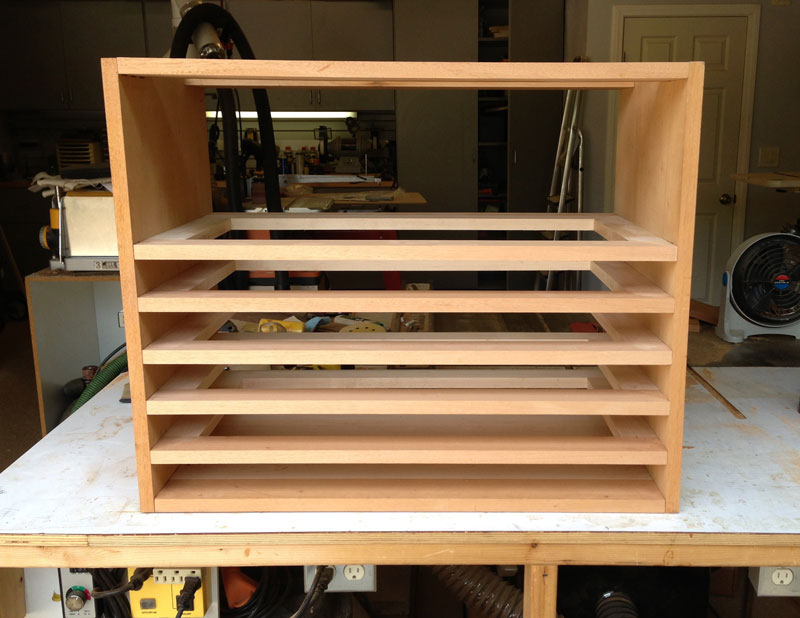
And seen from the back. Note that blades 1, 2, 3, and 4 are inset, while blade 5 comes all the way to the back. The back of the cabinet will only cover the blade area - it will not extend up into the drawer area (the drawer will be open in the back). Before I begin gluing the cabinet together, I'll sand and finish the inside because I won't be able to work between the blades.
7/4/2013 I worked on closing in the blades today. This step is fairly basic so I debated whether I should document the steps but decided to do so.
This is the same process that you might use in a chest of drawers to add what's called "dust shields" between drawers. One difference that I would suggest, however. If doing this for a chest of drawers, the plywood should be put on the bottom of the blades, rather than the top. Drawers often get overfilled. If the plywood is on the bottom of the blade, the excess clothes will simply slide along the blade. If the plywood is on top of the blade, the clothes often get caught on the cross pieces of the blades and the drawer either jams, or clothes fall behind the drawers. Sure, I know people shouldn't overfill drawers, but they do.
Anyway, here's a blade ready for processing.
I'm going to use a 1/4" slot cutter, with a bearing that will give me a 3/8" wide rabbet. I'll adjust the depth of the cut to equal the thickness of the 1/4" plywood (which is actually a bit less than 1/4"). You could do this cut on a router table but I find it difficult to make sure the pieces are pressed firmly against the table. If one piece rises up a small amount during the cutting, the plywood will not be flush at that point. Doing it with a hand held router eliminates that problem but requires a steady hand - don't tip the router.

Here's the blade after routing. Note that the corners are rounded.
I draw lines in the corner aligned with the long parts of the cut and chisel out the corners.
And after chiseling.
Fitting the plywood is a cut and fit operation. I try to sneak up on the final size to give me a tight fit.
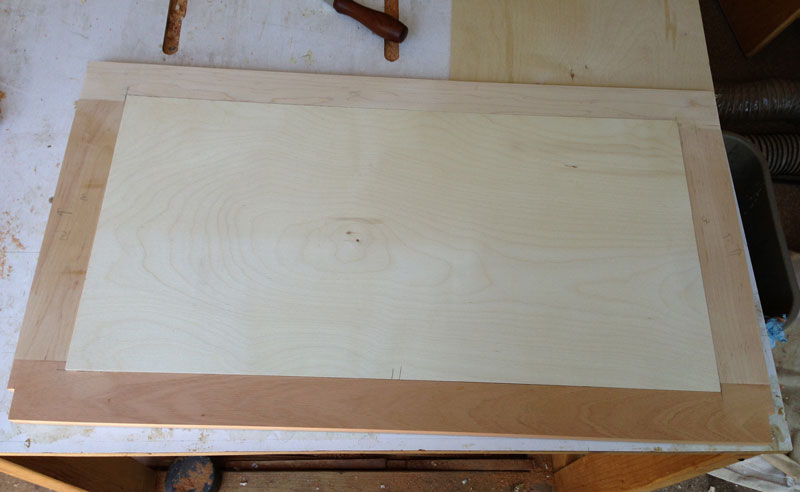
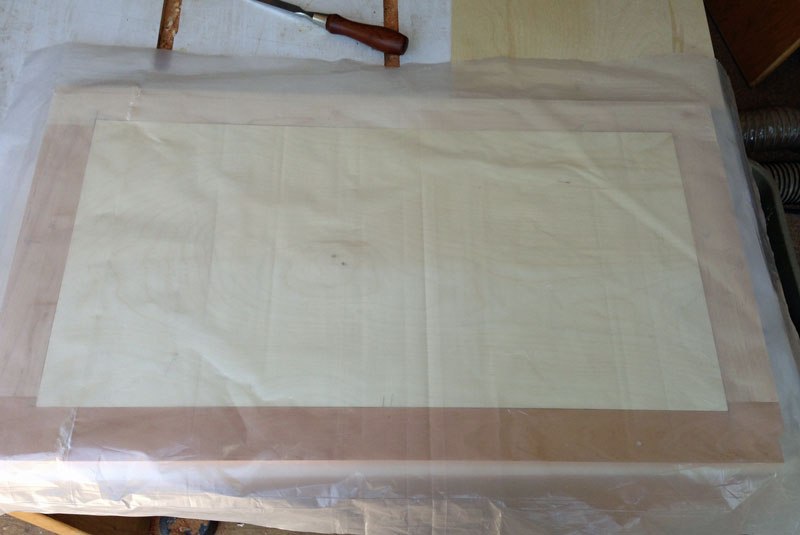
To glue it flat, I run a bead of glue in the rabbet - no glue on the plywood - and lay the plywood into the blade. Then I put a sheet of plastic on top of the blade (to keep glue away from the cauls).
Then I put a caul on top to press the plywood tightly into the rabbets. Here, I'm using two cauls because that's what I had in the shop.
Then clamp everything down.
There may be some squeeze out on the underside so I turn the blade over and remove the squeeze out. This also shows the bottom of the clamp up. I use small blocks of wood to keep the clamps from marking the blades.
And when the glue is set, this is what the blade looks like.
7/6/2013 I began working on the back today. The back will cover only the bottom part of the cabinet, the part where the tray stands will be stored. The top section will be for the TV electronics and will not have a back - so that the cables can be run, as well as for ventilation.
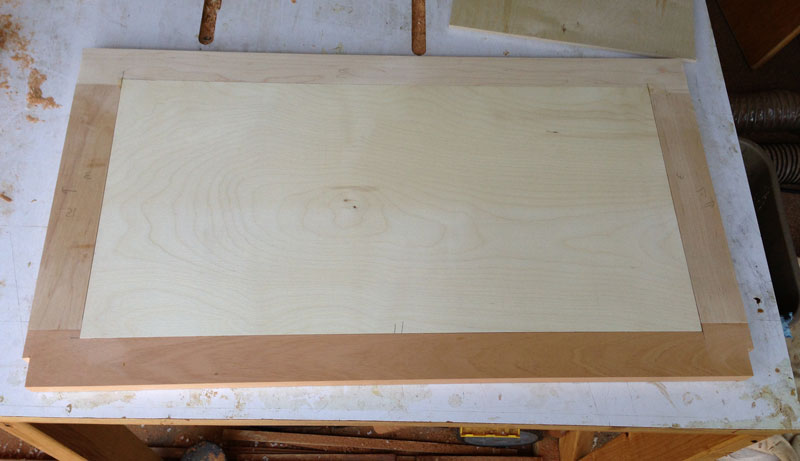
The picture below shows what the back will basically look like. The two open spaces will each be filled with a floating panel veneered in mahogany. The pieces are all cut a bit long - I won't know the exact size until I get the cabinet glued up.
The panel will fit into a rabbet on both sides. Blade #5 will be cut back by the thickness of the back (11/16"), as well the bottom of the case. This will allow the back to sit flush into the back of the carcass. The back will be attached with figure 8 fasteners, both under the case (bottom to back) and on blade #5. I'll recess the figure 8 fasteners, especially on blade #5, so that everything is flush.
I actually prefer to put the figure 8 fasteners up from the bottom (on the inside) and down from the top, but with the small amount of space between the blades, I probably won't be able to get my hand in there to install the screws, so I'll have to install them as I describe above.
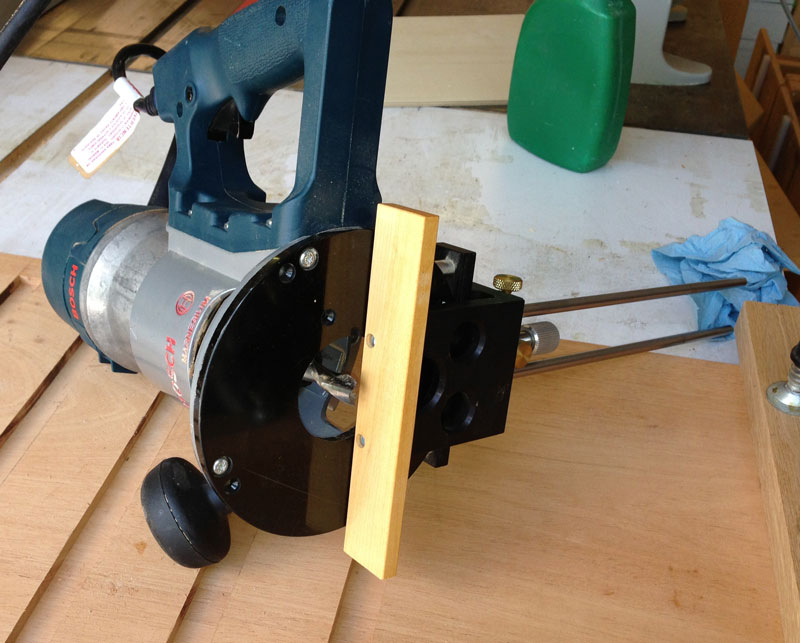
My next task is to cut the rabbets into the sides of the cabinet. I used a 1/2" upcut spiral bit, and a MicroFence (that's a brand). Here's a shot of the setup on the router. The depth is approximately the same as the dados (maybe just a bit more than the dados), so that the dados are not seen from the back of the cabinet.
And here's the rabbet cut into the side.
My next steps are to finish veneering the panels for the back, then to finish the inside of the carcass and glue up the top and bottom of the carcass. Then I'll be able to get the exact measurements for the back and can finish that much.
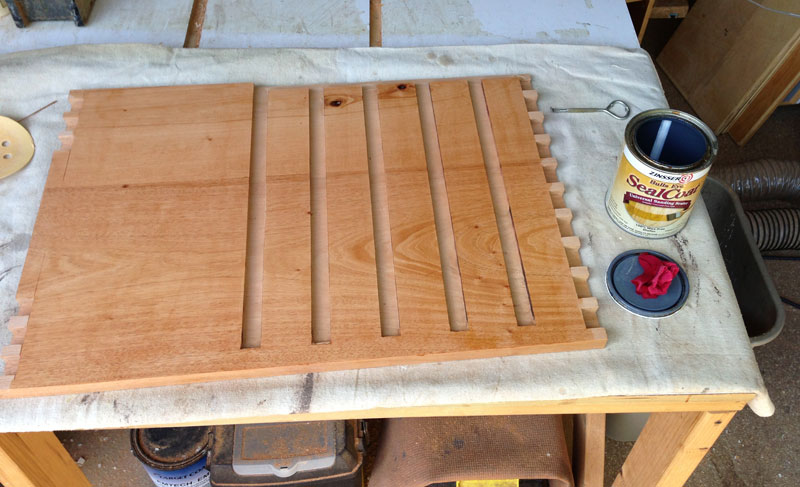
7/8/2013 Today was glue up day. I began by sanding the inside of all the pieces and finishing with shellac.
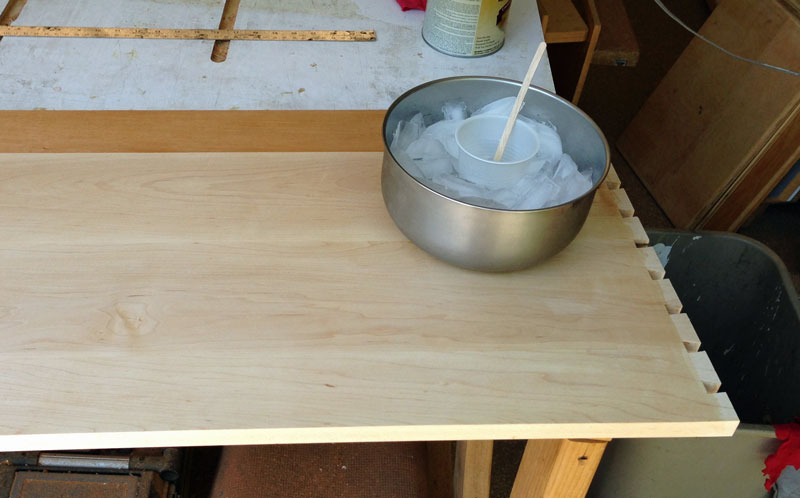
I used West Systems epoxy for the glue up, primarily because it's a very slow glue when I use the slow hardener. But even with that, the glue can harden up pretty fast if it starts to get hot. And the epoxy reaction is exothermic so if you don't keep it cool, the epoxy will get hotter and hotter and it will fully cure in the mixing cup. To keep it cool, I put the cup in ice.
Putting the glue on each tail, and inside each tail socket, is a slow process.
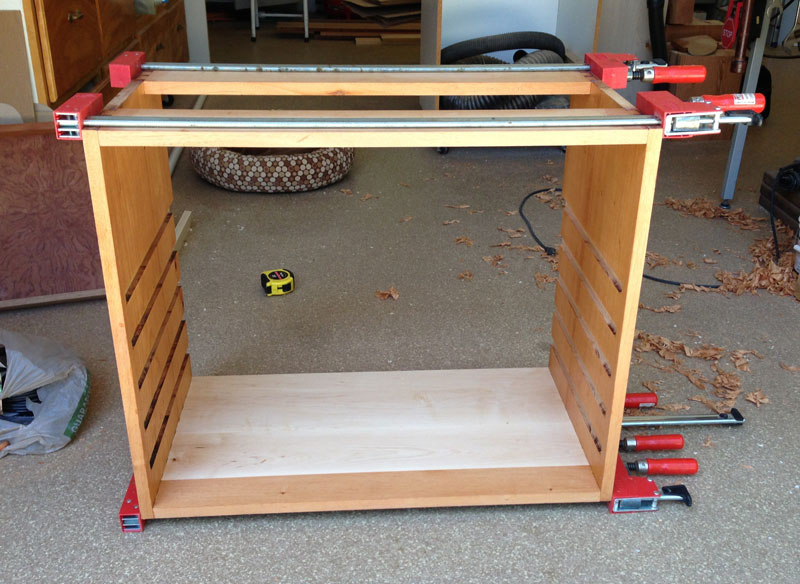
Here's the cabinet in clamps. I tapped the bottom and top pieces into place and then just clamped the sides in. The top pieces look bowed but they're not. It's just an artifact of the wide angle lens. I checked the corner-to-corner distances to make sure the cabinet was square/
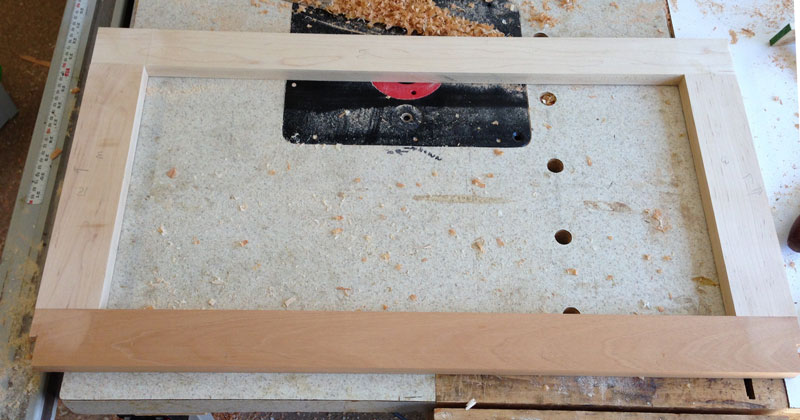
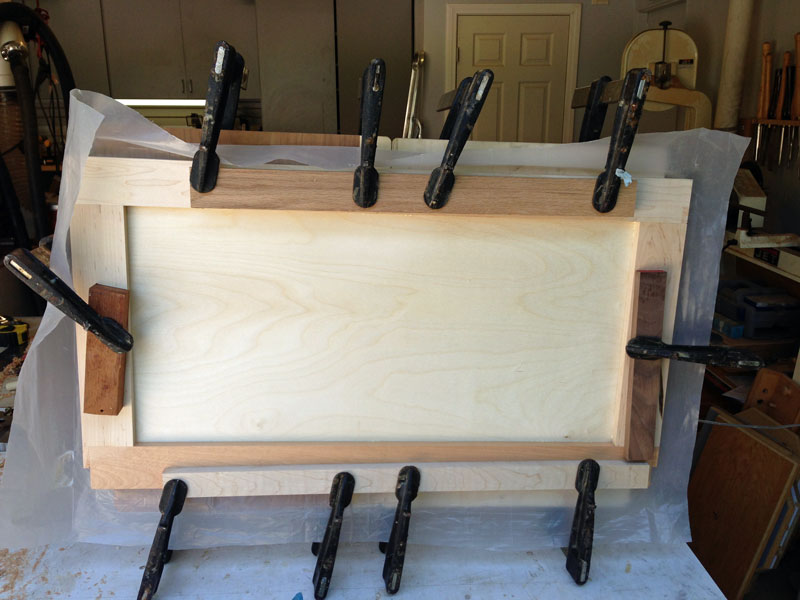
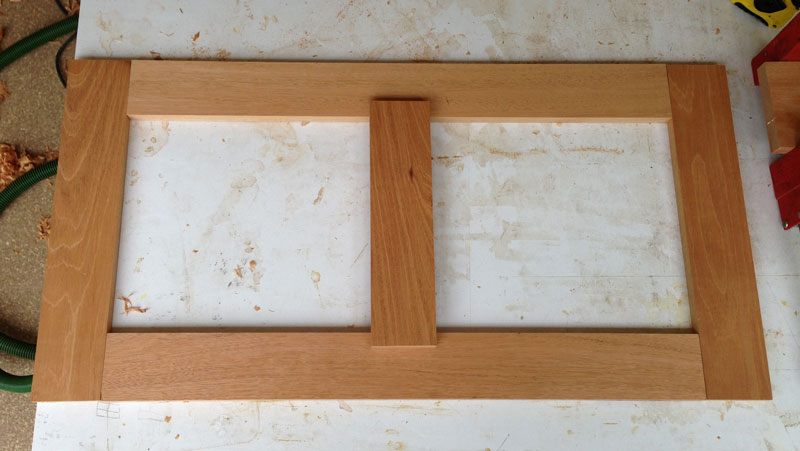
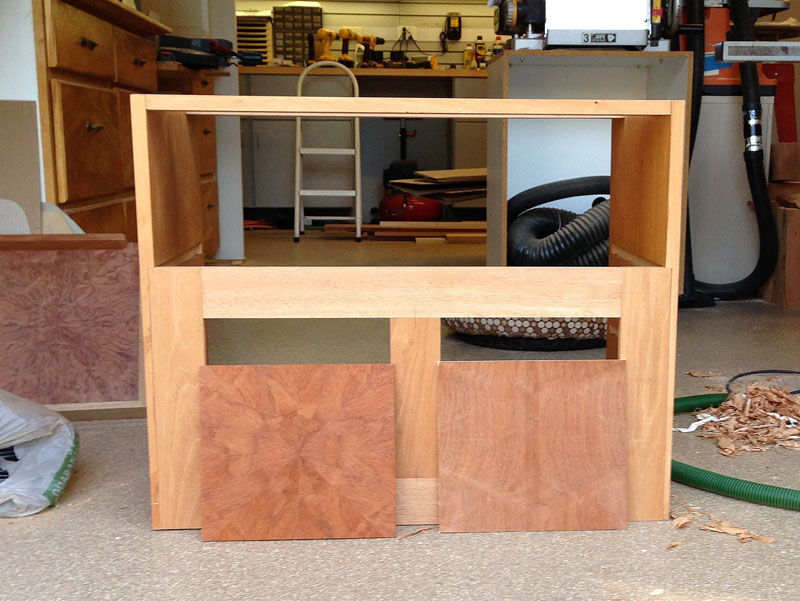
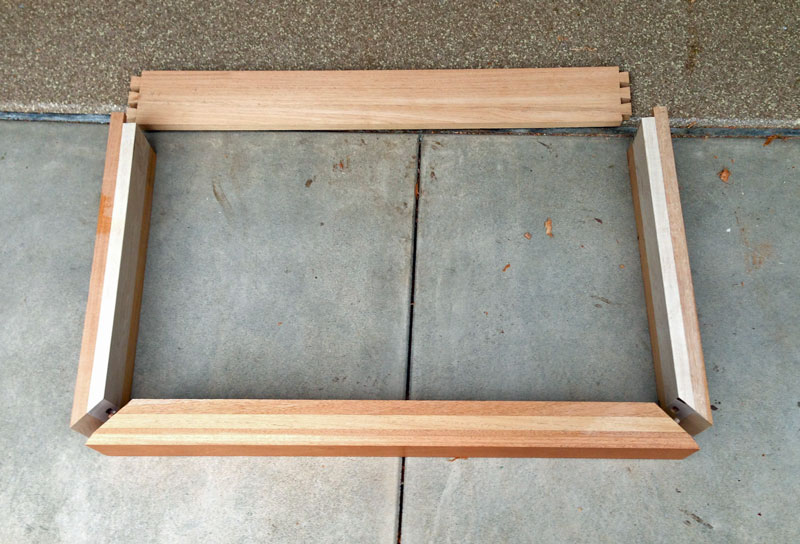
Once I had the cabinet in clamps, I could get an accurate measurement for the back, and I made the frame of the back. I'll use Dominos for joinery. Here's a pix showing how it will fit into the back of the cabinet.

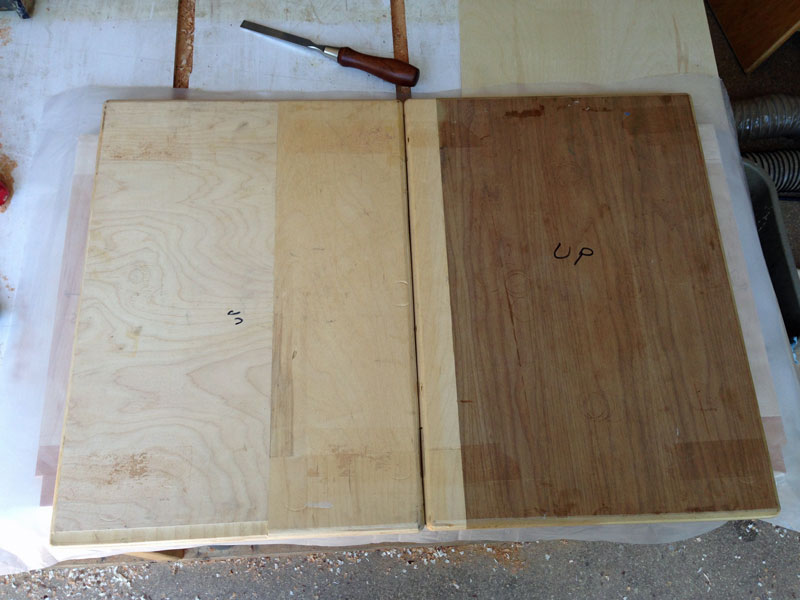
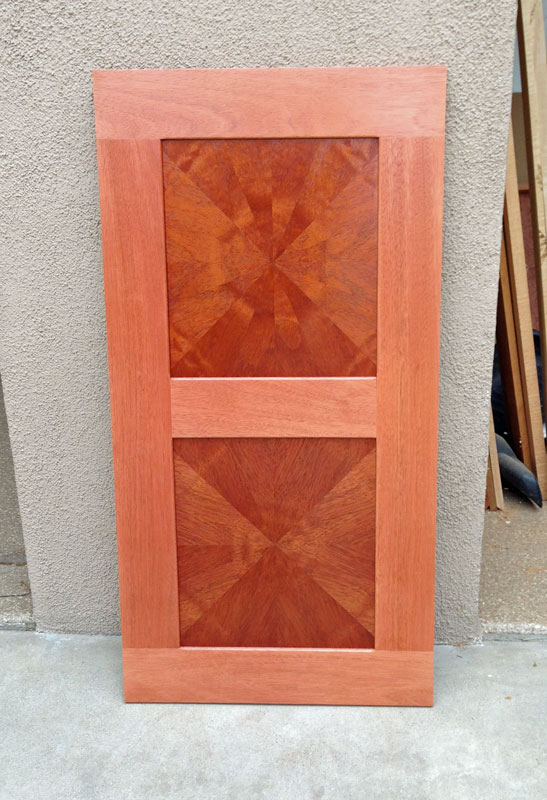
I did some veneering on the panels. The panel on the left (the radial match) shows what it will look like from the back. The panel on the right (bookmatch) shows what the panel will look like inside the cabinet. Of course, the inside of the panel will hardly be able to be seen. This was some scrap veneer I had left from another project - I was glad to finally find a use for it.
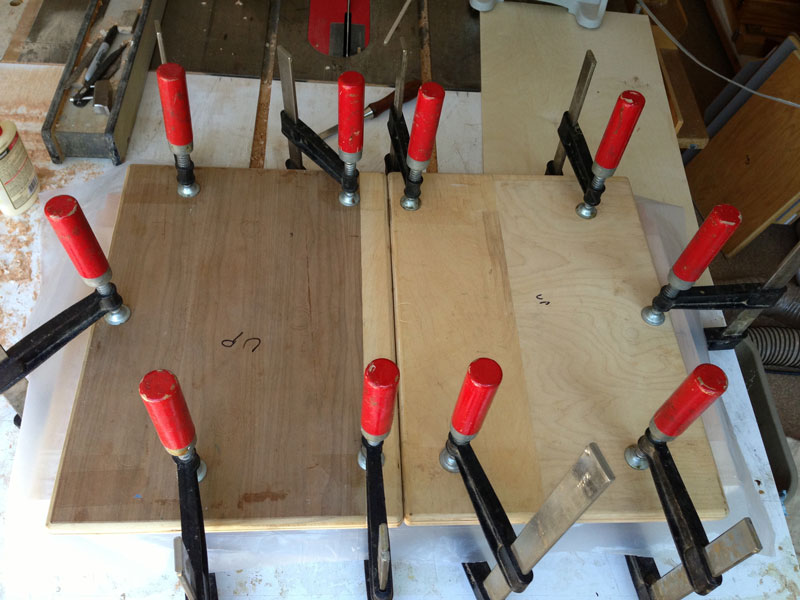
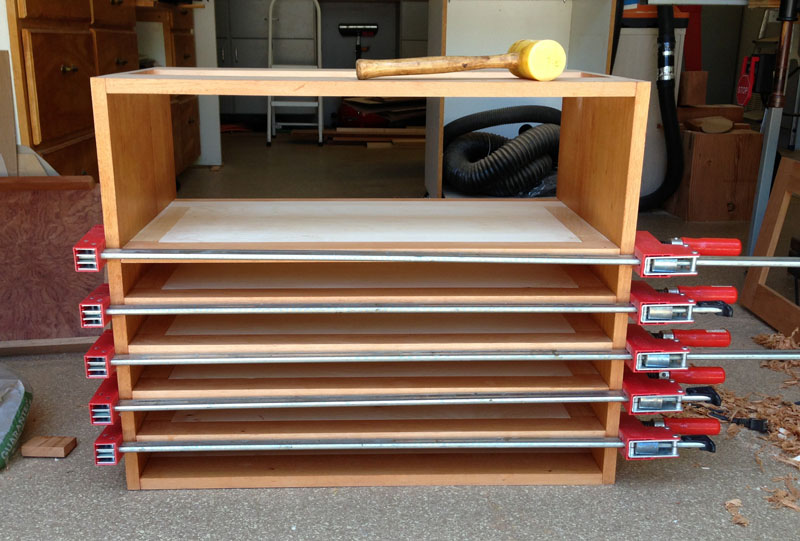
7/9/2013 I began this morning by sanding the blades and putting a coat of shellac on them. Once they were all prepared, I glued them in, using epoxy again. They are only glued in the front because the blades are cross grain to the sides of the case. By only gluing them in front, the sides can move relative to the blades. Here's a picture of the glue-up.
Once I had the blades in clamp, I started on the back. The first thing I did was to dry fit the pieces, except for the panels, and use a round over bit inside the openings. I did this before cutting the grooves for the panels because once I cut the grooves, the bearing on the round over bit would not have anything to guide on. I also sanded the inside of the openings.
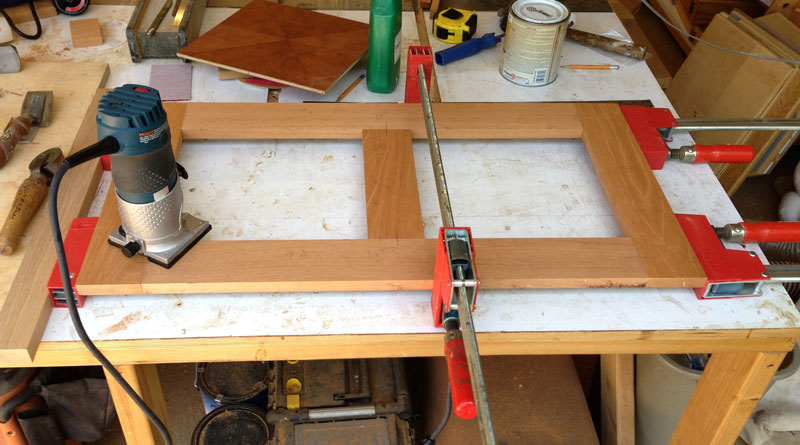
Then I went to my table saw and cut a groove 1/4" deep on all the inside faces of the boards. I ran the boards through the saw twice, cutting one side of the groove, then the other (this guaranteed that the groove was centered). So when enlarging the groove, I had to recognize that the enlargement was twice the amount that I moved my fence. In any case, I was able to get a good fit to the panels.
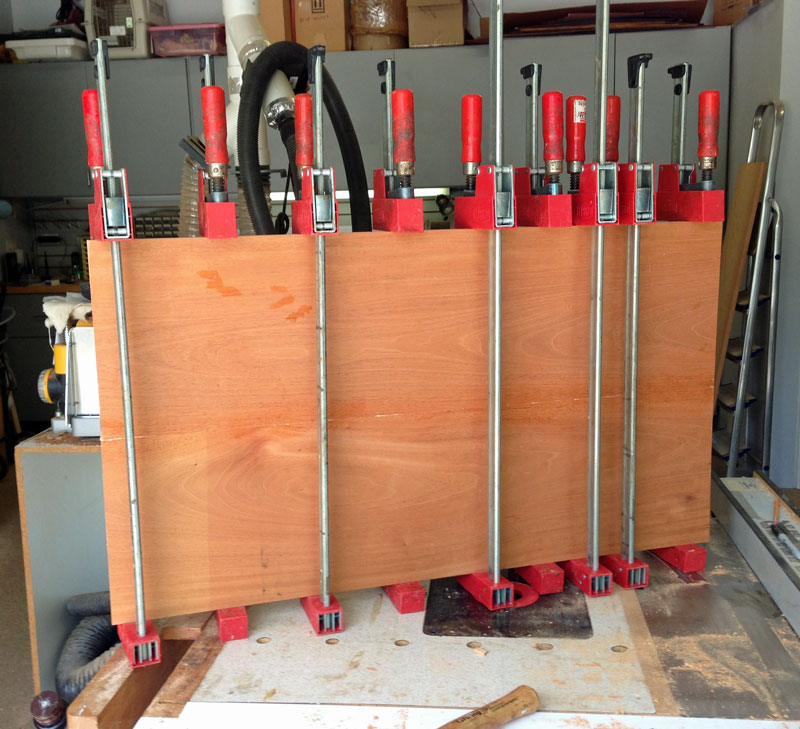
Next was to glue up the back, as shown here.
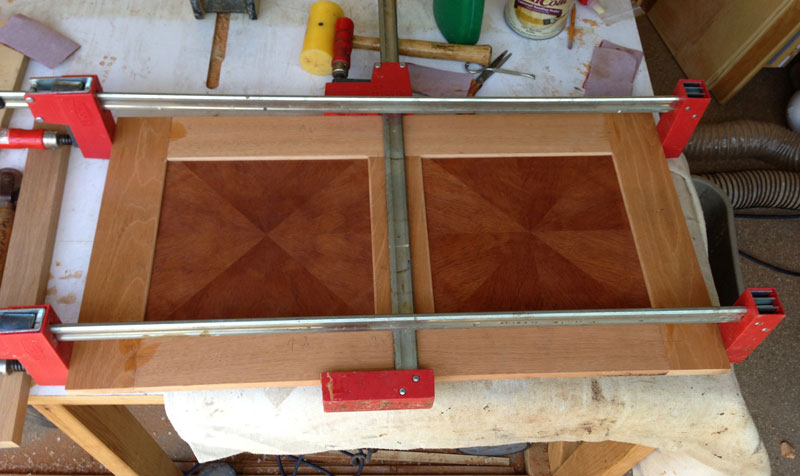
And here's the back in the cutout in the case. I put shellac on the panels before I did the glue up, which is why they're darker. The panels have to be finished before installation because if things shrink later, you'll see a line of unfinished wood around the panel.
I went with this kind of back because it hides the dados for the blades.
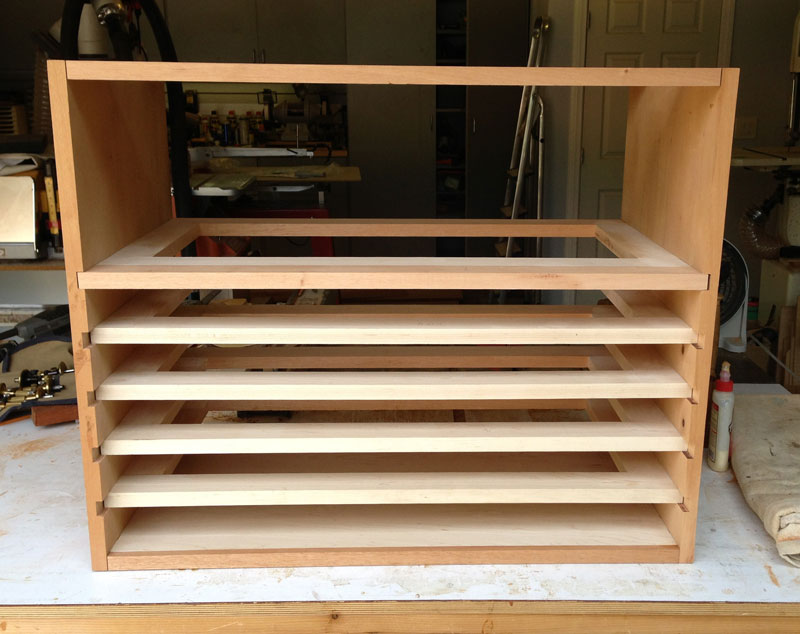
And here's a view of the front, after the glue on the blades was cured.
And here's a picture with one of the tray stands in the case. The fit is good.
Here's a picture of the back of the case with finish applied. Mahogany darkens with age. Within a fairly short time, the frame will be the same color as the panels. I'll put the back in a safe place until the rest of the case is finished.
7/11/2013 I decided to work on the base next. The cabinet is going to have doors on it, so the base has to be made to take that into account - mainly by having the front of the base protrude far enough so that when the doors are closed, the base is even all around.
The doors will be 3/4" thick so I have to move the front of the base out 3/4". I did that by gluing a piece of 3/4" stock to the material I'm using for the base. Actually, I would have only had to do this for the front piece but decided to do it for the sides, also. This gives more support for the case.
I'm putting a profile on the top of the base boards. This is what the profile looks like.
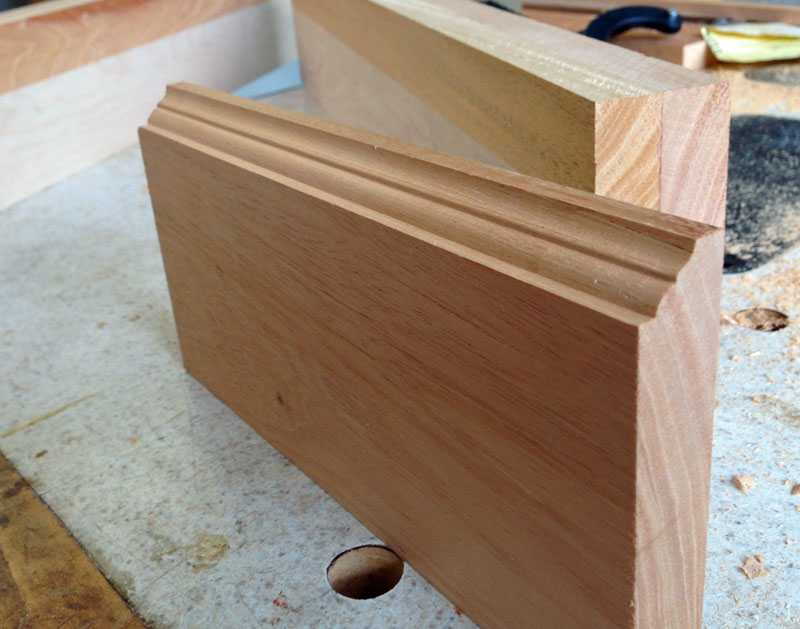
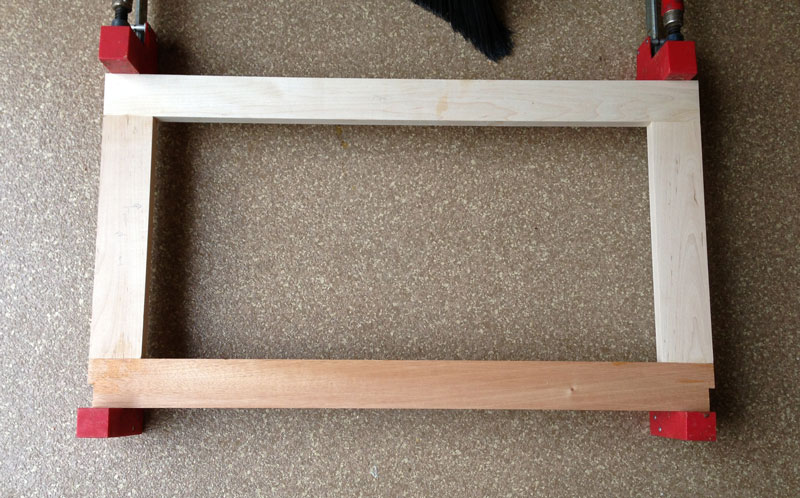
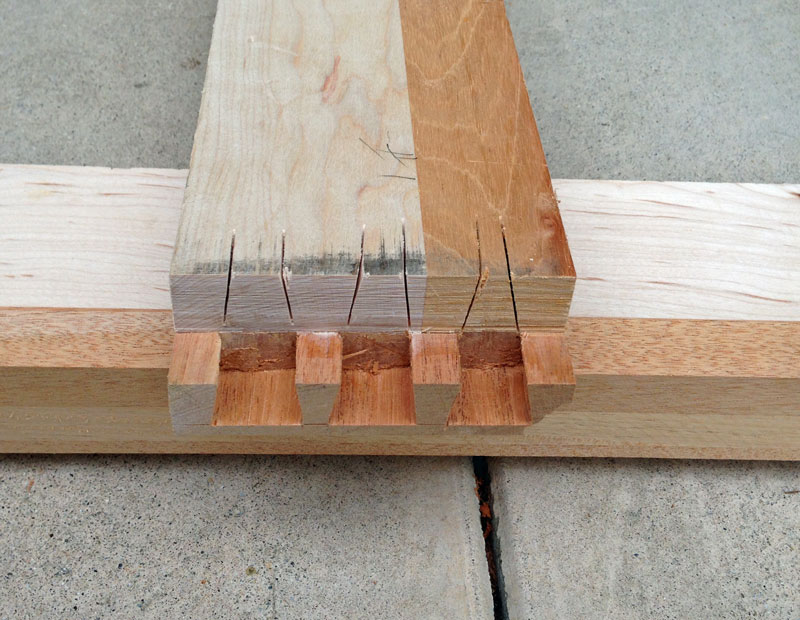
I cut the pieces to size, with miter joints in the front and dovetails in the rear. Normally, the rear is done in secondary wood, but since I did the back in mahogany, I decided to do the rear of the base in mahogany, also, so that it wouldn't contrast with the rest of the case.
I used Dominos in the miter joints to add strength and to help with alignment.
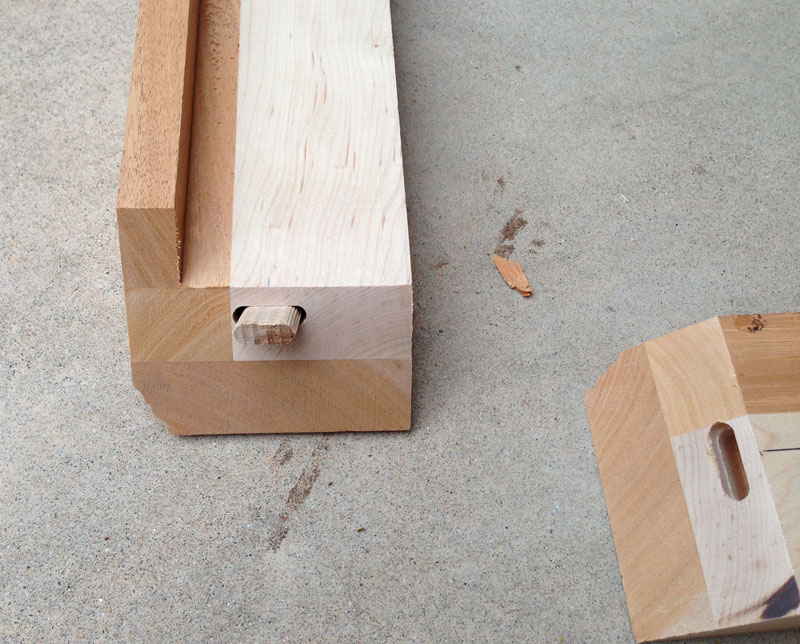
In the rear, I used dovetails. But since I didn't want the secondary wood to show, I had to cut a rabbet at the end of the side pieces so that the back piece would go completely across and the secondary wood would not show. I almost screwed up here. I forgot about the profile and placed the tail too close to the top of the rear piece. Luckily, it just fit.
Here's a picture of the base after glue up, screwed to the bottom of the case. I glued some strips all around the inside of the base and put screws through them to hold the base on.
Here's a picture from the rear of the case, with the case upside down. The back of the base is flush with the back of the case.
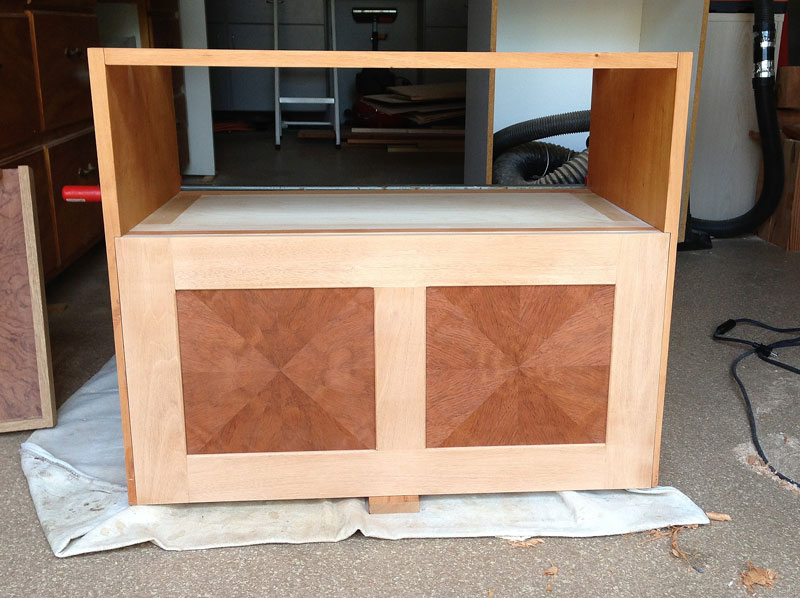
And here's a picture from the front and side, with the case right side up. It looks a little odd in this picture because the base is protruding forward. After the doors are installed, it'll look normal.

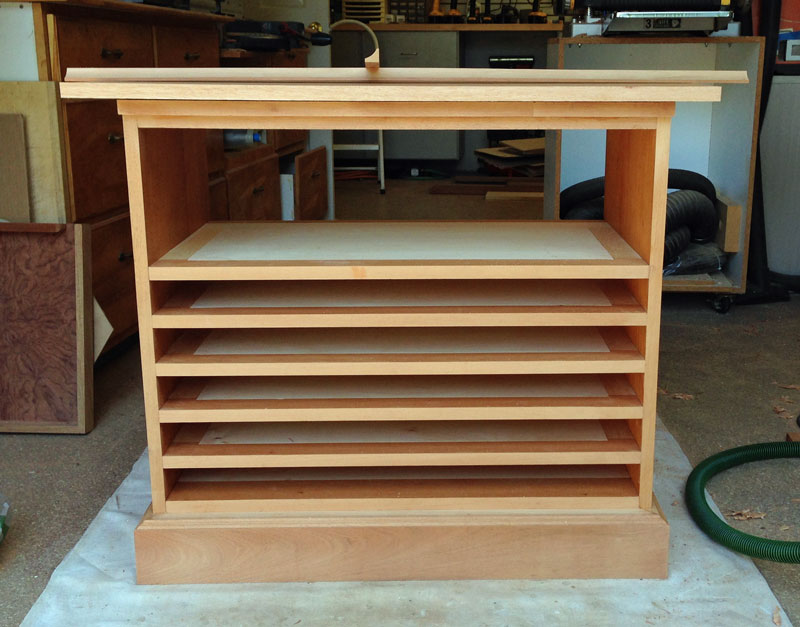
7/12/2013 I glued up the top today and made some cove molding which will go just under the top.
You can see the cove molding sitting on top of the top in the next picture. The top is oversize - I'll cut it down and put a profile on it. The overhang from the case will be about 1 1/2" to 1 3/4" - I haven't decided yet.
There were a few other small things I had to do today which I didn't take pictures of. I had to bring out the top stretcher by 3/4" so that it will be flush with the doors. The cove molding will be mounted to that extension.
I also had to glue a piece of 3/4" mahogany under the top stretcher, and flush with the front of the case. The drawer front will basically cover that strip, but without it, there could be a "crack" between the top of the drawer front and the front stretcher. Making those and gluing them in place took some time. This is an example of where doing a drawing would probably have caught that issue.
Next I'll work on the drawer, and then go back to the top to cut it to size and put on the profile. I also have to make the doors and the drawer front. Those will be covered with marquetry.
More to come.
The work continues here