Carving a Simple Early American Fan
P. Michael Henderson
January 5, 2009
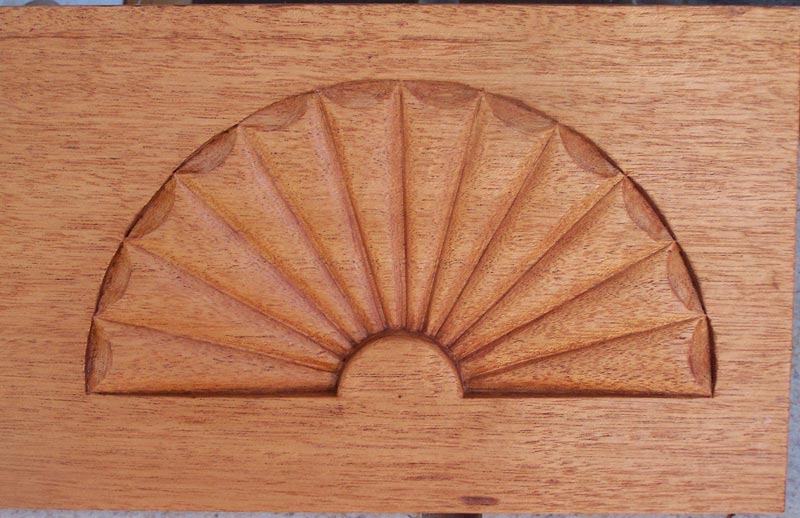
There are almost as many variations of the carved fan as there are shells. This one is very simple but elegant and easy to carve - a beginning carver should be able to carve this fan.
These fans were used on early American furniture, often on the center drawer of a lowboy. A drawer pull (almost certainly a round knob) was placed in the lower center of the fan. So when you look at the fan we're carving, try to imagine a drawer pull as part of the fan.
Note that I use the Swiss system to describe carving tools in all of my tutorials.
If you find this tutorial useful, I'd really appreciate if you would send me an e-mail with the subject line of "Simple Fan" so I can get some indication of how many people are reading it.
Here's the fan that you will carve in this tutorial.
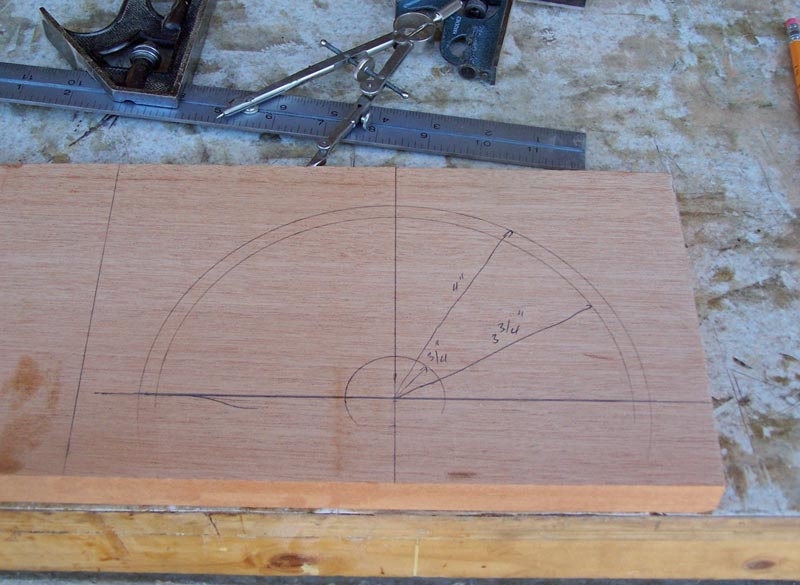
I'm using a piece of 3/4" Honduras mahogany about 6 1/2" wide. This piece is longer, but a piece about 10" in length will work well.
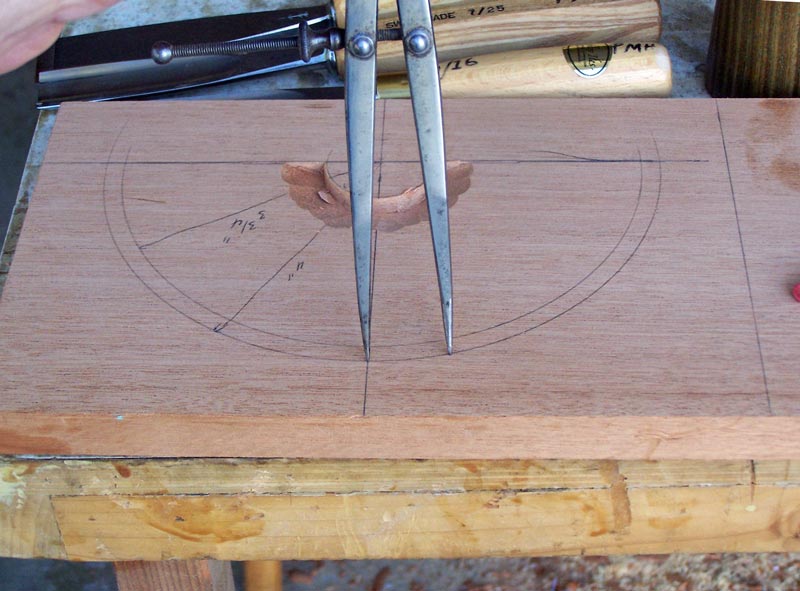
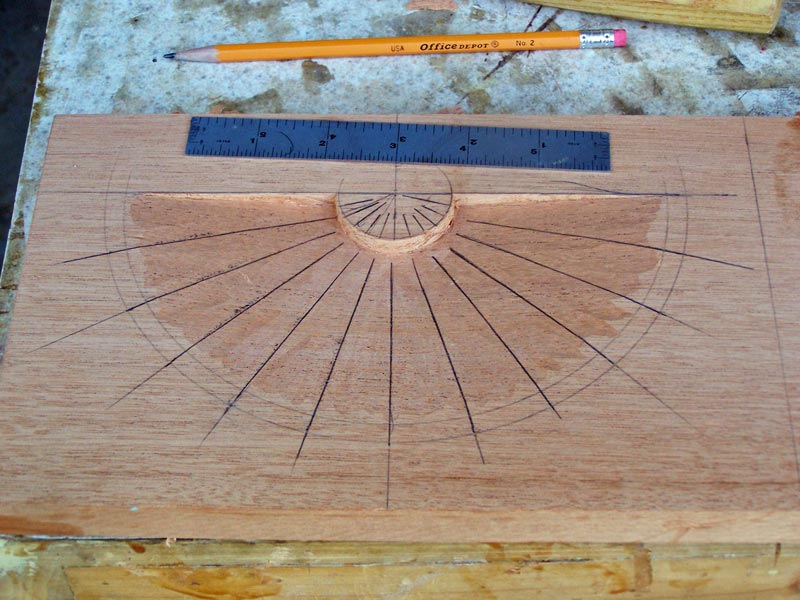
The first thing we'll do is the layout. I draw a vertical line 5" from the end (if the piece was 10" long, I'd split it in half), and a horizontal line about 1 1/2" from the bottom. Using the intersection of those two lines as the center point, I draw a half circle with radius 4", and another with radius 3 3/4". Finally, I draw a small circle with a 3/4" radius.
If you were doing this on a real piece of furniture, you'd have to scale these measurements to fit your drawer.
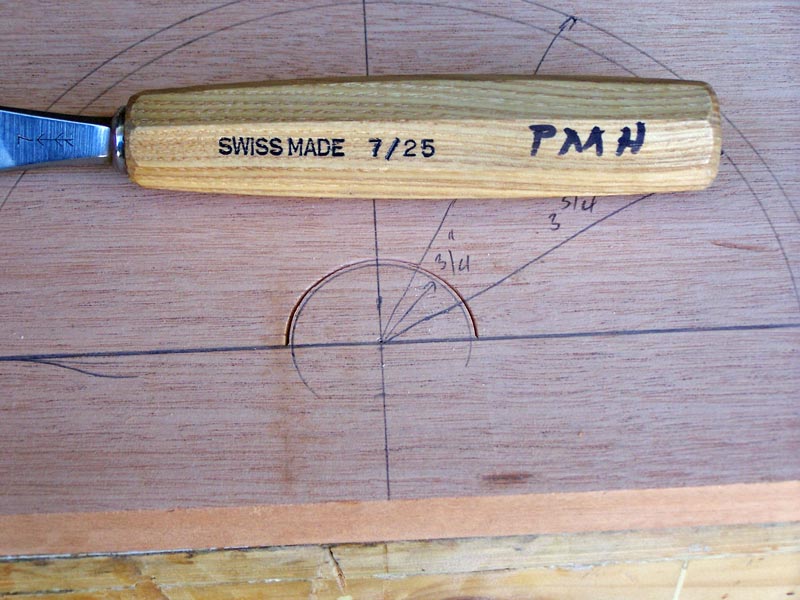
We begin our carving by making a downward cut with a #7/25 gouge to outline the lower half circle. Note that I didn't cut exactly to the line - I cut just a bit away from the line. As I do the rest of the carving, I'll "damage" the side of that half circle. As the final carving, I'll trim back to the line and remove that damage.
Next, I begin cutting away the wood on the outside of that half circle so that it stands proud by about 1/4".
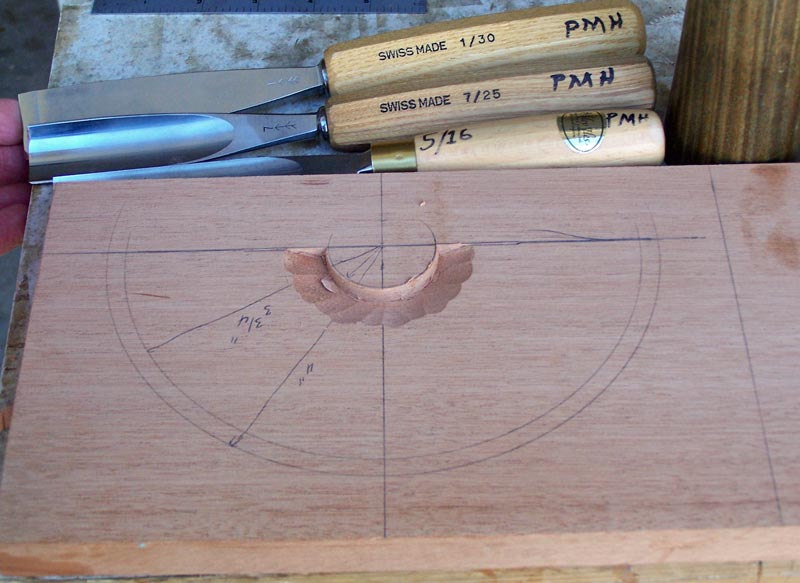

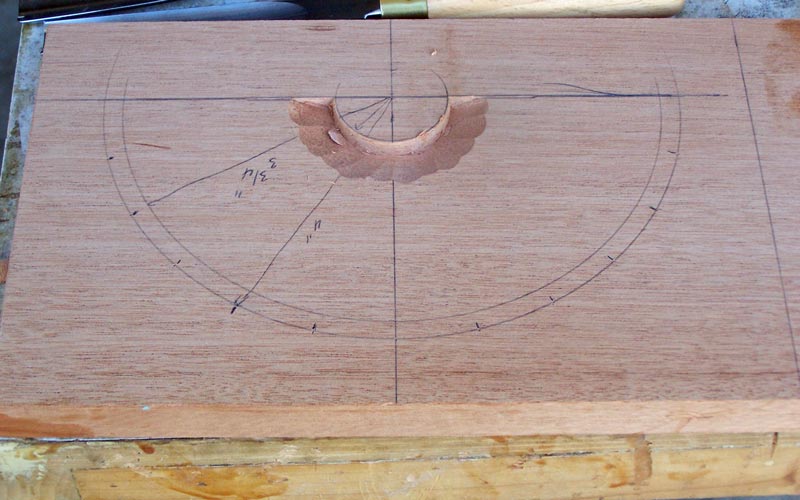
Next, I need to lay out the flutes. I actually should have done this as part of my original layout, but I forgot to do it then. I can do it now with no problems to the carving. I want about 12 flutes across the fan, which means 6 on each side. I use the dividers and adjust until I get six even spaces.
There's nothing magic about having 12 flutes - you can use as many or as few as you choose - but 12 is a good compromise. If you use a lot more than 12, the flutes get too narrow at the bottom and they're hard to carve. And if you use a lot less than 12, the flutes are too wide at the top. You can use an odd number instead of an even, but then you have a bit more of a layout problem since the center flute will be on the center line, instead of the center line being a cut between two flutes. An odd number will look fine, however.
You can see the six spaces on each side of the center line in the picture below.
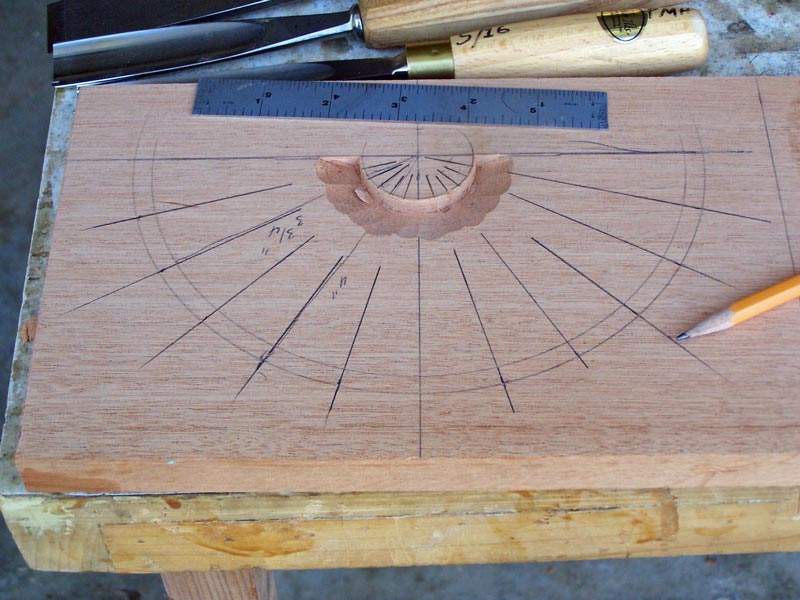
Then draw a line from the center point to beyond the outer circle. It's important that the line extend beyond that outer circle.
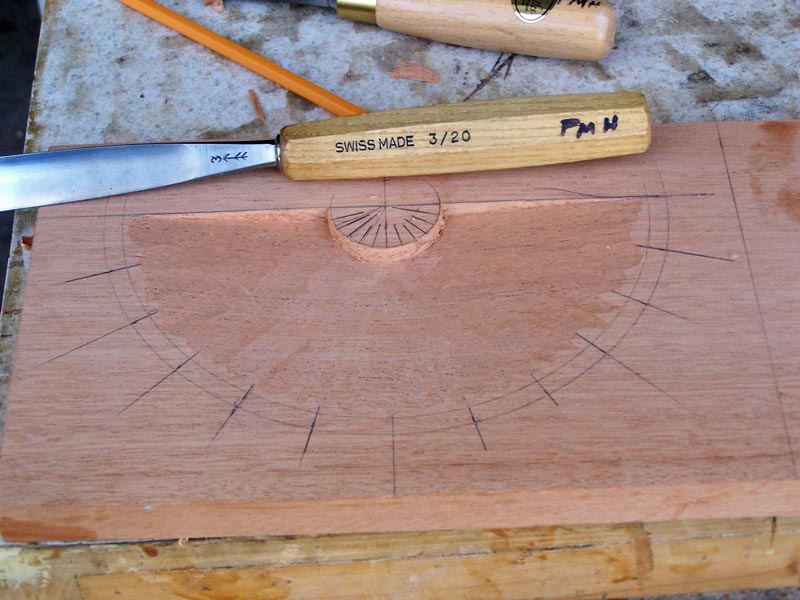
Using a #5/16 (many other gouges will do) I cut the wood down so that it slopes smoothly from the outside to the small half circle. At the bottom of the fan, there's a straight section on each side of the small half circle that needs to be cut. I used a wide #1 gouge because I had it, but a regular bench chisel will work just as well.

I then took a #3/20 and smoothed down the tool marks from the #5/16. You don't have to do this step but it's nice to have everything smooth.
Then, using the marks from when you drew the lines before, re-draw the lines for the flutes.
The tutorial continues here.