Louis Cubes
P. Michael Henderson
Louis cubes are a striking veneer pattern but one that's somewhat difficult to accomplish. It requires great accuracy in cutting the pieces so jigs and/or spacers are needed to help cut the elements to the right size.
Louis cubes are named for Louis XIV of France because the cubes were popular on furniture during his reign. But the cubes go back much further in antiquity.
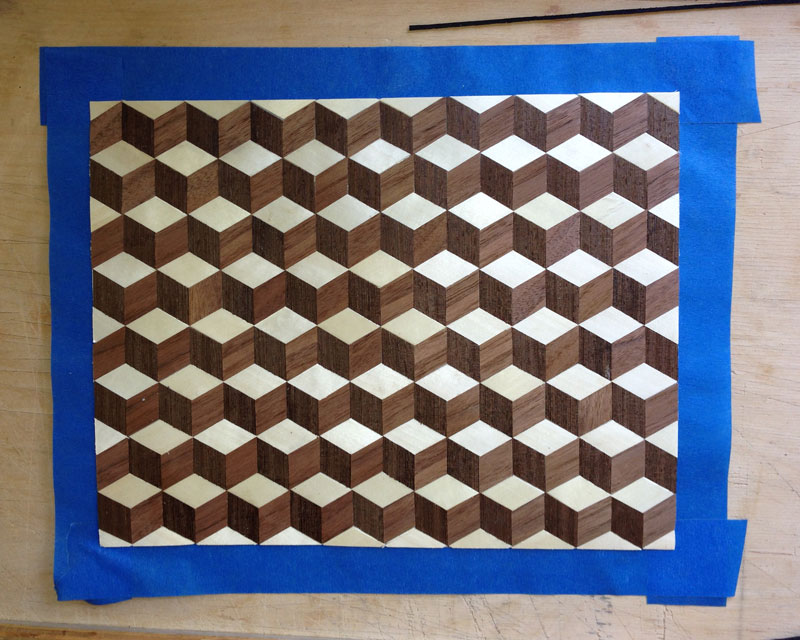
Louis cubes are constructed by cutting three pieces of veneer, and laying them such that the grain orientation is different on each piece. This means that Louis cubes can be constructed from a single species of veneer, but a more dramatic design results from using three colors of veneer, a light color, a medium color and a darker color. Quarter cut veneer is a better choice than flat cut veneer.
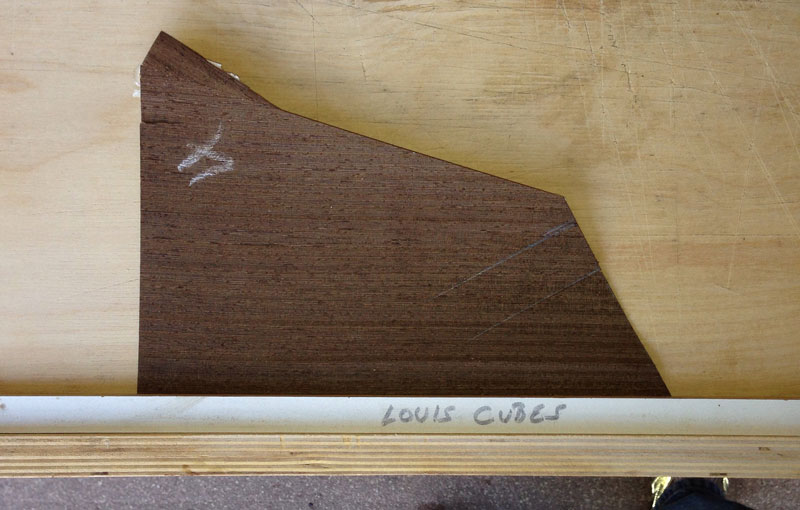
To construct the Louis cubes in this tutorial, I used walnut, wenge, and a processed light wood that I purchased one time as a possible replacement for holly.
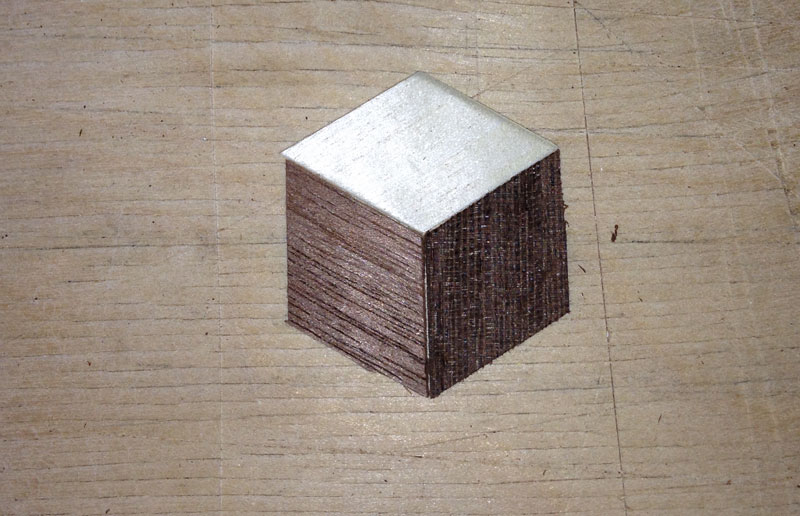
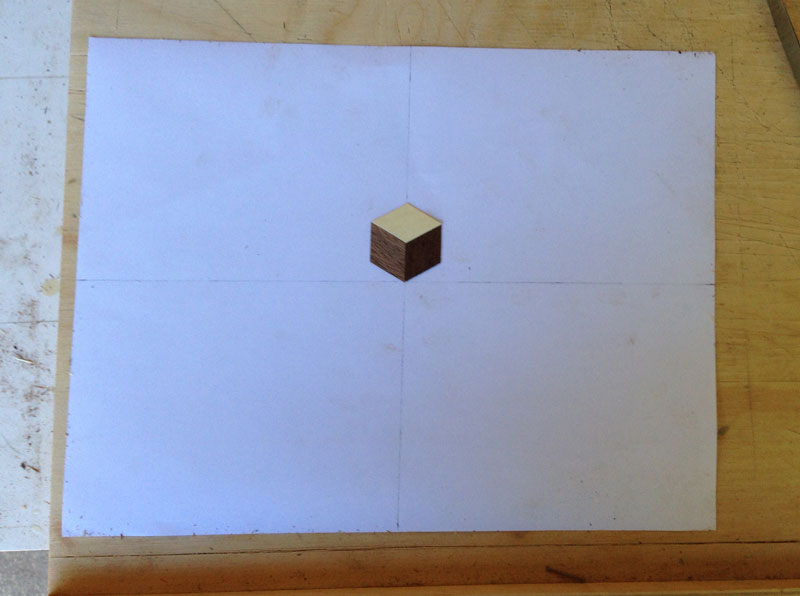
Here's a close up of single Louis cube:
In this cube, I put the light wood at the top, the walnut on the left, and the wenge on the right. You can see that the grain direction is different for each piece.
I think that making the left hand piece vertical sometimes makes a better cube than the right hand piece but I that's the way I did these.
There are many ways to cut the pieces for Louis cubes and I'm describing only one technique. You may find other techniques on the web and those will certainly work well.
To do my technique, the following is needed:
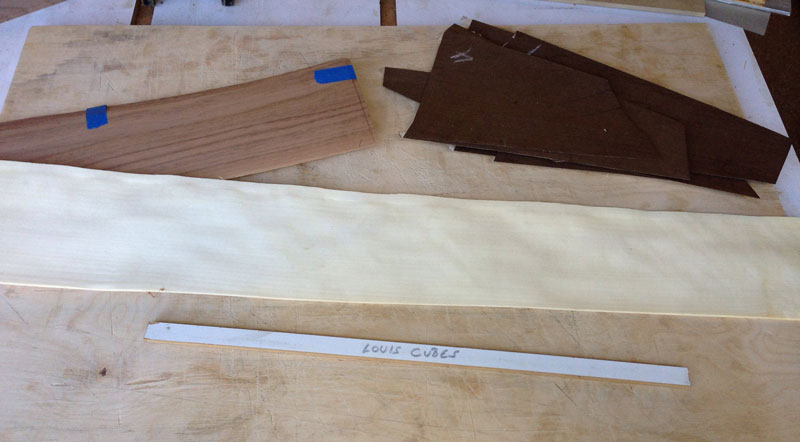
1. Three colors of veneer. Here I'm using walnut, wenge, and a light colored processed veneer. Wenge is a "difficult" veneer - there are others which could be used that would cut cleaner than wenge.
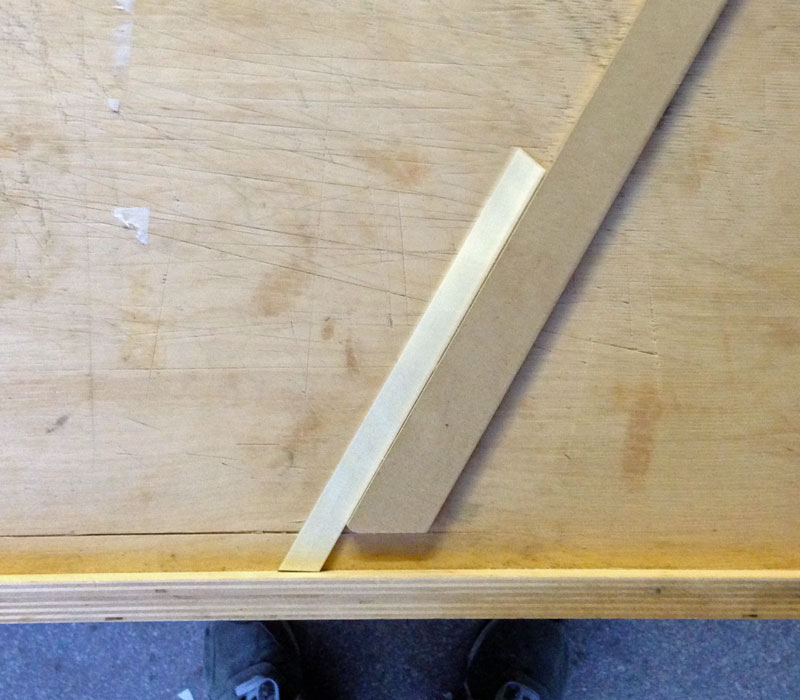
2. A spacer, which is nothing more than a length of 1/4" MDF cut to width, in this case 5/8". When making Louis cubes, you should make the cubes appropriate to the furniture that you're going to put the Louis cubes on. It's tempting to make the cubes large so there's not so many pieces, but smaller cubes (appropriate to the furniture) look better.
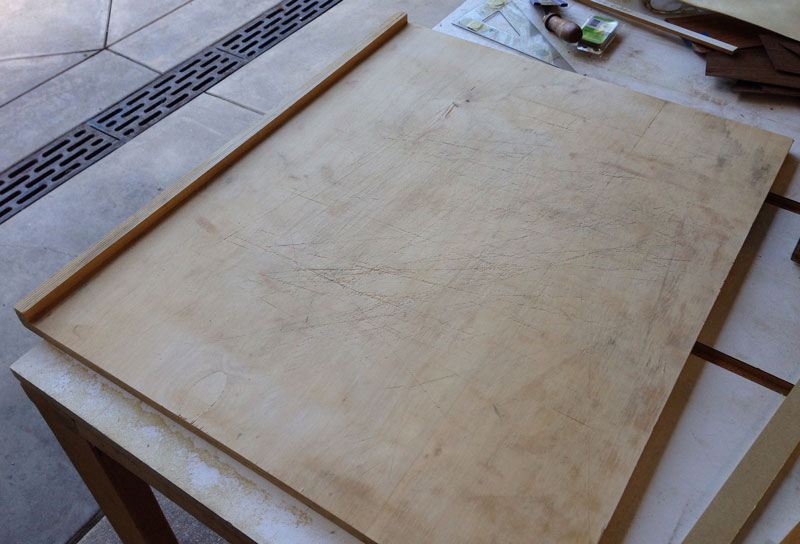
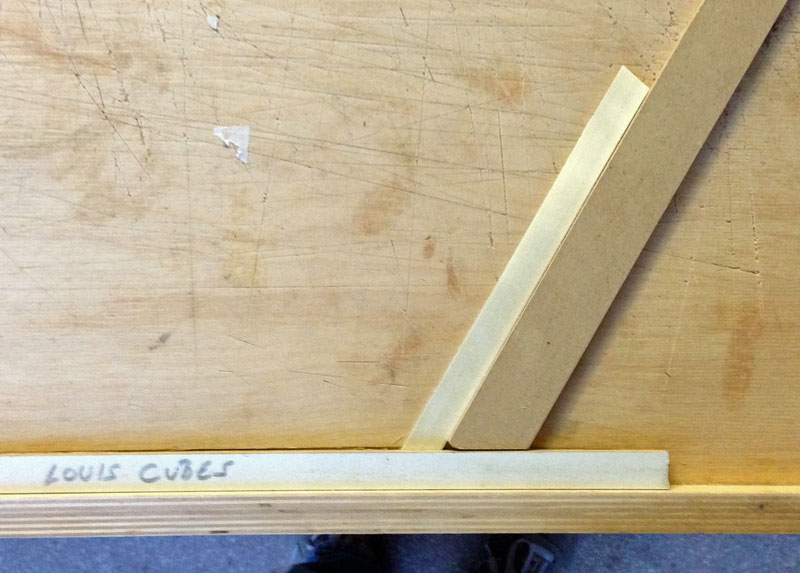
3. A cutting board with a lip on the front.
4. A 30/60/90 triangle.
5. Another piece of MDF set at a 60 degree angle.
6. A sharp 1" chisel and mallet. It must be really sharp.
7. Miscellaneous veneer tools, such as a veneer saw, straight edge, sanding blocks, etc.
Here's the veneer and the spacer:
And here's a view of the cutting board with the lip on the front.
A view of the spacer, showing the size.
To begin, cut strips of each veneer using the spacer to set the width. Using a sanding block, sand one edge of the veneer so that it's straight and smooth, and place it against the lip on the cutting board. Note that I'm just using some scrap veneer here. That's one reason to keep some scrap from other veneer projects.

Then place the spacer on top of the veneer and against the lip.
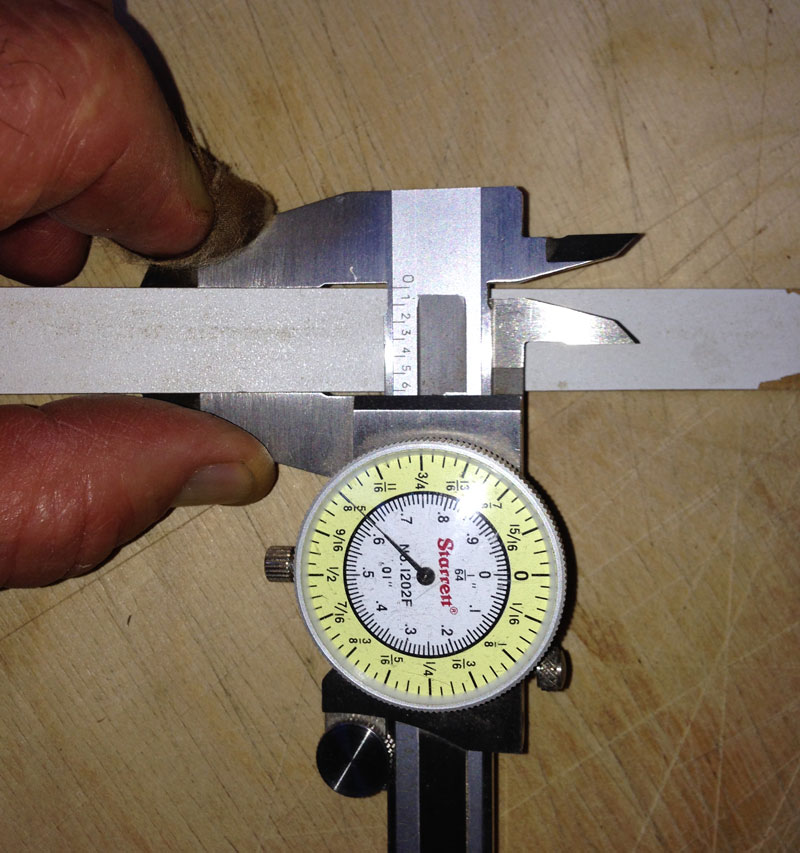
If necessary, you can clamp the spacer down to help keep it in position. Then cut the strip of veneer. After you cut it, check it with the dial caliper. The strip should be 5/8" +/- 1/64". Mine usually come out 1/64" small.

Next, we need to set up the jig to make the 60 degree cuts. I use the plastic triangle to do this and tack the MDF down with 32 gauge pins.

Note that the MDF is cut on the end at 30 degrees and there's space left to fit the spacer below it.
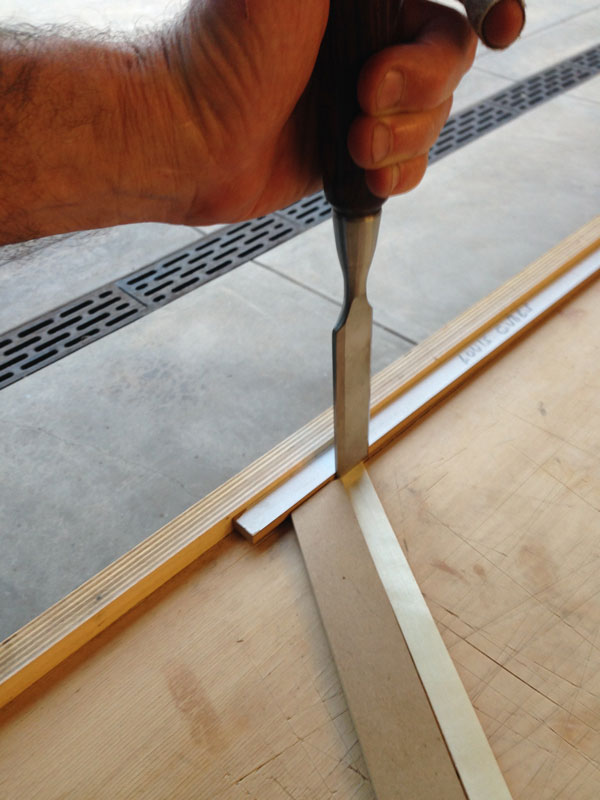
To cut the individual pieces, I first cut the end off of a strip using the jig, then slide the piece of veneer down until it hits the lip.
Then I put the spacer on top of the veneer.
Next, I press the back of the 1" chisel against the spacer and give the chisel a rap with a mallet. When cutting a lot of these, the chisel will dig a trench in the cutting board so I often use a backer of cardboard to avoid that. The problem is not the damage to the cutting board, but when the back of the veneer is not supported (because of the trench) the chisel pushes the veneer down into the trench before it cuts it and the length will be off.
The chisel needs to be really sharp so that it cuts the veneer cleanly. You may have to touch up the chisel after cutting some amount of elements.
This produces one of the Louis cube elements. It's good to check these pieces with the dial caliper to make sure that the "length" is 5/8" +/- 1/64". You don't have to check each one, but you need to be sure that you're being accurate and consistent.
Cut a bunch of each color. Only one light one is shown here but I cut a lot more.

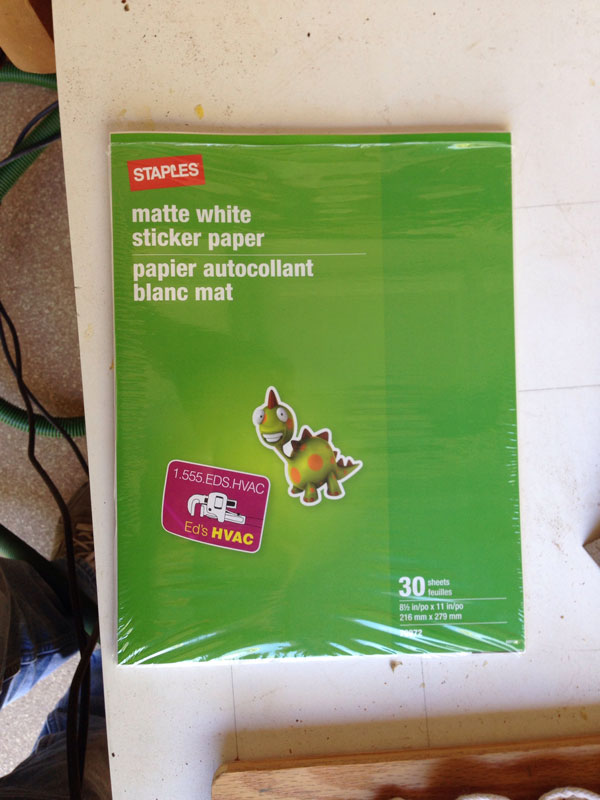
After you have enough pieces cut, we're ready to start placing them. The best way is to have a sticky surface that will hold the pieces, but release them when you're ready to remove the backing. I found this at Staples. It's not perfect but it worked. If you need more than 8 1/2" by 11, tape several sheet together.
Before I removed the protective paper, I drew perpendicular lines on the back of the sticky paper. You can see the lines through the paper.
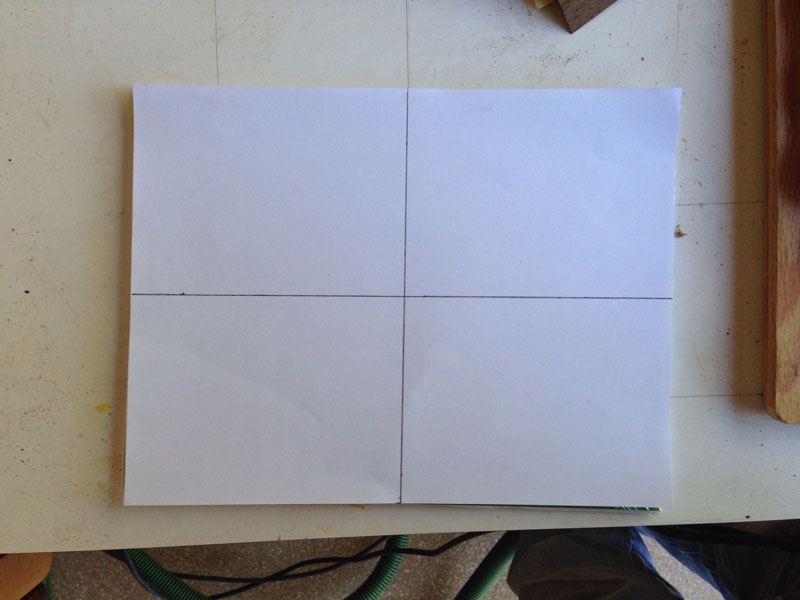
Then I removed the protective paper and placed the sticky paper down, sticky side up and placed the first three elements on the paper, aligned with the lines.
Then, it's just continue to put pieces in place.
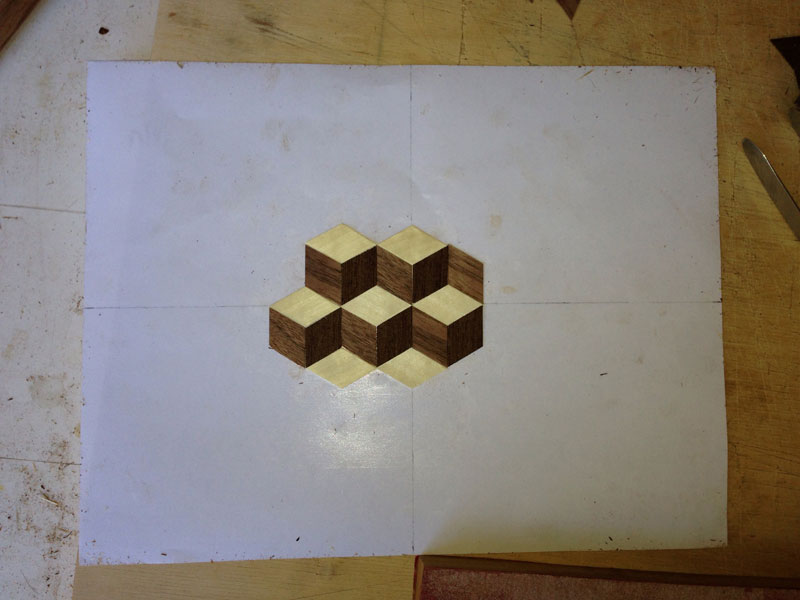
And more,

And more,

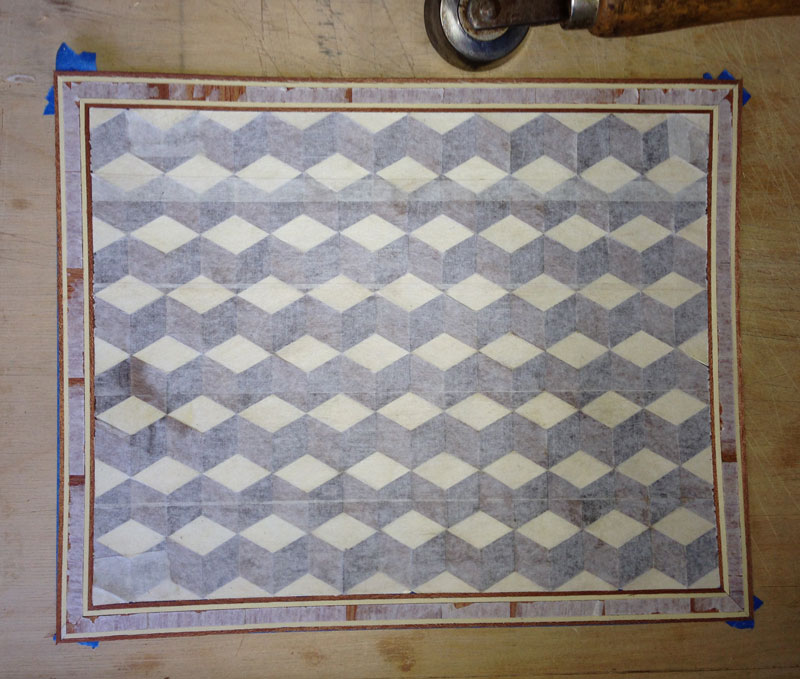
Until the whole surface is filled.
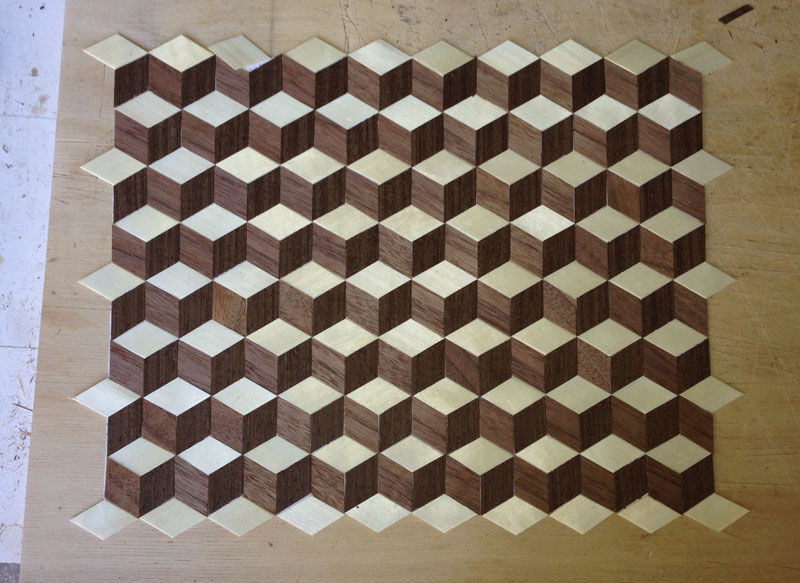
As you work on putting the pieces in, you'll find that your pieces have slight errors and irregularities. You may sand a piece a bit to get it to fit better, or leave a small gap to get the pieces to fit in properly. Move the elements to avoid any large gaps - equalize gaps between several pieces and the gaps won't be seen. Also, when you apply the wet veneer tape the veneer absorbs the water and expands a bit, closing up some of the gaps. This is also true if you use a water based glue. The finished product often comes out tighter than you thought it would.
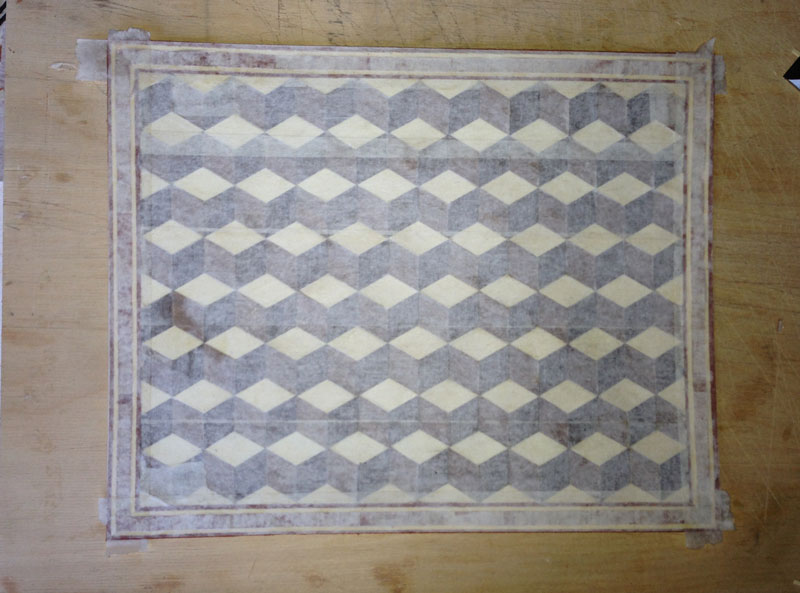
Then put veneer tape on the face.
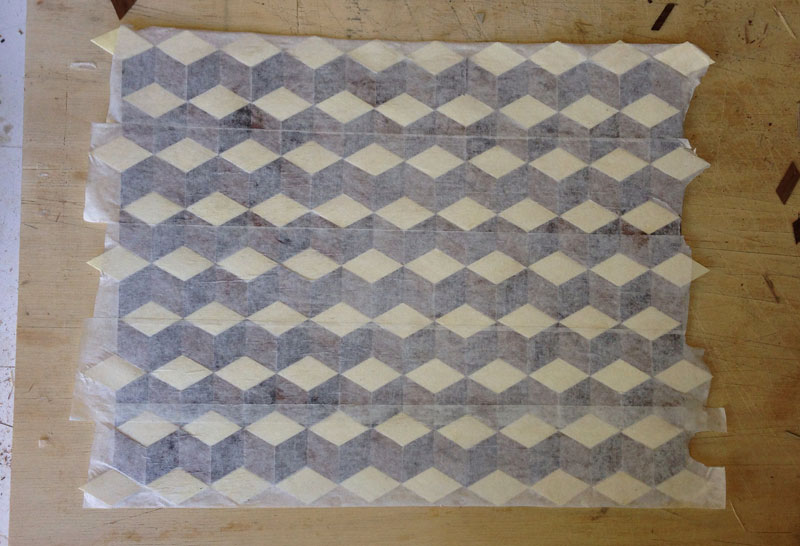
And remove the sticky paper off the back. This is what the back looks like after the sticky paper has been removed.
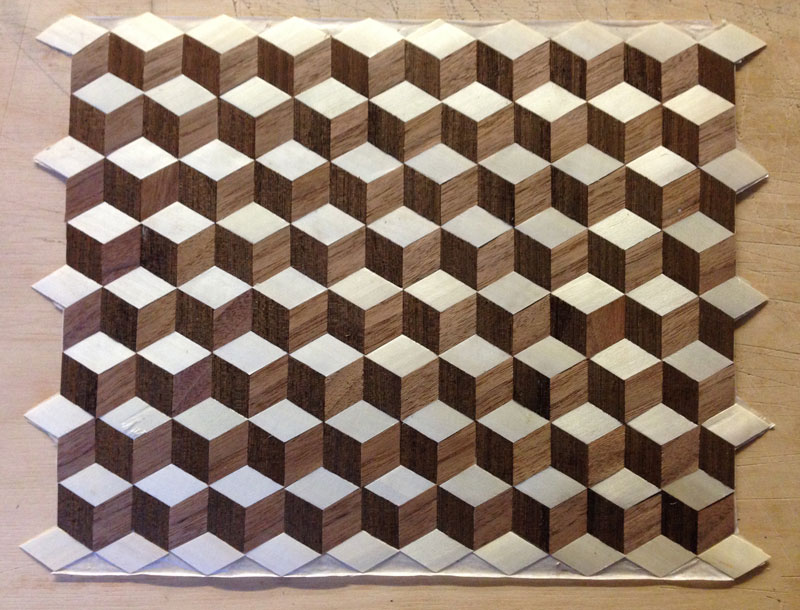
Since this is just a sample panel, I trimmed it all around to the full size that I made it (8 1/2" by 11").
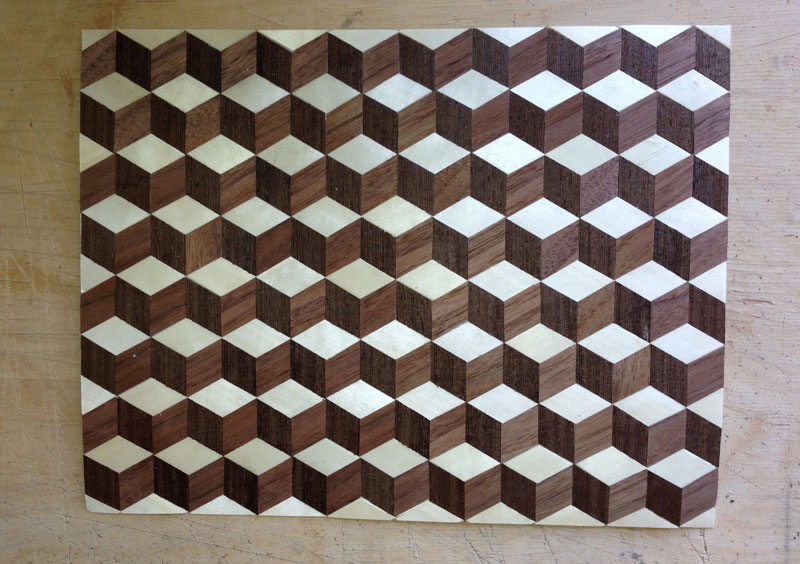
I'm now going to put banding around the panel. To prepare for this, I turn the panel over (show face up) and put wide blue tape around the outside of the panel, with at least an inch overlapping the outside of the panel.

Turning the panel over, this is what it looks like from the glue face.
I cut some stringing and some tulipwood for the banding. To see how this is done, see here. The next picture shows some of the stringing and tulip wood laid in place. The stringing is dyed veneer (adobe) and holly.
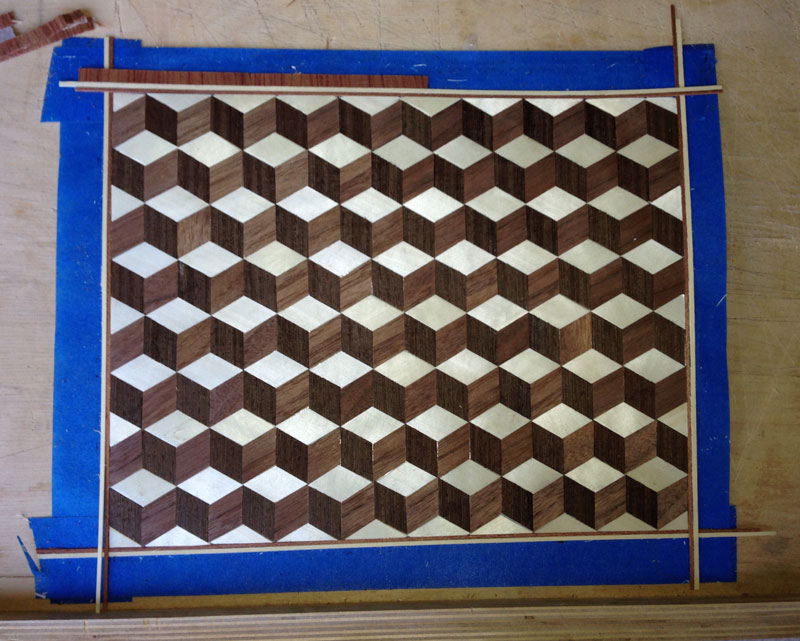
And here's a picture with all the banding laid.

Next is to miter the banding at the corners. To do this, I take a sharp 1" chisel and carefully place it from corner to corner of the banding. Incidentally, this is one reason you need to make sure the banding is long enough to stick out the sides.
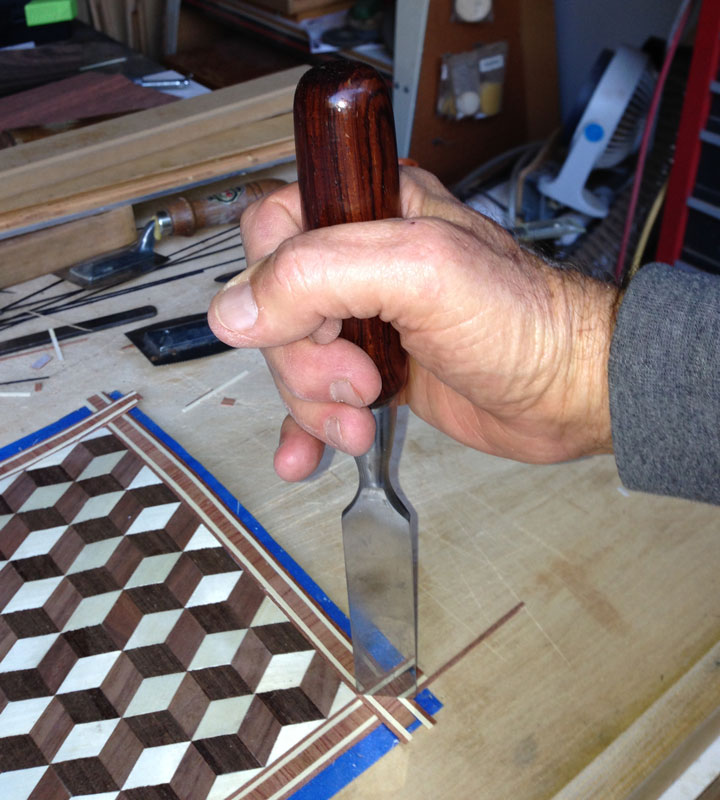
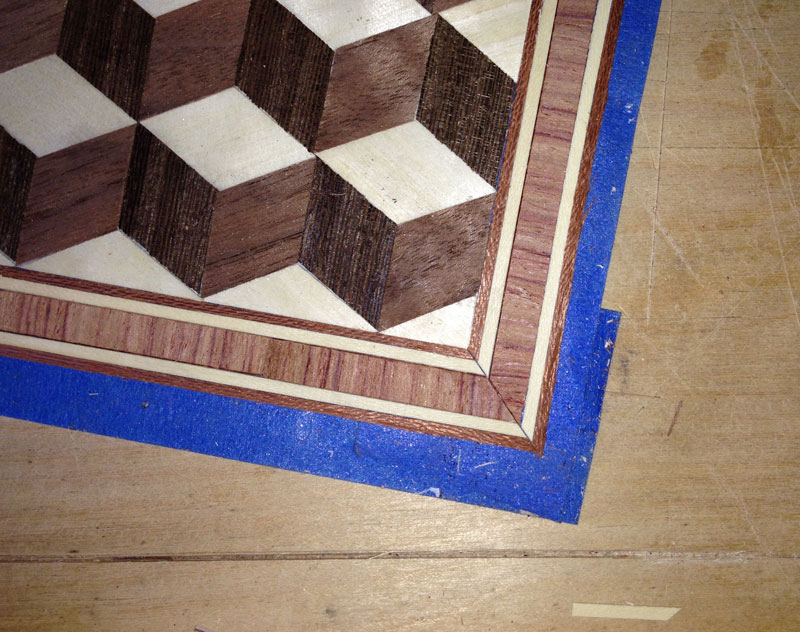
Once the chisel is in place, I give it a rap with a mallet to cut through all the banding in one cut. When properly aligned, this is what a corner looks like. I don't get all of them perfect but I do a lot better than when I started.
After mitering all the corners, I want to attach the banding with veneer tape on the show face, which means that I have to remove the blue tape on that face. I put blue tape on the banding on the glue face to hold it in place.

Then turn the panel over and remove the blue tape from the show face.
Next, I put veneer tape on the banding on the show face.
Then turn the panel over and remove the blue tape from the glue face. This is what the panel looks like now, from the glue face.

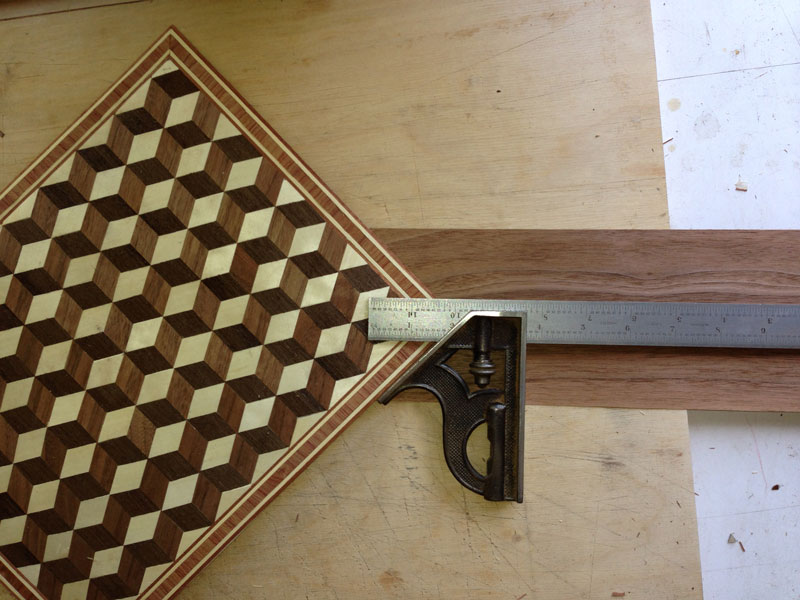
Now that I have the banding installed, I'm going to do the border in walnut. Instead of just laying walnut along the sides, I'm going to install it a bit differently. Rather than try to describe what the border is, I'm going to start with a picture of the finished product so you'll know where we're going.

As you can see, the grain of the border flows from the inside of the panel to the outside, rather than around the panel.
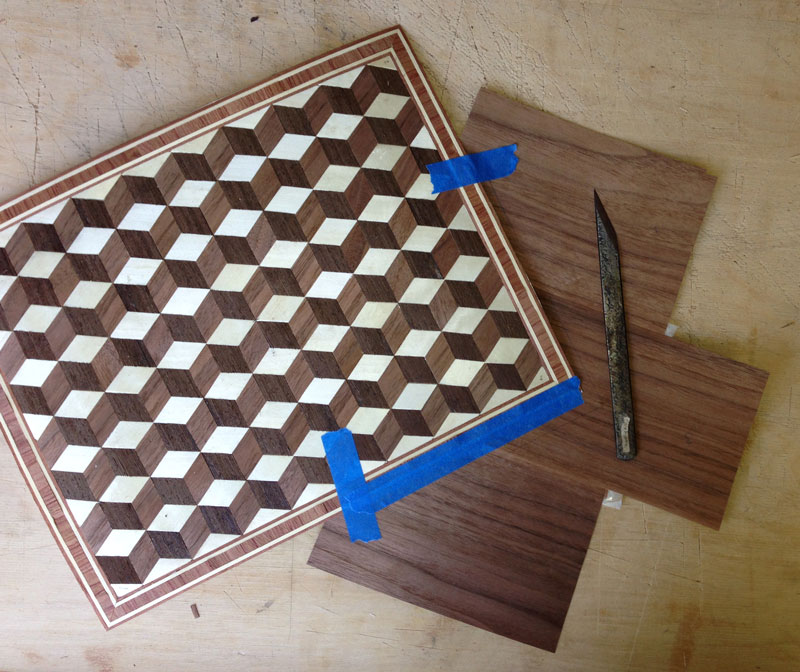
I begin to make the border by laying a piece of quarter sawn veneer at 45 degrees to the rest of the panel.
I use a pencil to mark the corner on the veneer so I can keep the alignment, and I number the veneer and put a number on the corner of the panel so I can put this piece of veneer back in the same place.
Then I put several pieces of veneer together so that the whole piece extends to the middle of the rest of the panel.

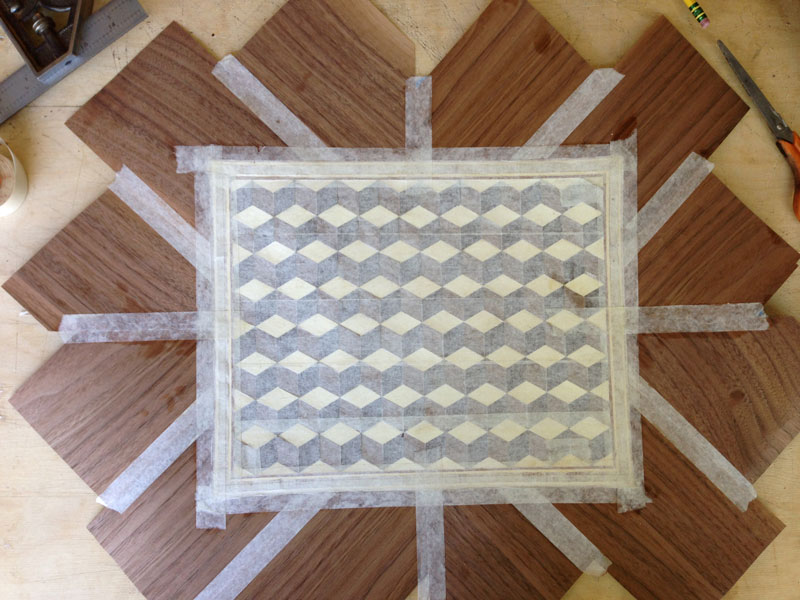
And here are all four pieces placed in position.
I now have to cut the four pieces using the panel as a guide. I place the walnut in position, using the pencil marks I made earlier and matching the numbers, and tape it in place. Then I take a sharp knife and cut along the outside edge of the panel.
After cutting all four pieces, I tape them into place against the Louis cubes panel.

Now, I want to cut across the walnut pieces. I place my straight edge through the center and aligned along the horizontal row of cubes.
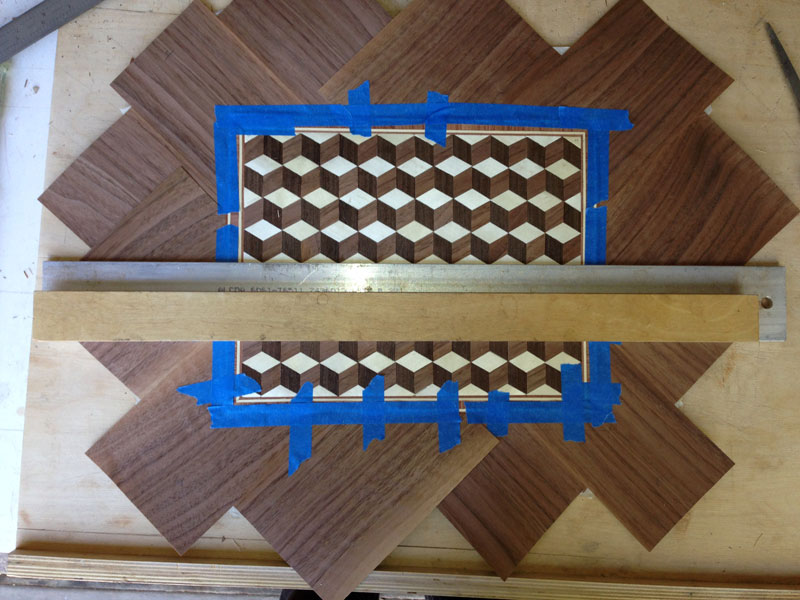
Then I cut both sides with a knife. This is what it looks like from the show face.
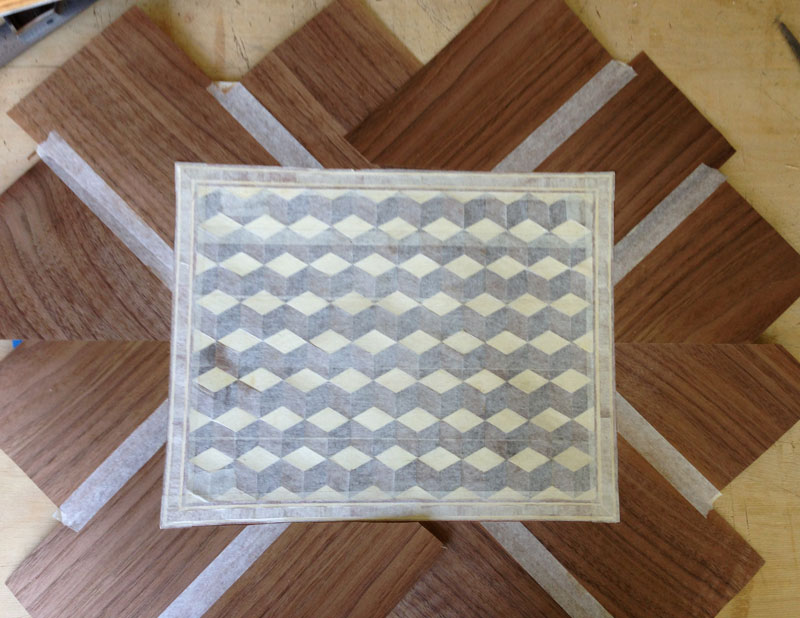
I flip the panel over and align the straight edge vertically, to cut the other two joints. This is what it looks like from the show face after that cut.
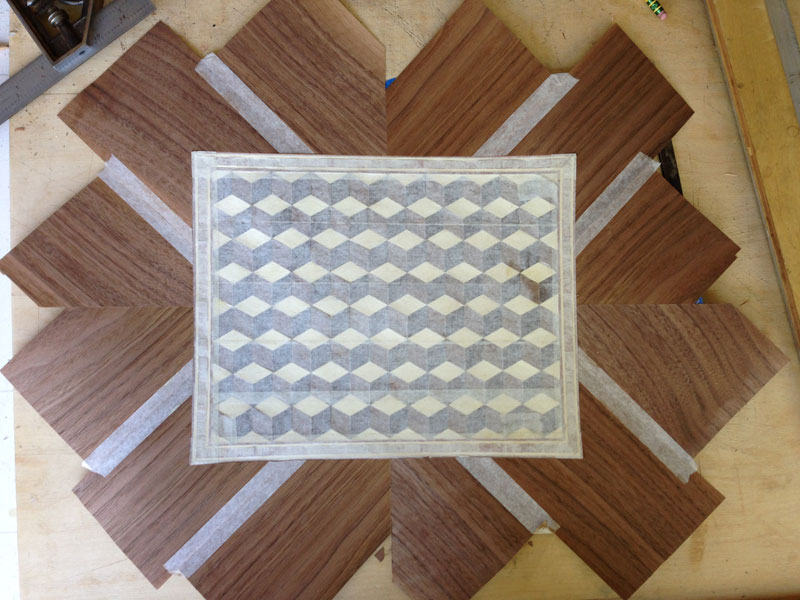
I put veneer tape on all the seams.
And remove the blue tape from the back.
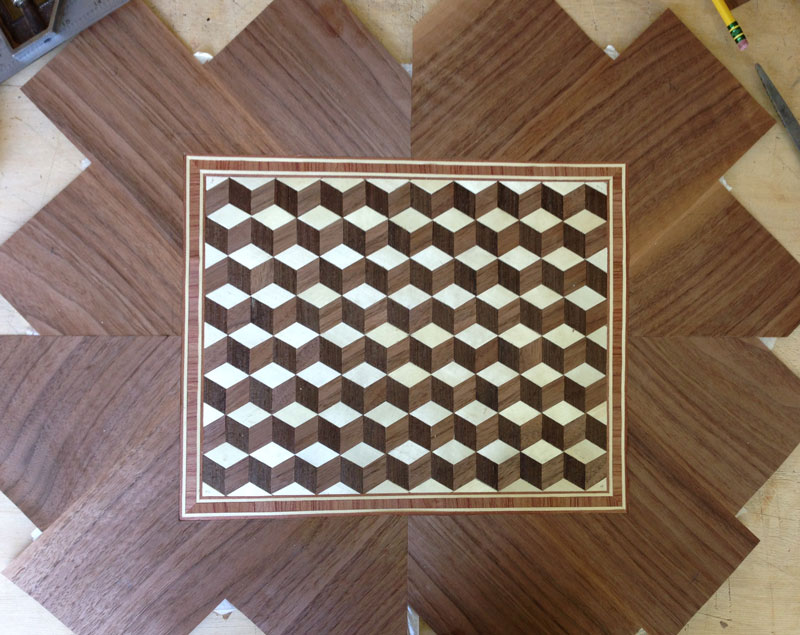
Then I trim the border to 2". I may decide to make the border smaller (later) but for now, 2" is good.

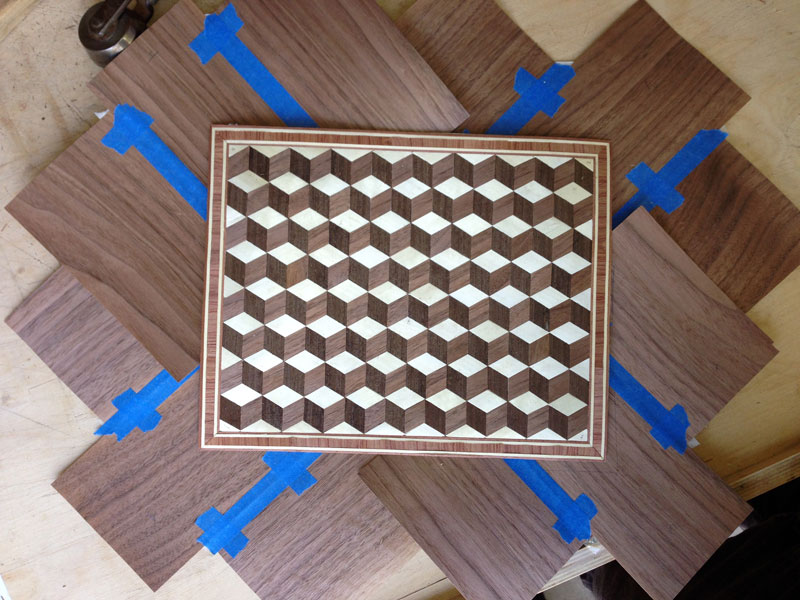
The panel is completed and read for glue up.
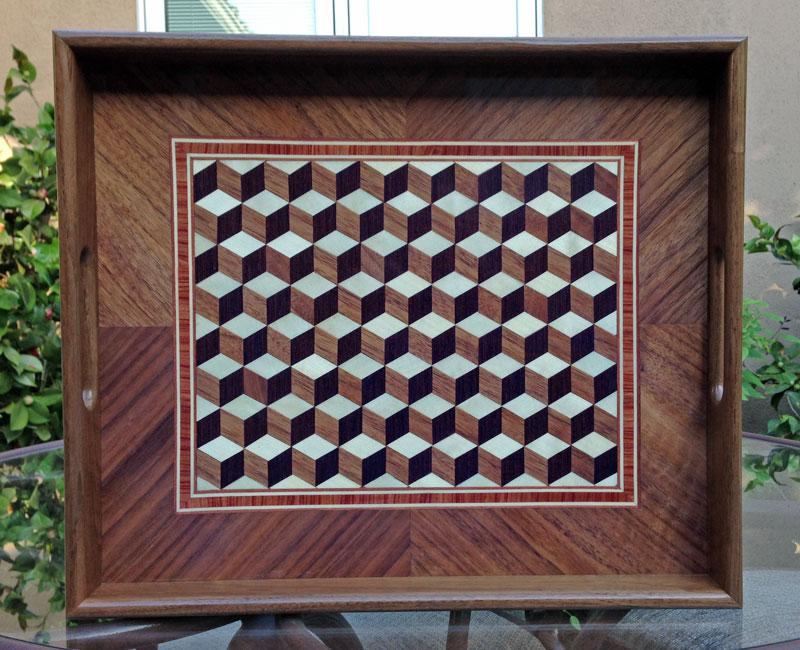
And here's the finished product, glued to a 1/4" MDF substrate, finished, and with sides put on to make it into a small serving tray.

Here's a view straight on.
And here's the back.

You can return to my woodwork here.