Display Cabinets
P. Michael Henderson
March 2010
I have a project to build two display cabinets, and modify two other existing cabinets. The cabinets were built by Jerry (I'm only going to use first names here), who unfortunately passed away. Judith, his wife, wants to modify the two existing cabinets so that they are "cabinet-on-cabinet".
Jerry had a third cabinet in progress when he passed away and Judith asked me to begin by working on that unit. My task is not just to complete it, but to make it a "cabinet-on-cabinet" unit.
The chronology below is in reverse order with the most recent events first.
[Change in plans] After I built the first cabinet, Judith asked me to "re-build" the other two cabinets. I did them one at a time, as you see below. I took the old cabinet apart and used what I could of the existing wood. Mostly, this was the sides, which wound up as the substrate for sides for the upper cabinets (I veneered over them). The horizontal surfaces were not usable because they were plywood. If I had tried to sand them to remove the old finish, I would have sanded through the walnut veneer. Also, for the joinery I used (dovetails), plywood doesn't work well. So, mostly, the new cabinets are new wood. I used a lot of veneer - the sides are veneer with solid wood substrate, and the backs are veneer over 1/4" MDF (veneered front and back). I used the brass pulls that Jerry had installed, but put new hinges, primarily because I felt the hinges Jerry used were too large. On the lower doors, I used knife hinges instead of leaf hinges, because the knife hinges are not as visible. For door latches, I used large Brusso bullet latches.
Note: The description below is for the third set of cabinets. The first set of cabinets (shown on my main page) is further down (just click on the link at the bottom of the pages until you get to it).
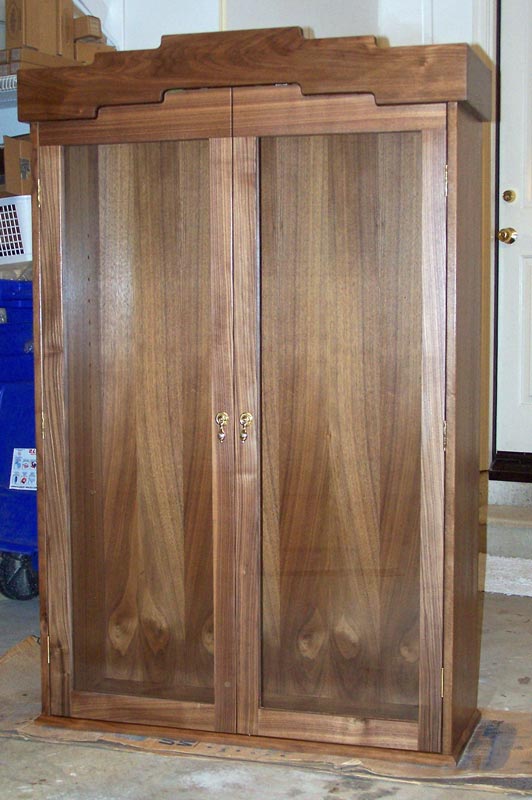
06/16/2010 And here's a picture of the upper cabinet complete, except for rubbing out the finish.
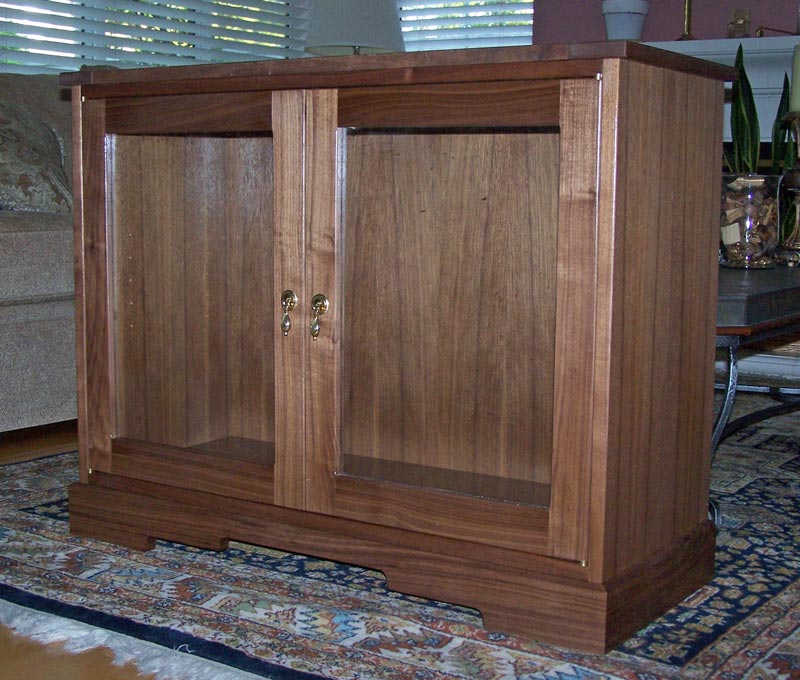
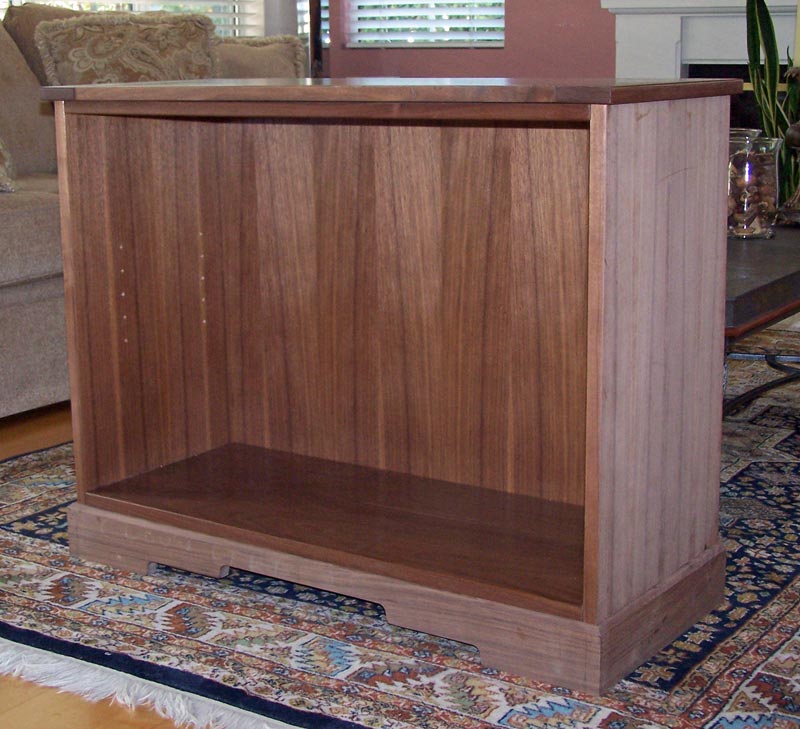
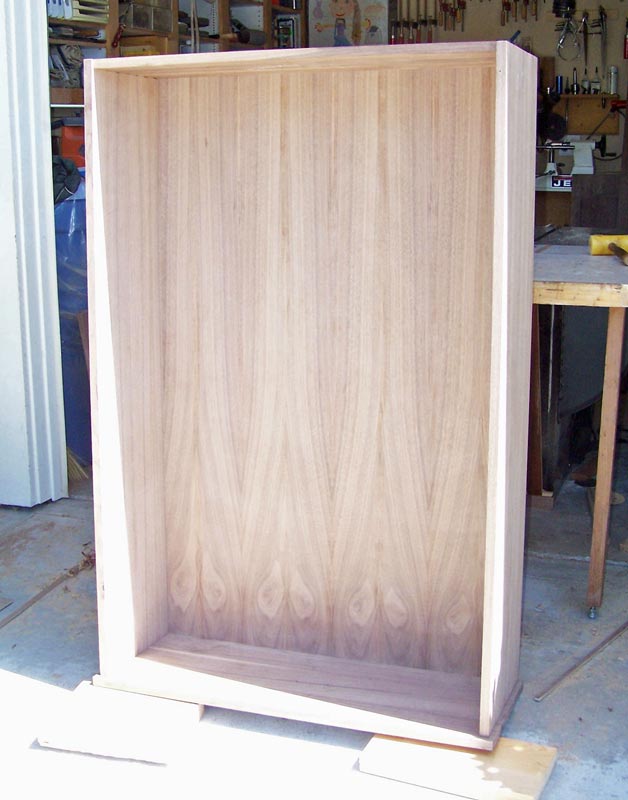
06/15/2010 Here's a picture of the lower cabinet complete. All I have to do is rub the finish out. Although it's not obvious in the picture, the glass has been installed in the doors. The upper cabinet is almost finished - just a few things to clean up and rub out the finish on that one also. I'll have them both finished soon.
06/08/2010 I have the doors made and the hinges fitted to the doors for the upper cabinet. I still have to make the hinge mortises in the sides of the cabinet. The doors for the lower cabinet are made but I haven't fitted the hinges to them yet.
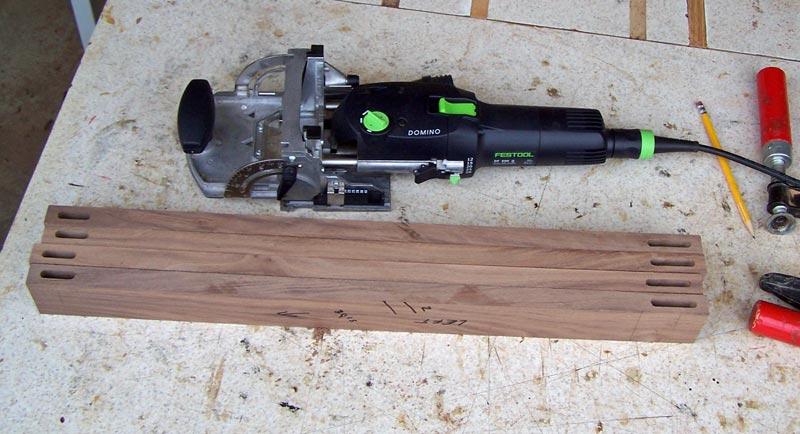
And just a construction note, I use a Domino to make the mortises on the doors. I use traditional tenons (not floating tenons) and fit them to the mortises. The Domino makes very nice mortises, just the right size for doors of this type (I use the 8mm cutter). Shown are the stiles for the lower cabinet doors. Note that the mortises on one end are wider than the other end. That's because the rails at the bottom are wider than at the top. The Domino doesn't make mortises that wide, but any width mortise can be made by making multiple plunges with the Domino. The Domino isn't a horizontal slot mortiser, but it doesn't take as much shop space either.
06/06/2010 I'm working on the doors. I've got a lot done but still have a lot to do. Pictures soon.
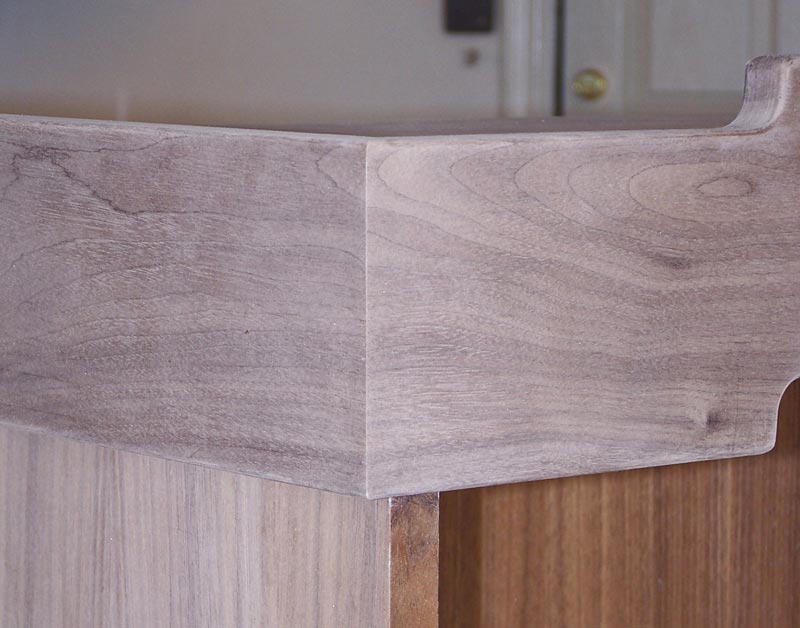
06/03/2010 I finished the cloud lift detail on the top of the upper cabinet. I did my usual "chasing grain" on the corners - you can see one corner in the second picture. I often wonder if anyone (other than another woodworker) notices these details. Now, on to the doors, then to apply the finish to the outside.
05/29/2010 I have the top and base for the lower cabinet finished. Next, I'll put the cloud lift on the upper cabinet, then I'll start making the doors.
05/23/2010 I was able to glue up the two cabinets today. I'll do the top and base for the lower cabinet next.

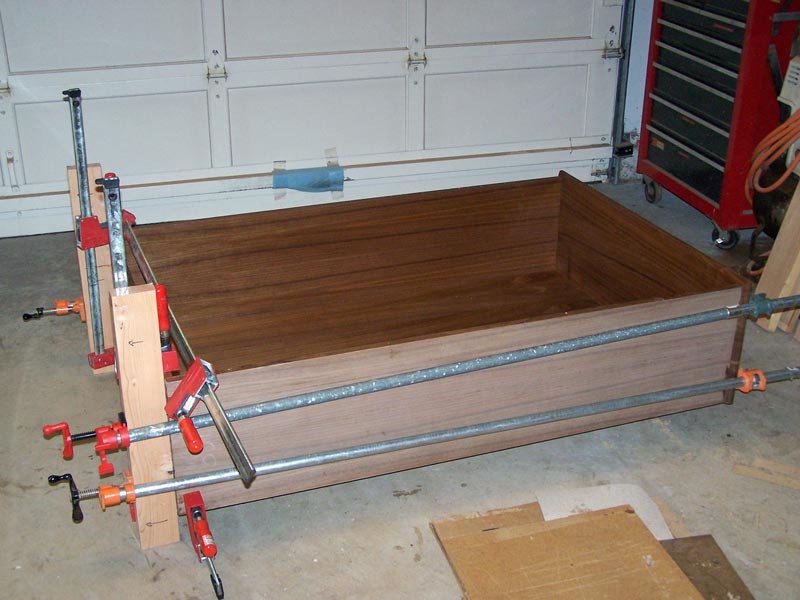
05/20/2010 I got a bit sidetracked but I have the inside surfaces finished and should be able to do the glue-up this weekend.
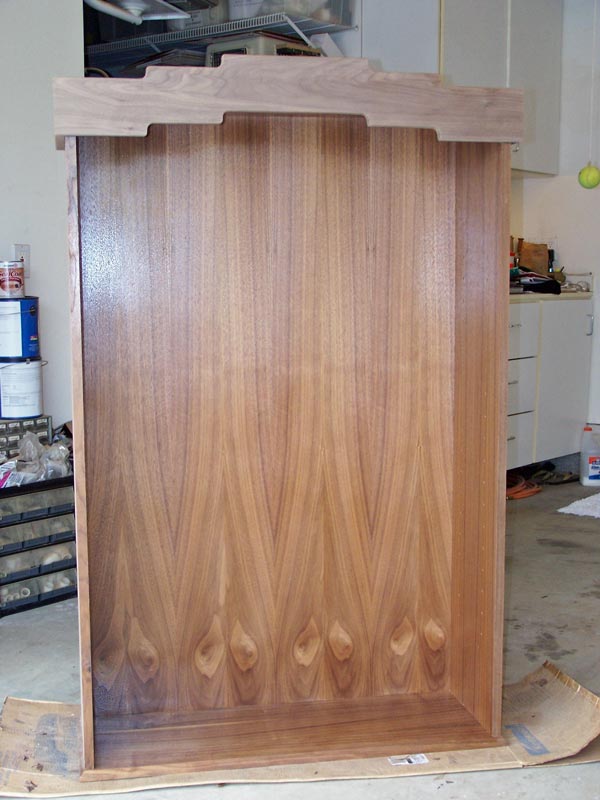
05/01/2010 I have the upper cabinet fitted together. Next is to shoot the interior surfaces.
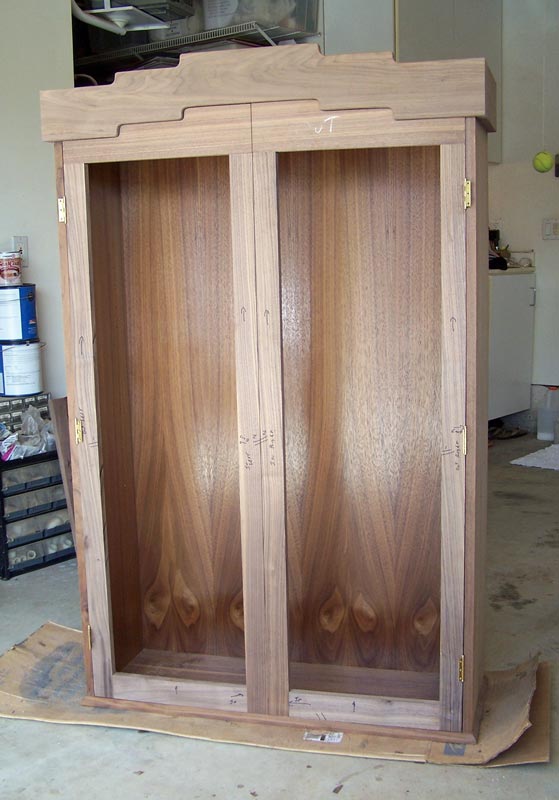
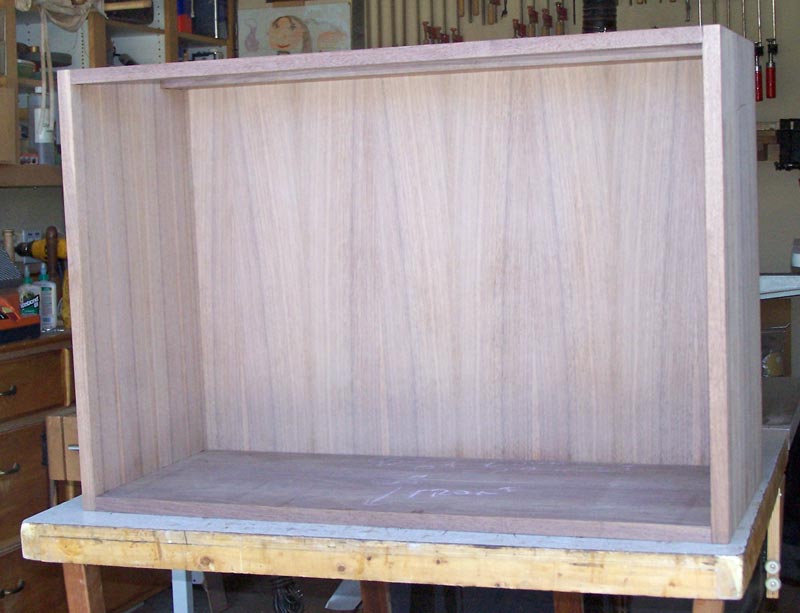
04/29/2010 Work continues slowly. I have the joinery done on the lower cabinet and the back panel cut to size (see pix). I have some of the joinery done on the upper cabinet but had to buy some more wood today to complete it. I'll finish the joinery on the upper cabinet, then begin applying finish to the inside surfaces before doing the glue up.
04/19/2010 I completed veneering the backs for the cabinets, both upper and lower cabinets. I'll start on the joinery next
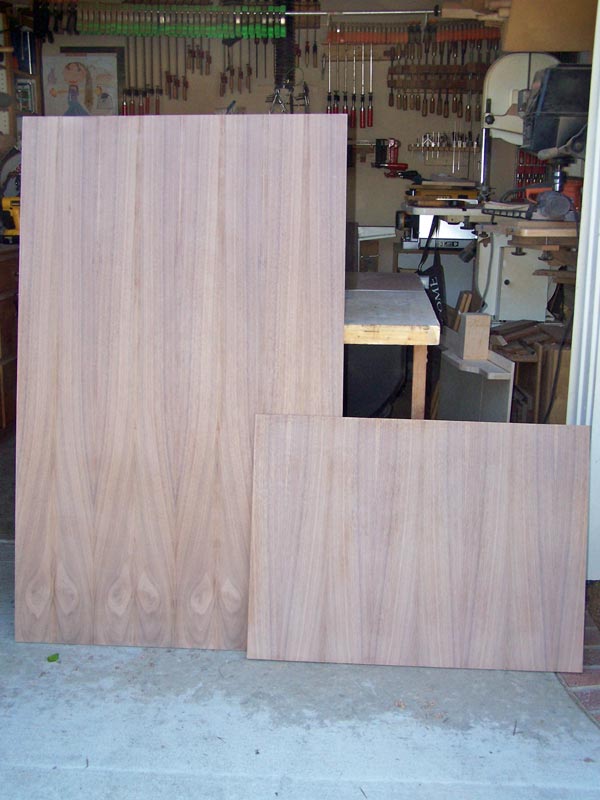
04/15/2010 Well, life goes on. I have most of the horizontal surfaces glued up and bought some 1/4" MDF for the backs. Next, I'll probably concentrate on veneering the backs, probably interleaved with doing the joinery for the bottoms and tops of the cabinets.
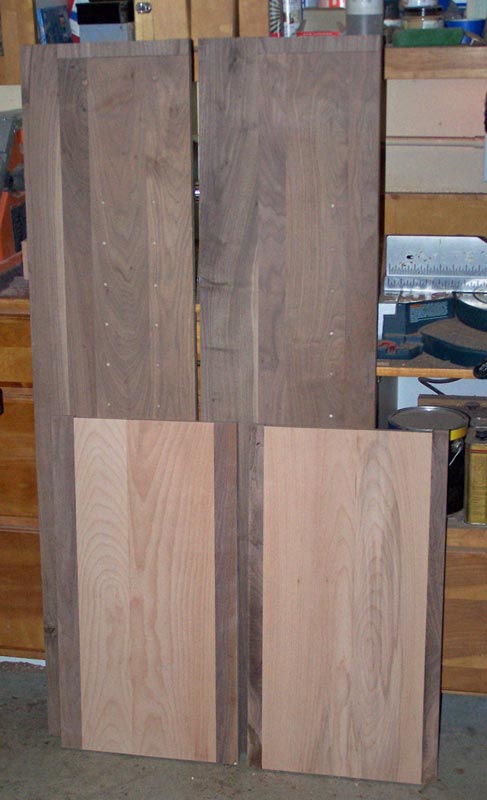
03/23/2010 I finished the veneering of the sides and have started fabricating the horizontal surfaces (bottom and top of lower cabinet, bottom and top of upper cabinet). I had bought rough cut walnut and that always takes a lot of work to prepare since I don't have a jointer - I have to flatten the stock by hand. But I'm making progress.
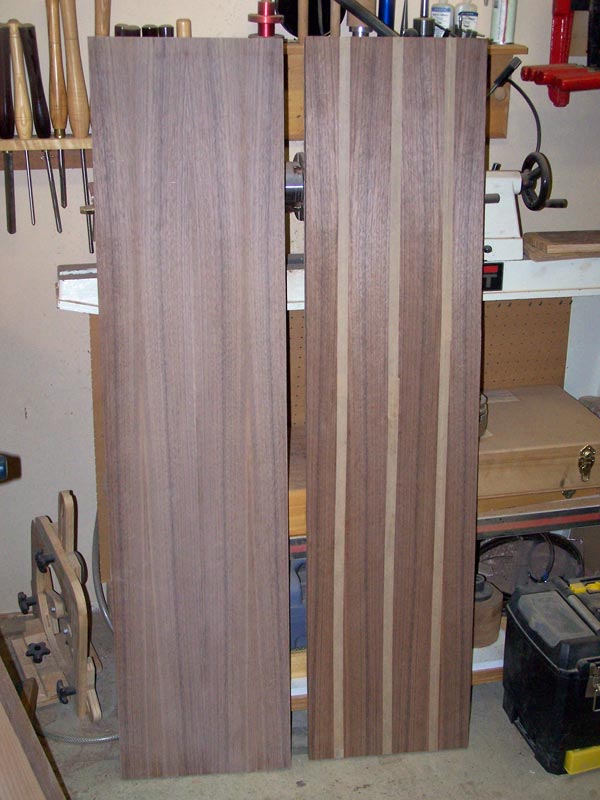
03/19/2010 This past week has been just crazy with lots of demands on my time - but I finally got back to working on the cabinets. I have the veneer laid on the sides of the upper cabinets. The picture shows one side completed, and the other side with the veneer tape still on the veneer. This veneer is more "sedate" than the veneer I used on the previous set of cabinets. It just all depends on what I get from my supplier. Next, I'll lay the veneer on the lower cabinet sides.
03/14/2010 Happy Pi Day! I finished the crosscut sled so now I can get back to the cabinets.
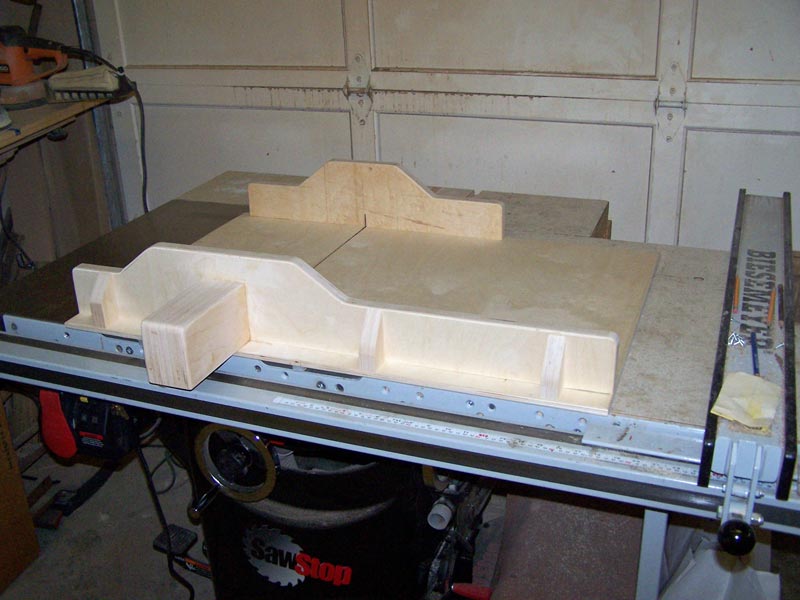
03/12/2010 I have the substrates for the upper and lower cabinet essentially finished. The sides for the lower cabinet are too long but I'll trim them to approximate size. The problem is that I need to make a crosscut sled for my new table saw so that will delay work on the cabinets. I used European beech for the sides of the lower cabinet. After I finish with the sled, I'll start veneering the sides.
03/09/2010 I took the old cabinet apart and cut the sides to make the top and bottom cabinets. I have the wood sanded but need to plug the shelf holes and add a bit to the edges. Pictures later.
03/06/2010 I've been setting up my new table saw and haven't done anything yet on the third set of cabinets. I'm just about finished with the set up so there'll be some progress here soon.
Click here to see more of the cabinets project