Making a Basic Jewelry Box
Second Version
P. Michael Henderson
Over the years I've built a number of these boxes and my techniques and design have evolved. I'm doing this second version of a jewelry box tutorial to show the techniques I use now. This may be of most interest to the students who take my jewelry box class but I expect others may benefit from it, also.
I did a video of the making of a jewelry box but the production quality was not great, especially the audio, and the video wound up in three parts, each almost an hour long. I hope this "picture tutorial" will provide the information someone would need to build this project.
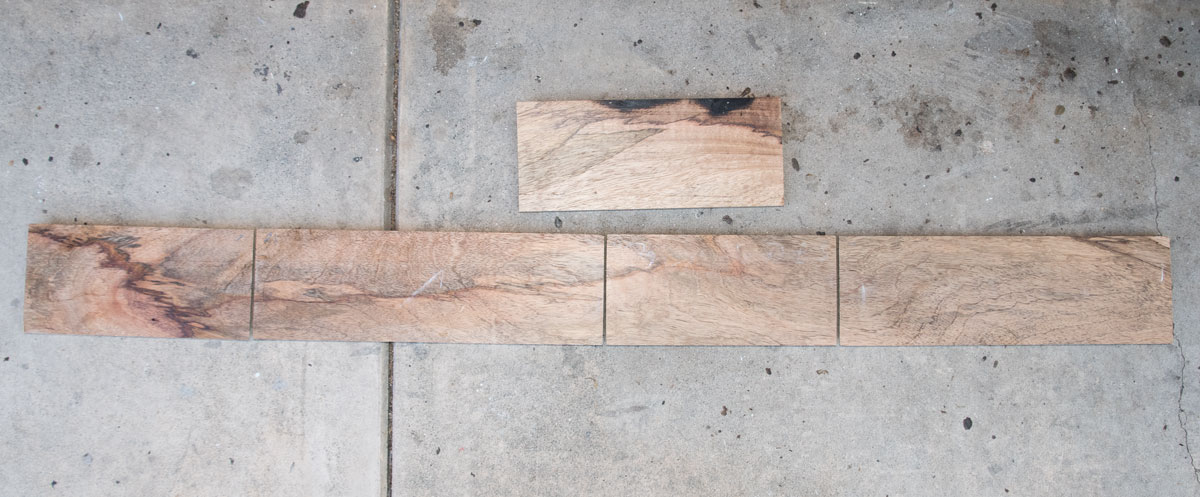
I'm not going to go through all the stock preparation except to show the components that go into making a box. When selecting stock for a jewelry box, I look for interesting figure in the wood. I'm going to make this box out of some wood that was given to me by a friend. The wood originally came from southeastern Asia and neither he nor I can identify what species it is.
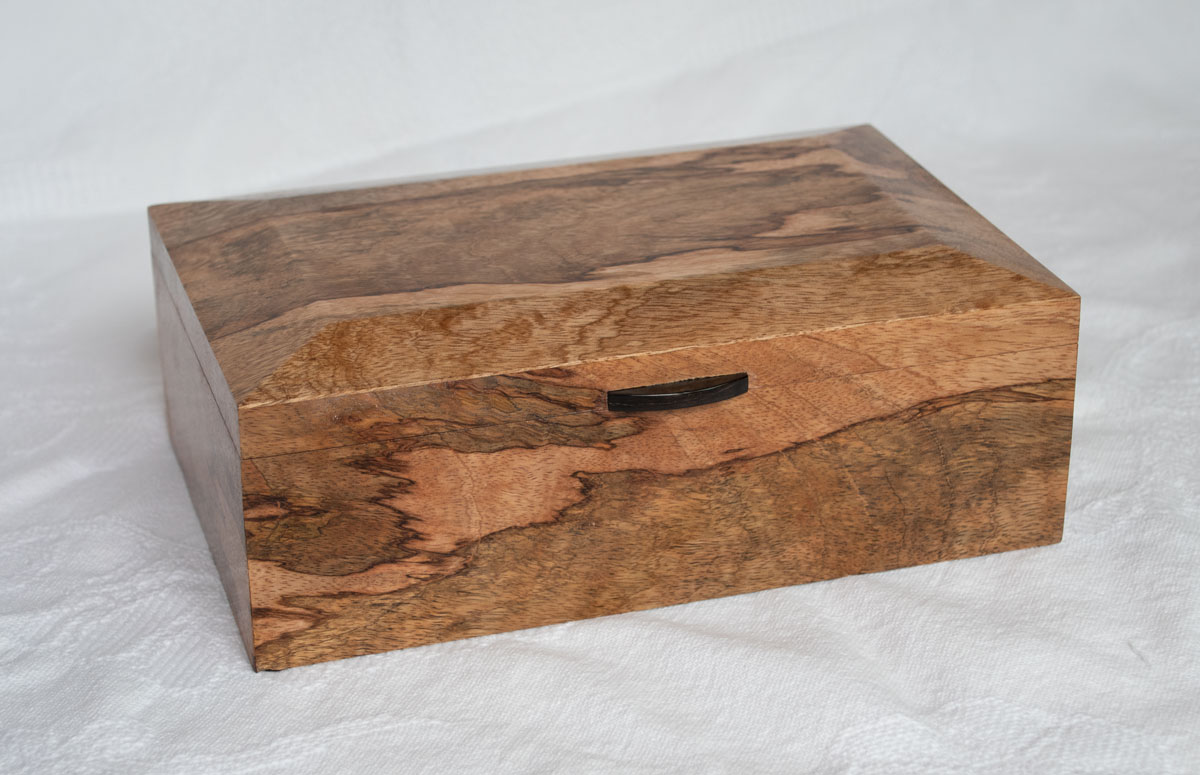
The jewelry box is going to be about 12 inches across the front, 8 inches along the side, and a bit less than 4 inches high. The box will have a removable tray.
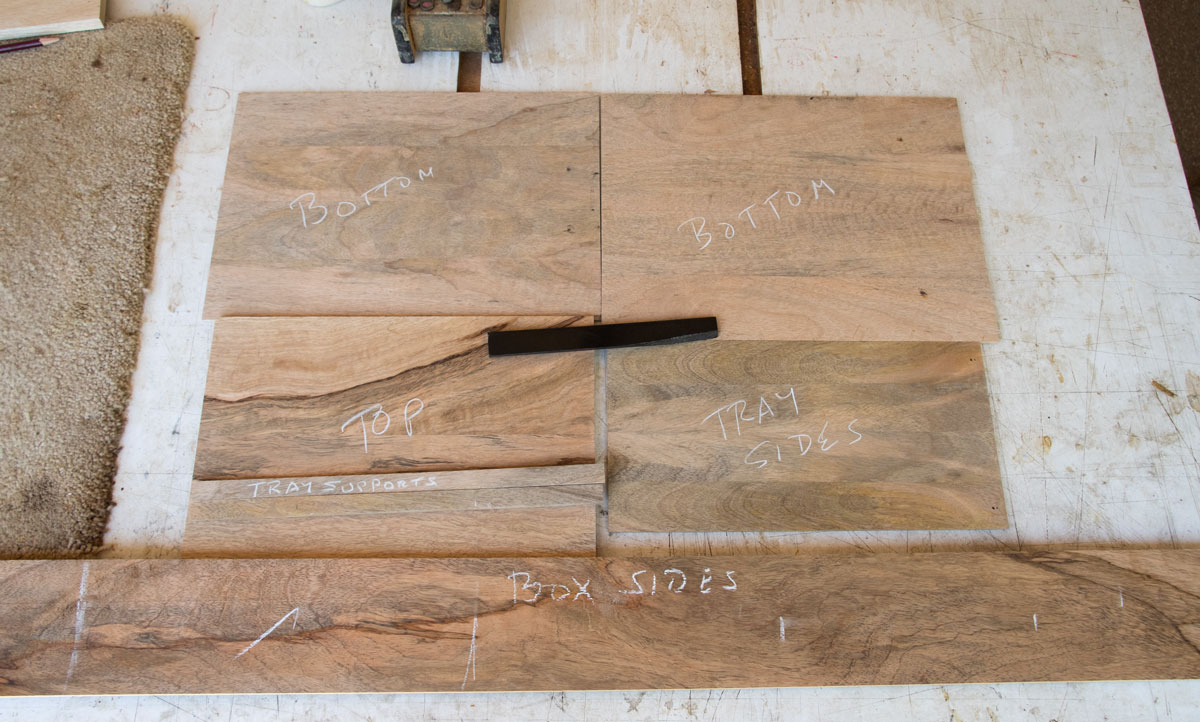
Here are the components needed to build the box and tray. At the bottom of the picture is a piece that's a bit over 40 inches long, about 4 inches wide, and 1/2 inch thick. This will be the sides of the box. At the top of the picture are two pieces labeled "bottom". One will be used for the bottom of the box and the other for the bottom of the tray. These are 3/16 inch thick. Since the box will be 12 by 8, and the groove that the bottom will sit in will be 1/4 inch deep, the bottom of the box must be 11.5 inches long and 7.5 inches wide. It's better to make it bigger and trim to fit.
Between these two are the top, on the left side. This needs to be a bit bigger than 12 by 8 inches and a least 3/8 inches thick. This wood was reclaimed and there were some nail holes on the sides of the top. I'll have to see if that presents a problem as we build the box.
On top of the "top" are two pieces which will be used to support the tray. They're a bit over 11 inches long, 5/8 inches wide, and 1/4 inch thick (could be a bit less than 1/4 inch).
On the right side is a piece of wood 3/16 inch thick and at least 11 inches long. This will be cut for the sides and center of the tray.
On top of it all is a piece of ebony that will be used for the handle. I'll cut it to about 2 inches long. It's about 3/16 inch thick and 7/8 inch wide. One thing about ebony is that because it's so dark you can glue up small pieces and no one can see the glue lines.
I prepare the 3/16 inch stock by resawing on my table saw. I cut a bit thicker than 3/16 inch so that after I glue the pieces together and flatten them, I have 3/16 inch left.
For the top, I try to choose a couple of pieces that have really interesting figure and glue them together.
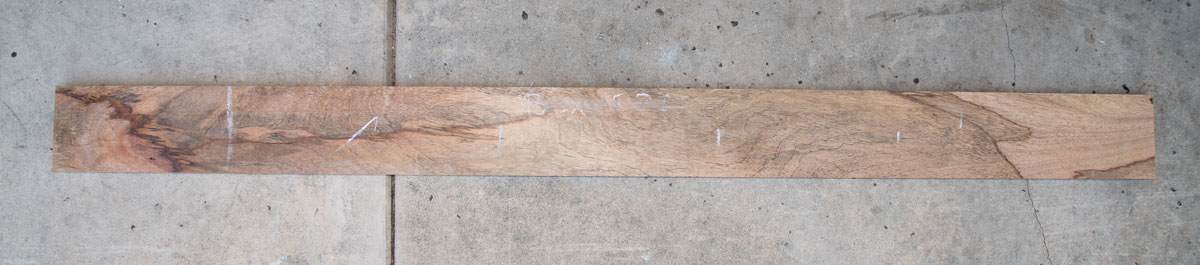
I'll start the actual building with the piece for the sides. I cut this one down to 3 3/4 inches. I have been building these boxes with 4 inch sides but decided that a lower box looks better. When you "wrap" a board around a box there will be one corner where the grain doesn't match and that corner should be in the back. But it can be on either side. So when cutting the board for the sides, I can start with an 8 inch piece or a 12 inch piece.
I make that decision based on what the wood will look like on the front of the box. In the picture below I've used chalk to rough out where the cuts will be. I will start from the left with an 8 inch piece, and then the 12 inch piece for the front. Then the other side and the back.
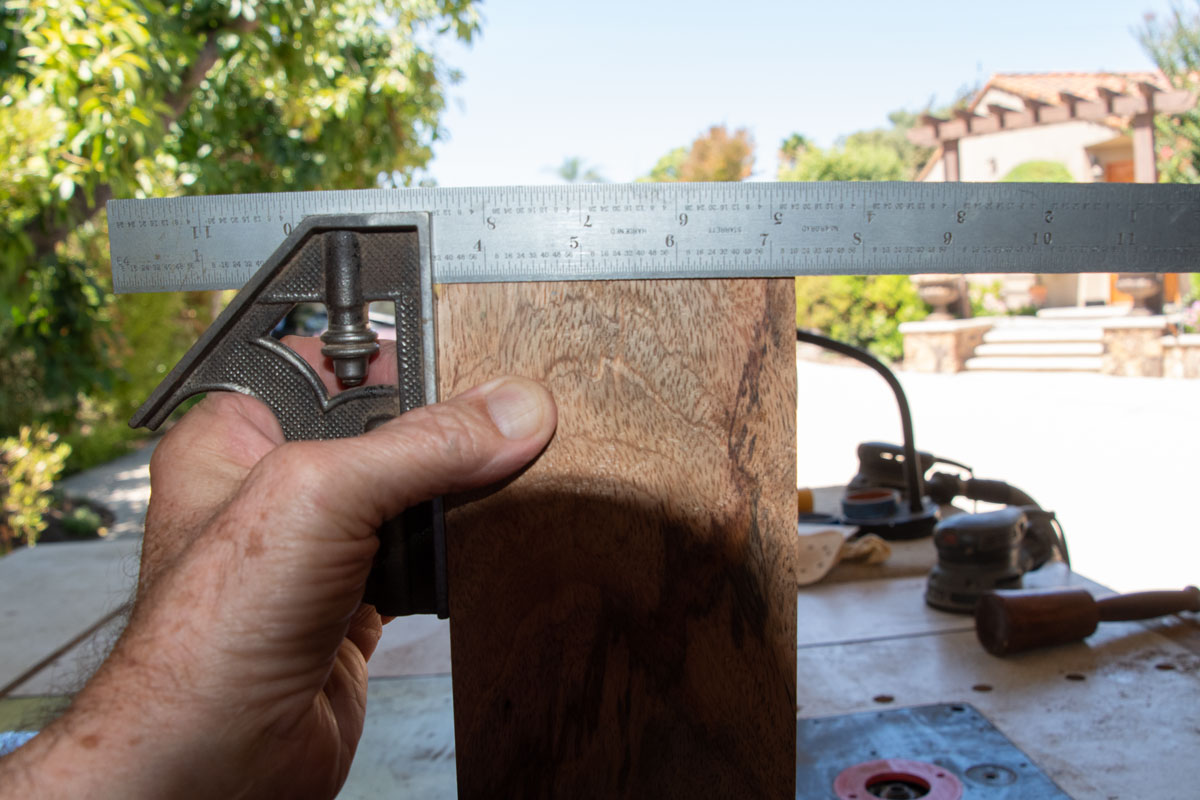
I cut the miters on my table saw now. I used to use my miter saw but I found that I can make the miters more accurately on the table saw. Here's the setup. The blade has been tilted to 45 degrees and I'll use my miter gauge. I begin by cutting the miter on the end of the board.
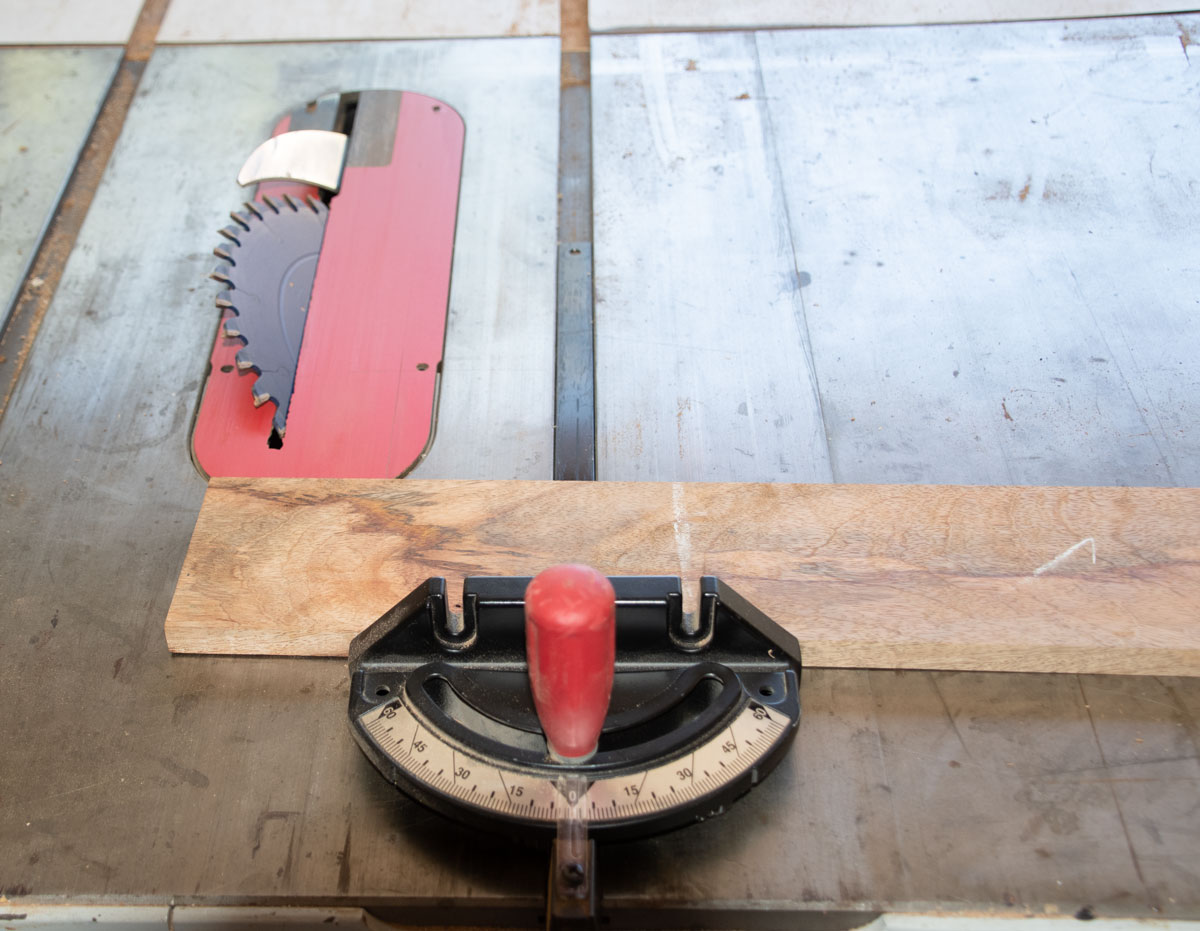
After you make your cut you want to make SURE that the cut is square across. If not, adjust your miter gauge and re-cut.
Measure and mark 8 inches back off the end of the board. Reverse the board so that the 8 inch piece is against the miter gauge. This is perhaps the hardest cut to make - you have to hold the board tightly against the miter gauge as you push the wood through the cut. Also keep the wood pressed downward, flat against the table.
I number the two sides of the cut so that I can put the pieces together in order (so that the grain figure flows). This is numbered "1" but the "1" is upside down in the picture.
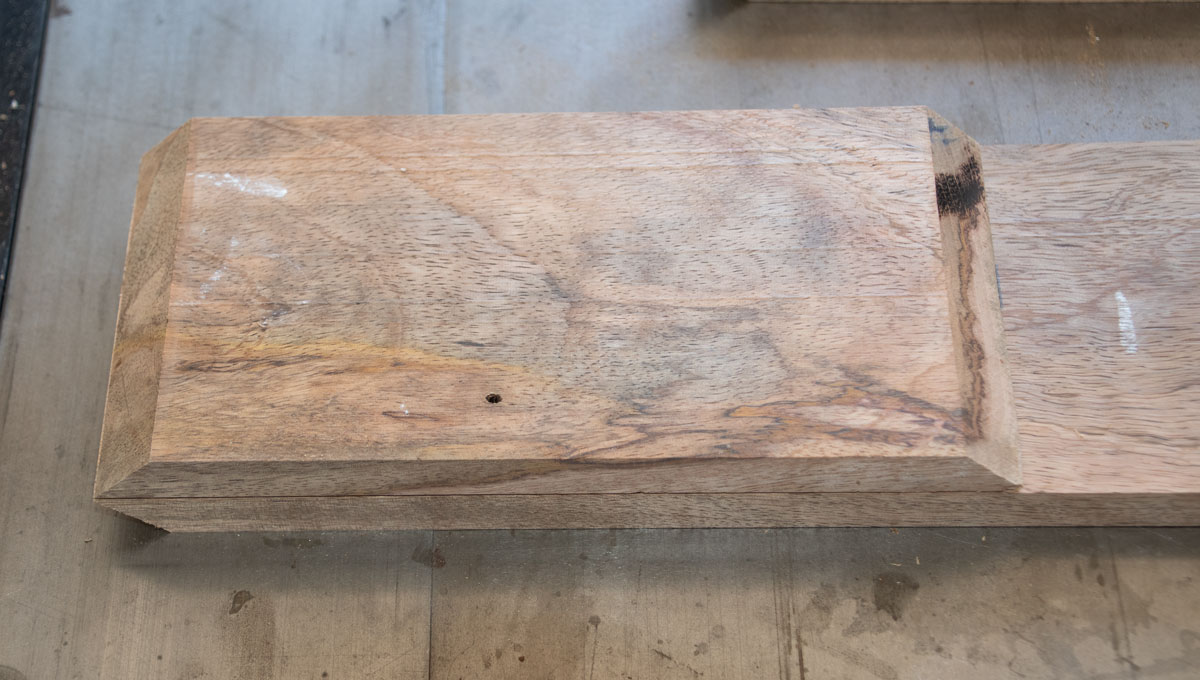
My next cut is to take the wood on the left side of this picture and cut a miter on it (so that it can make a 90 degree corner). I have to do this since I want to grain figure to flow around the corner. If I turned the board over to use the 45 degree cut that's on it now, the grain figure would not flow.
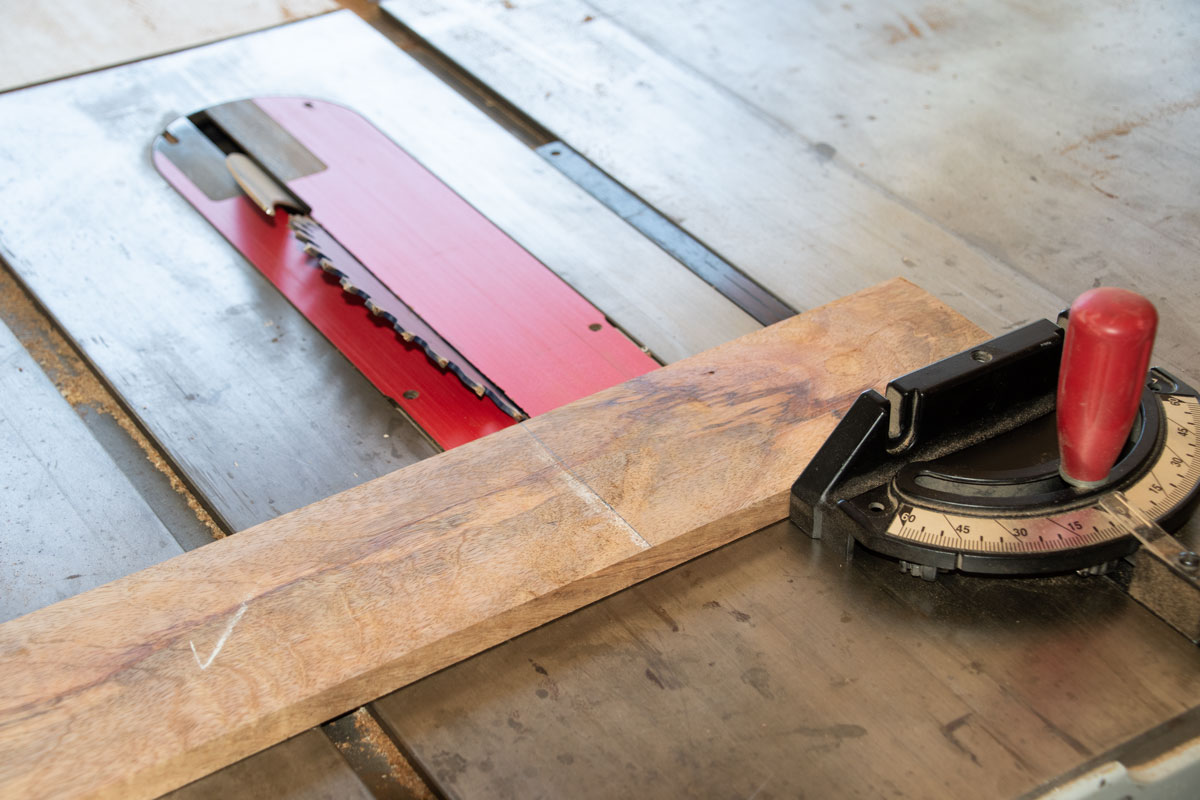
After making that cut, I measure, mark and cut the 12 inch piece.
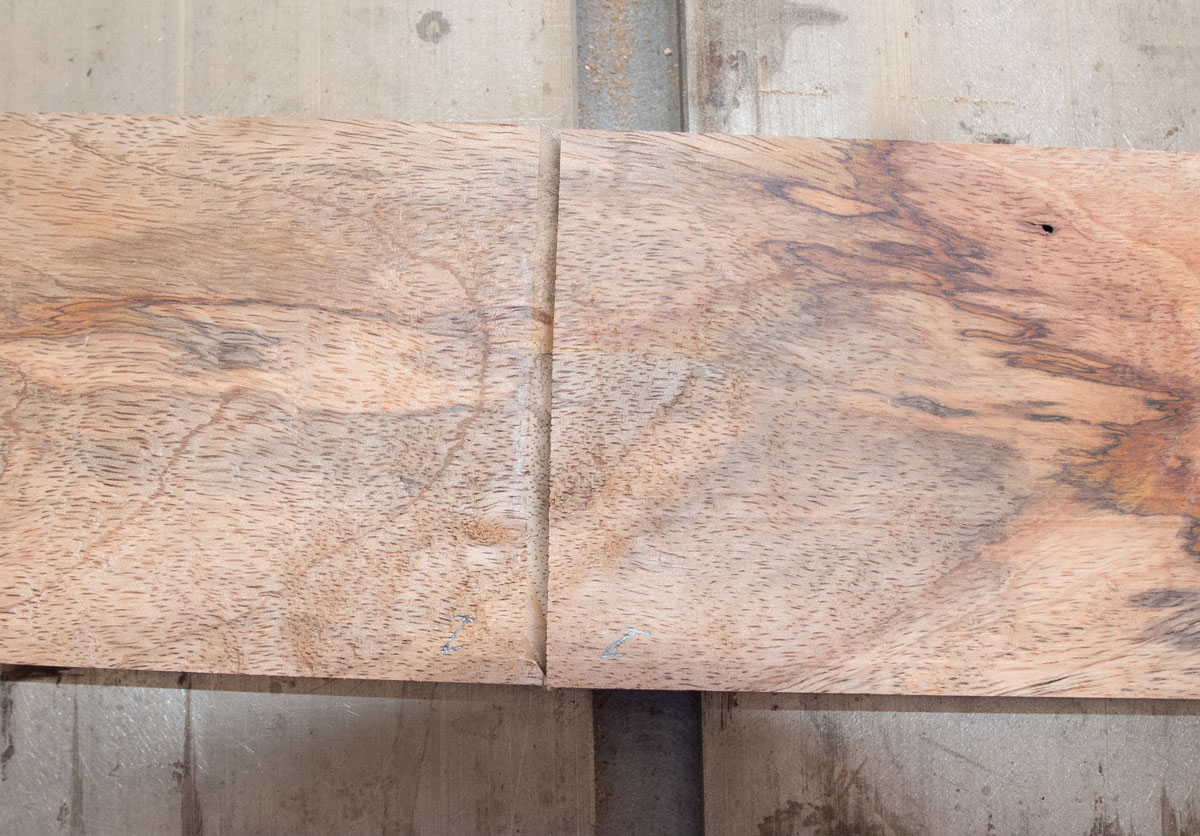
After making that cut, I mark the pieces with the number "2".

I now have to cut a miter on the piece on the left in the above picture to prepare it for the next cut, which will be an 8 inch piece. Rather than measuring for this cut, I take my previous 8 inch piece and use it to mark for this cut.
After you cut the 8 inch piece, stand the two pieces up on your table saw and see if they're the exact same length - it's important that they are the same length.

Then cut the next piece, which is 12 inches, in exactly the same manner. This will give you two 8 inch pieces and two 12 inch pieces, plus a cutoff. Here's a picture of the pieces laid in order (you can see the grain figure is continuous), with the cutoff above. Save that cutoff - you'll use it later.
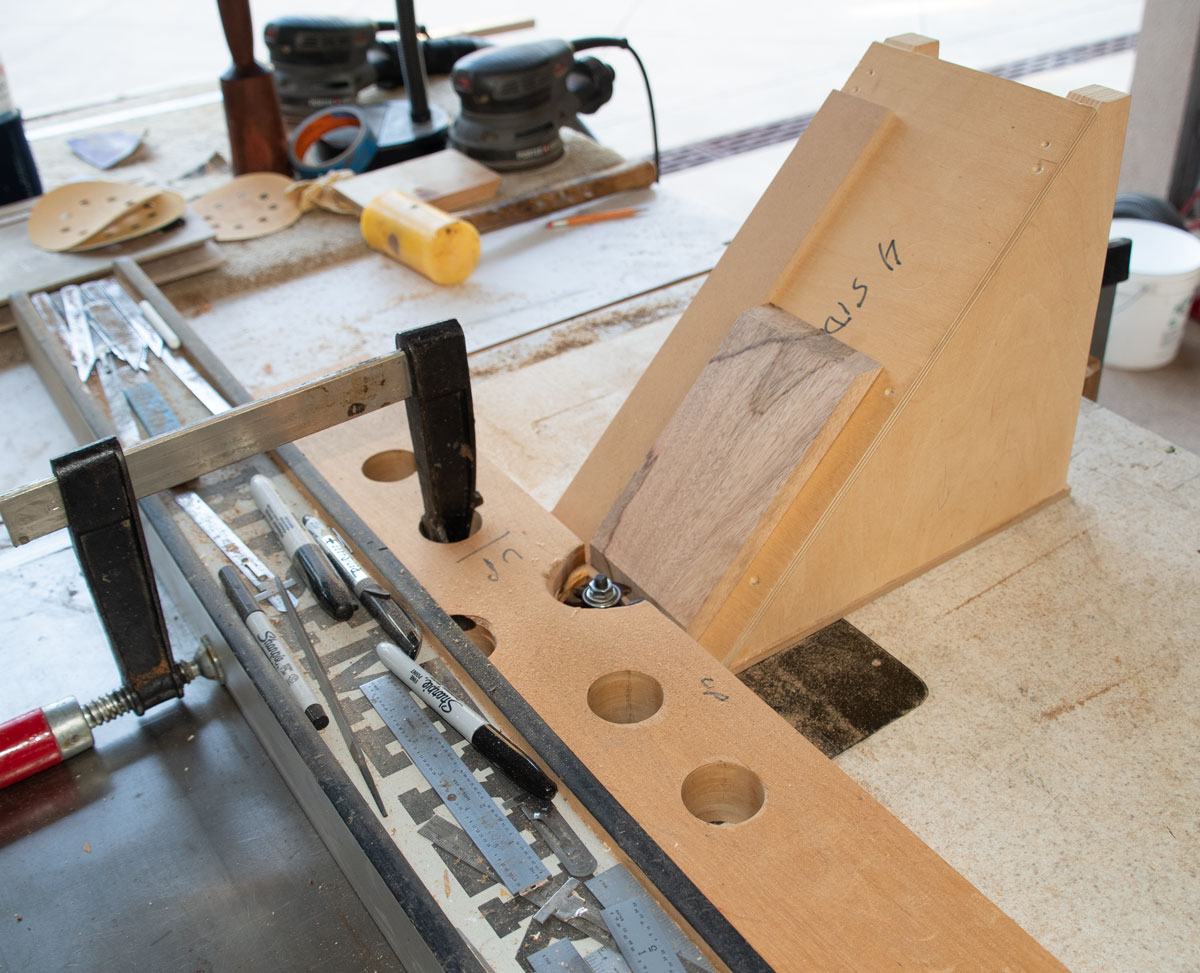
The next step is to cut slots in the miters to put an ff (face frame) biscuit between each of the two sides. Here's the way I do it. I use a 5/32" slot cutter which is the same as the thickness of an ff biscuit. I made a jig that holds the piece of wood at a 45 degree angle so that the face of the miter is presented square to the slot cutter.
It takes some setup to get all this right.
1. You have to adjust the fence back and forth to get the proper depth of cut. The proper depth is a bit over half of the ff biscuit.
2. You need to center the slot between the two ends of the side. You could do this another way, but centered is the easiest.
3. You need to adjust the height of the cutter so that the slot is cut neither too high nor too low. Look at where I positioned the cut for an example.
After making the cuts, this is what the miters will look like.
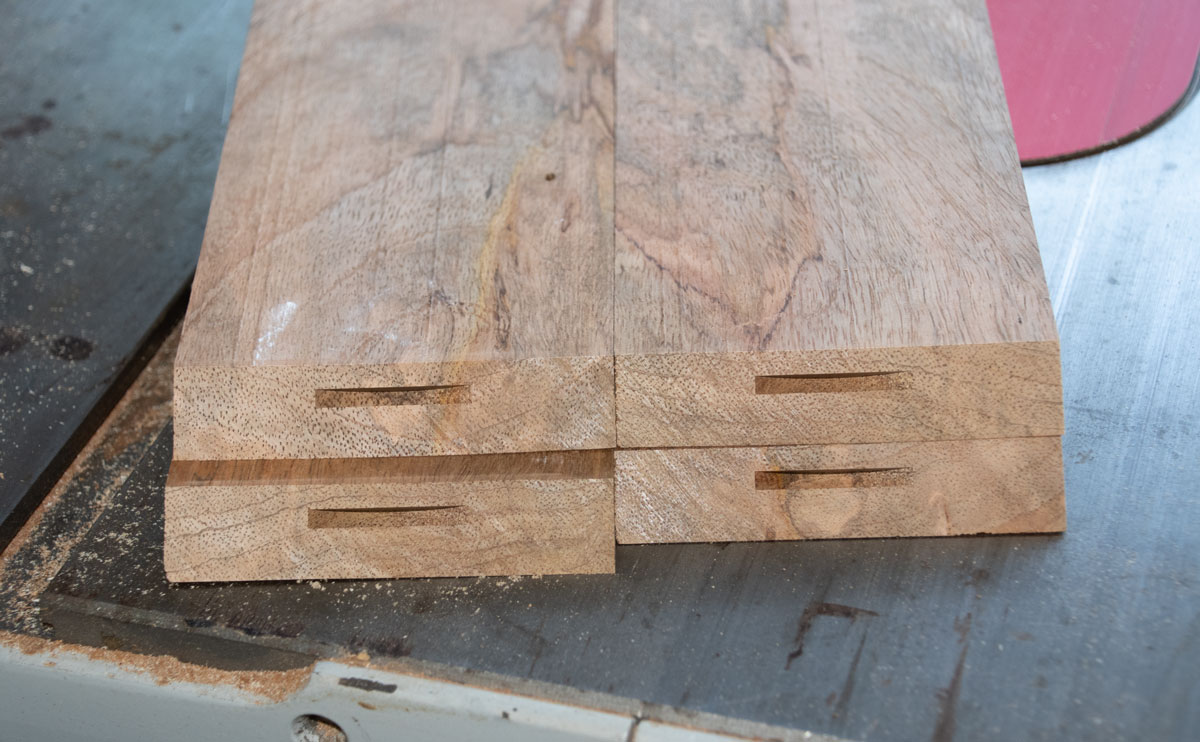
The next picture shows how deep to make the slots, using an ff biscuit for scale.

One final check is to put two pieces together with an ff biscuit and make sure the miter will close. If the slot is not cut deep enough, the biscuit will hold the two pieces apart. If you do encounter that, you can re-cut the slots but an easier solution is to sand the sides of the biscuit so that it's not as wide.
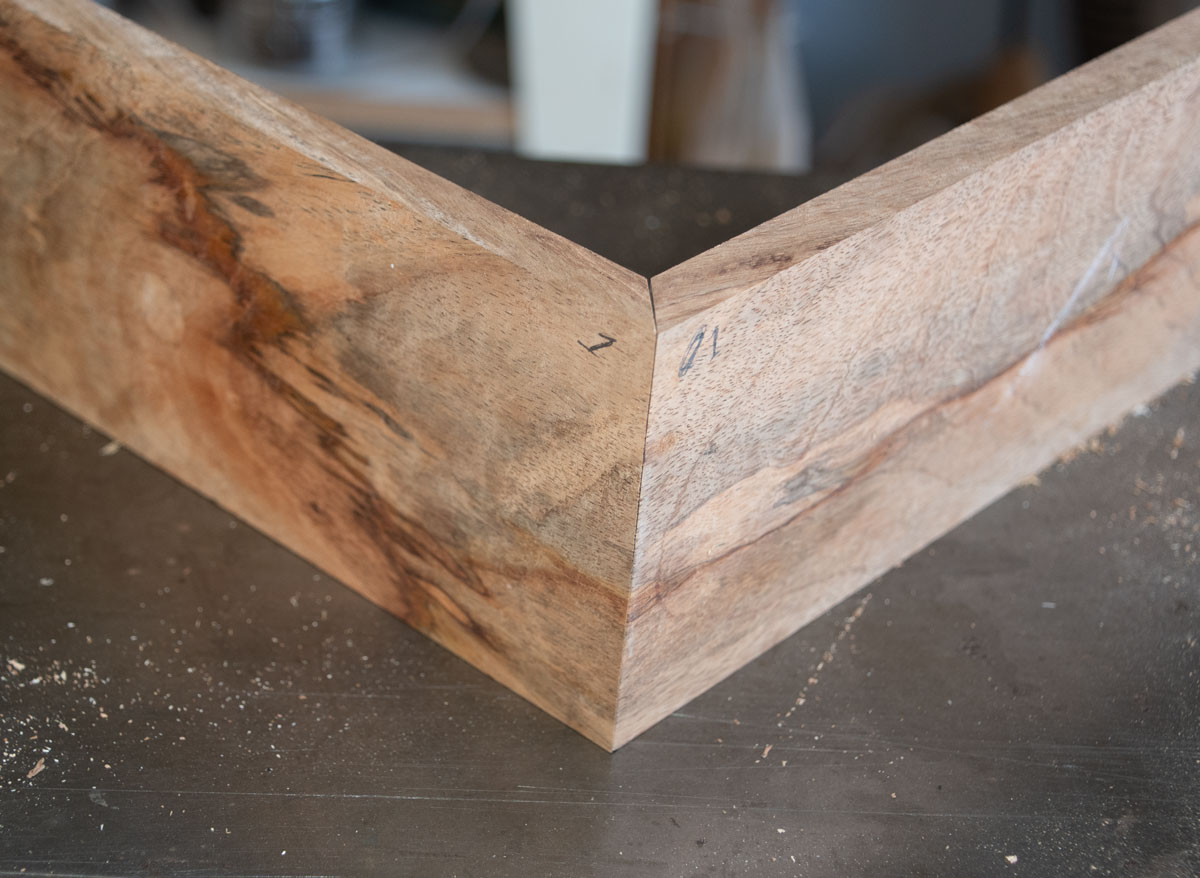
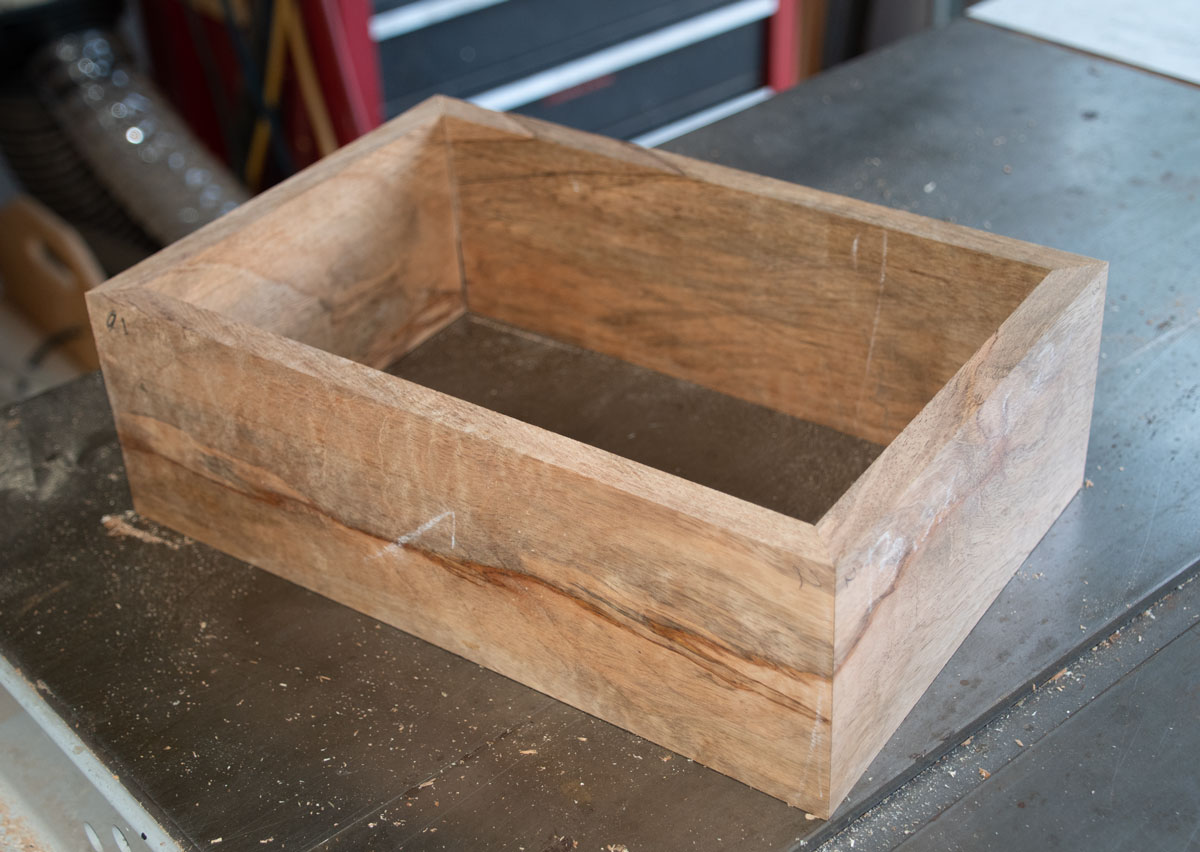
So, now we have a box (shown below with biscuits in each corner) with the grain flowing around the box.
Our next step is to cut the grooves to install the bottom. I'll cut these on the table saw. You want to use a piece of scrap to set up your cut.
Adjust your fence about 1/4 inch from the blade. You could go as small as 3/16 inch if you want. Set your blade about 1/4 inch high.
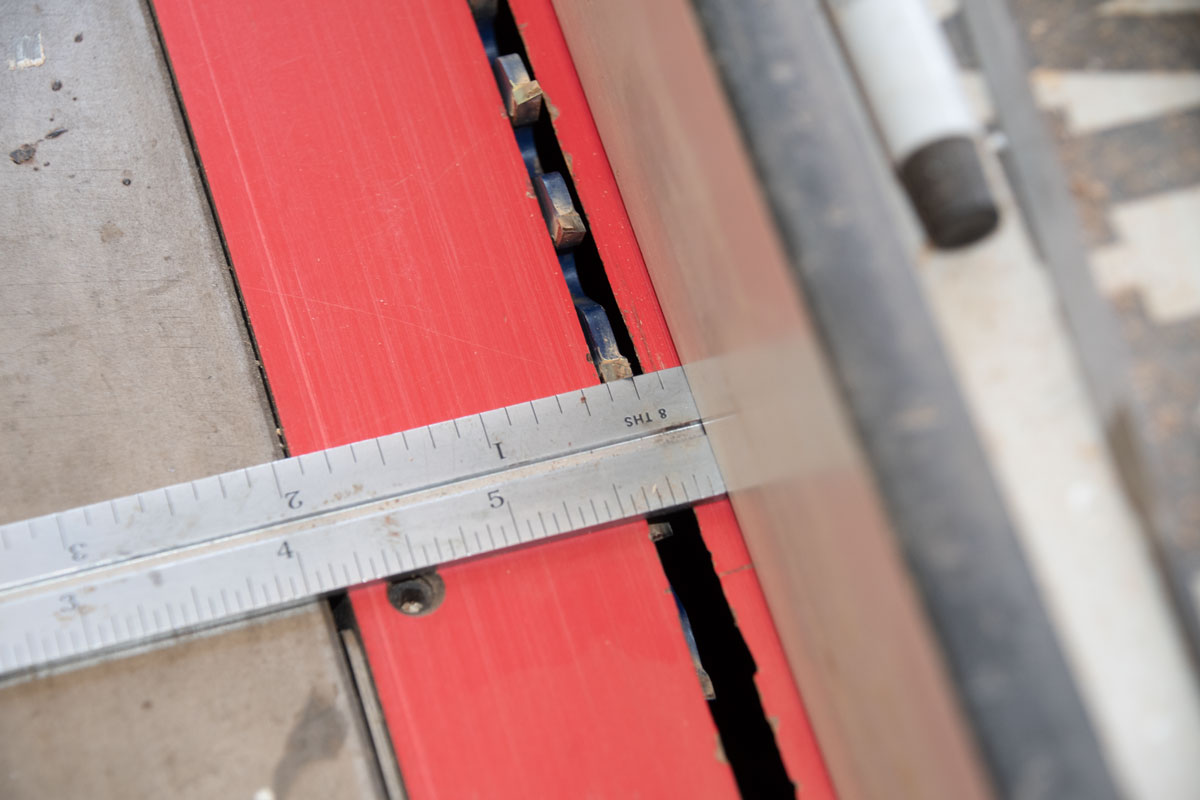
Use a piece of scrap and make a test cut about 2 inches long. That is, push the piece of scrap about 2 inches into the blade and then retract it. You'll use this cut to check the depth of cut. If it's too deep you can lower the blade and go about 2 more inches.
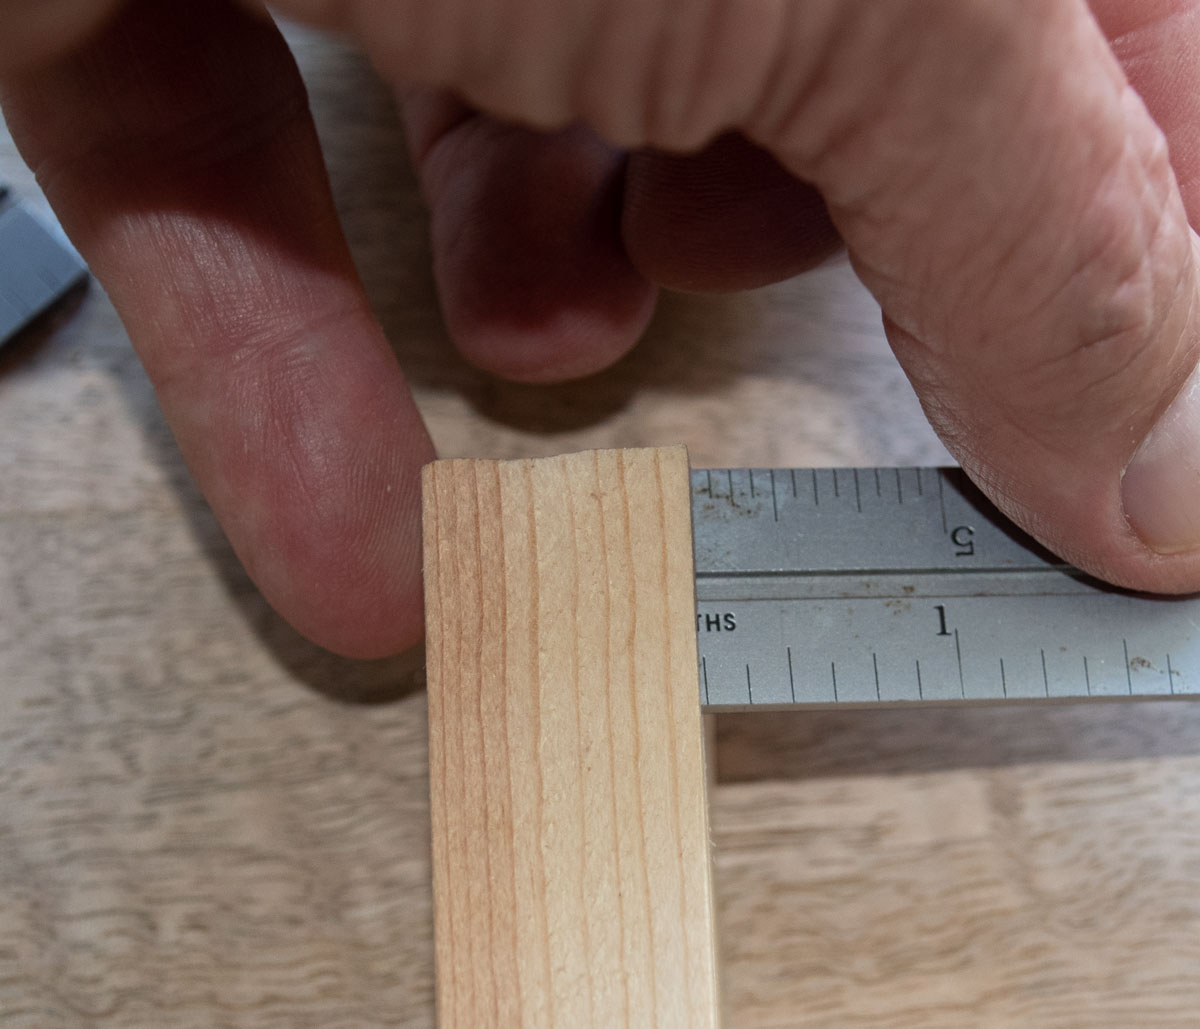
Check your cut. I'm about 1/4 inch from the side.
And about 1/4 inch deep.
Mark all four sides with an arrow pointing either up or down. I use up. You do not want to cut one piece on the wrong side.
I had a student do this one time. To fix it, I cut a piece about 1/8 inch thick off of some scrap and the same color as the wood. I glued it into the cut and then sanded it down after the glue set. It was not invisible but would not be noticed.

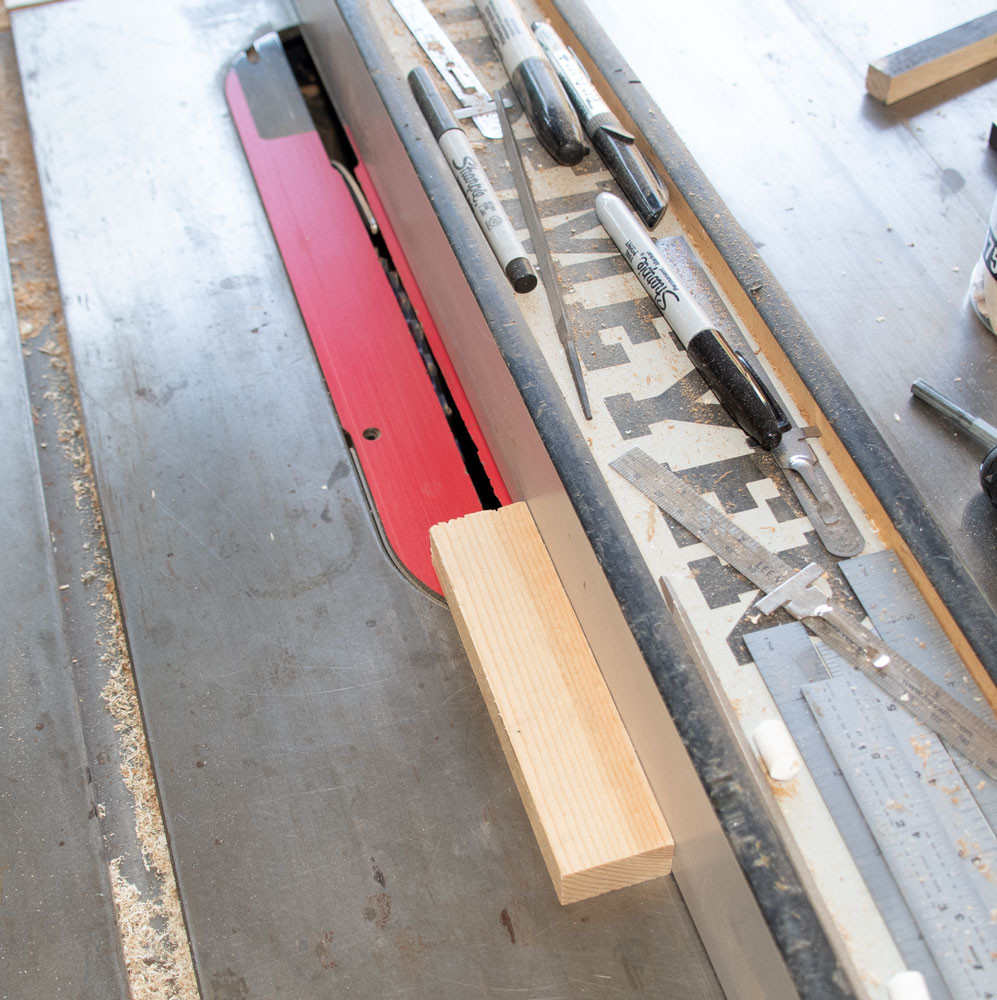
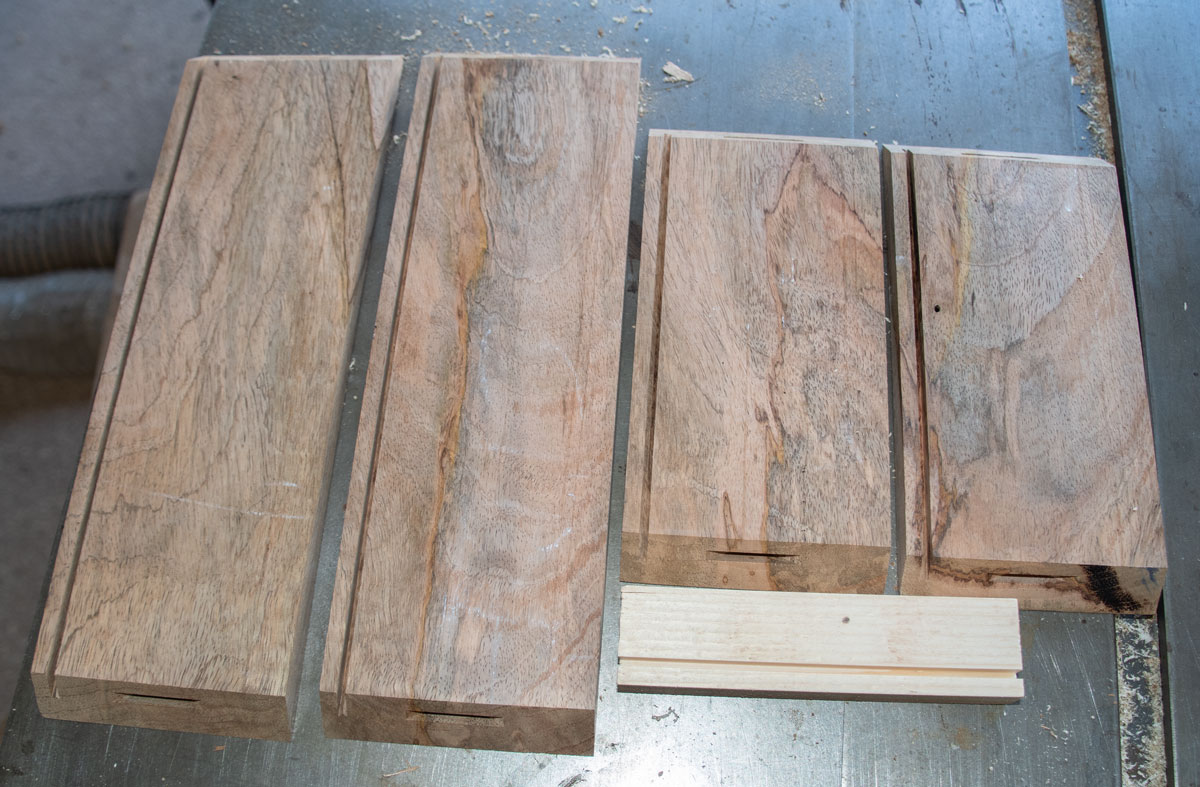
Here are the sides and the scrap run through the blade one time.
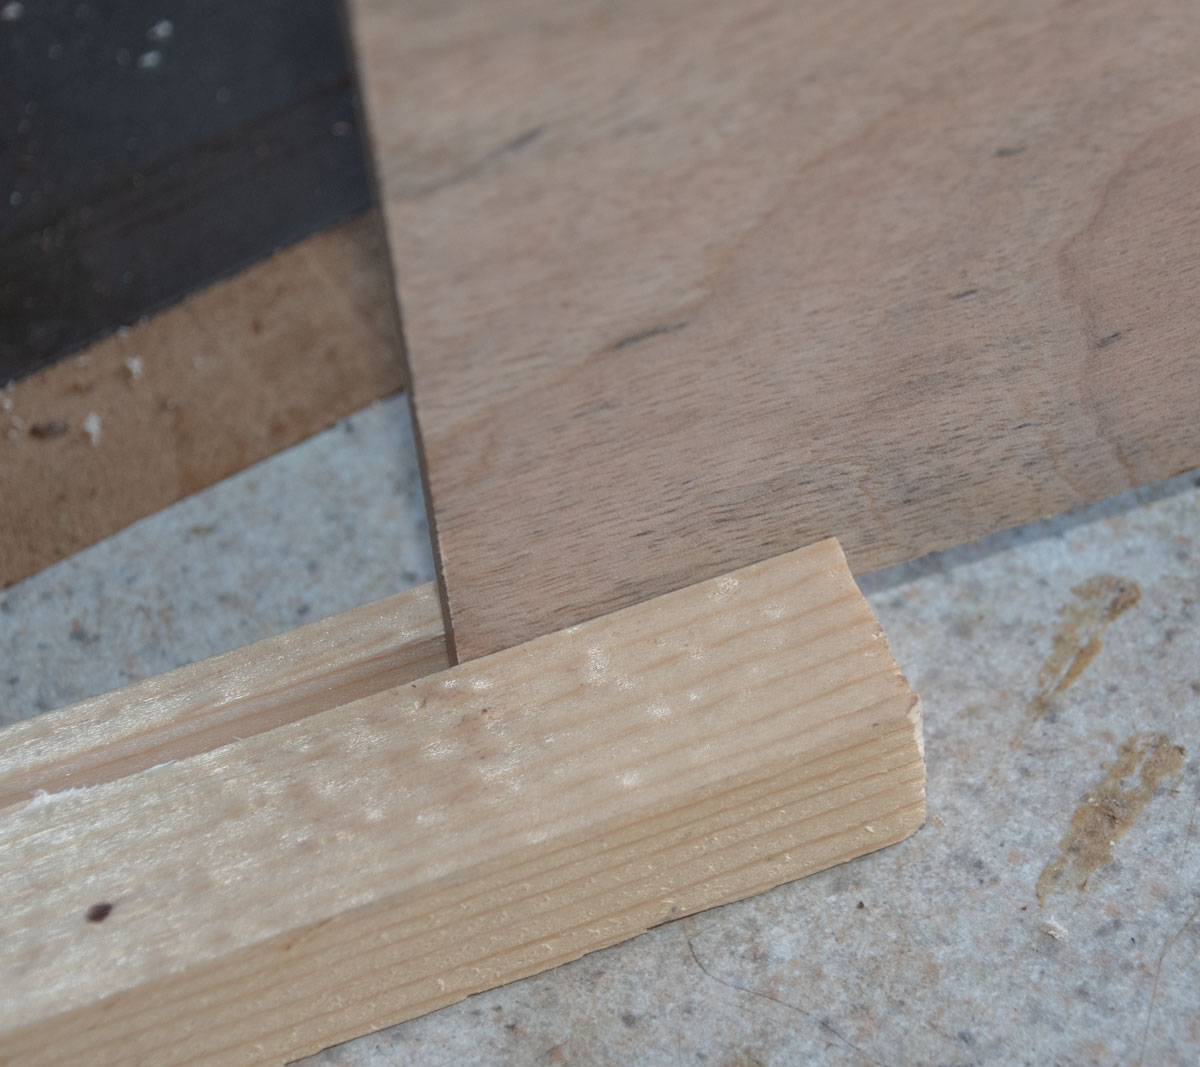
The bottom is about 3/16 inch thick and the blade kerf is about 1/8 inch. So we need to move the fence away from the blade enough to make a groove about 3/16 inch wide. Use your scrap piece for tests. Move the fence a little, push the scrap about 2 inches into the blade and then see if the bottom fits into the groove. Only 2 inches so that if you go too wide, you have some more kerf to test with.
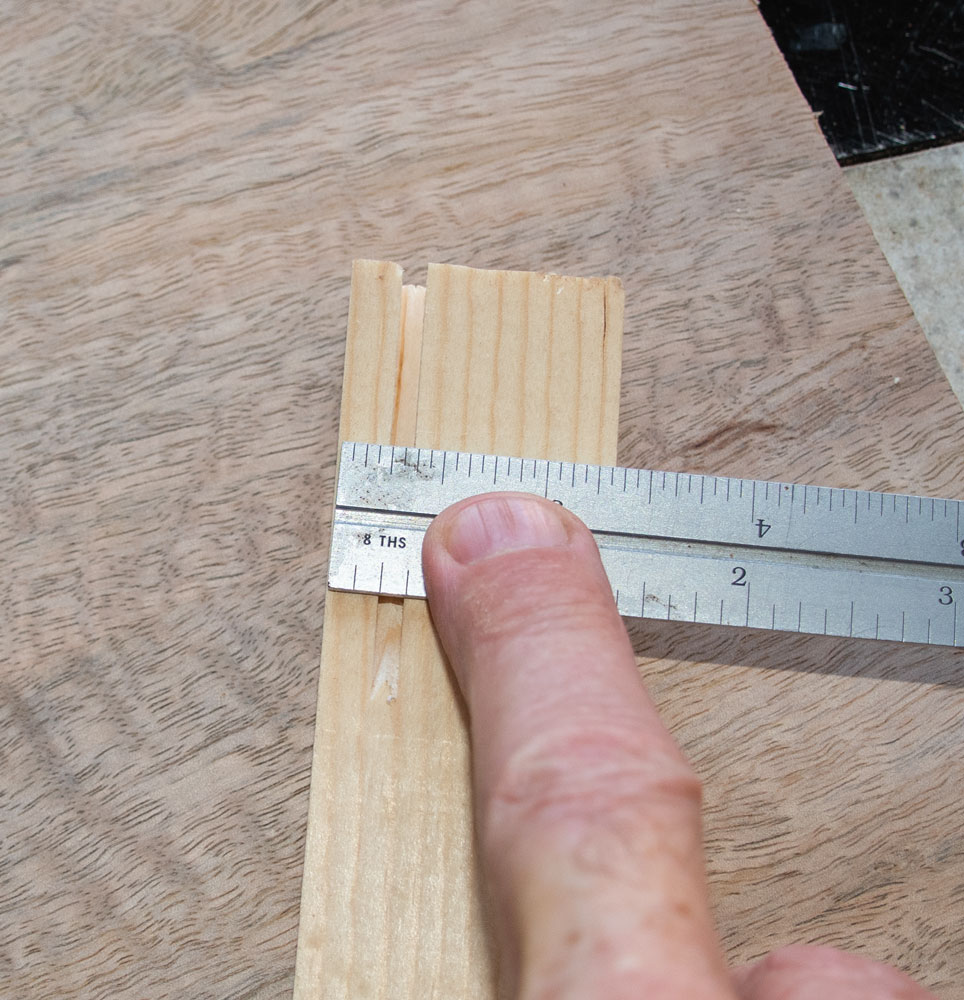
Here's a good fit.
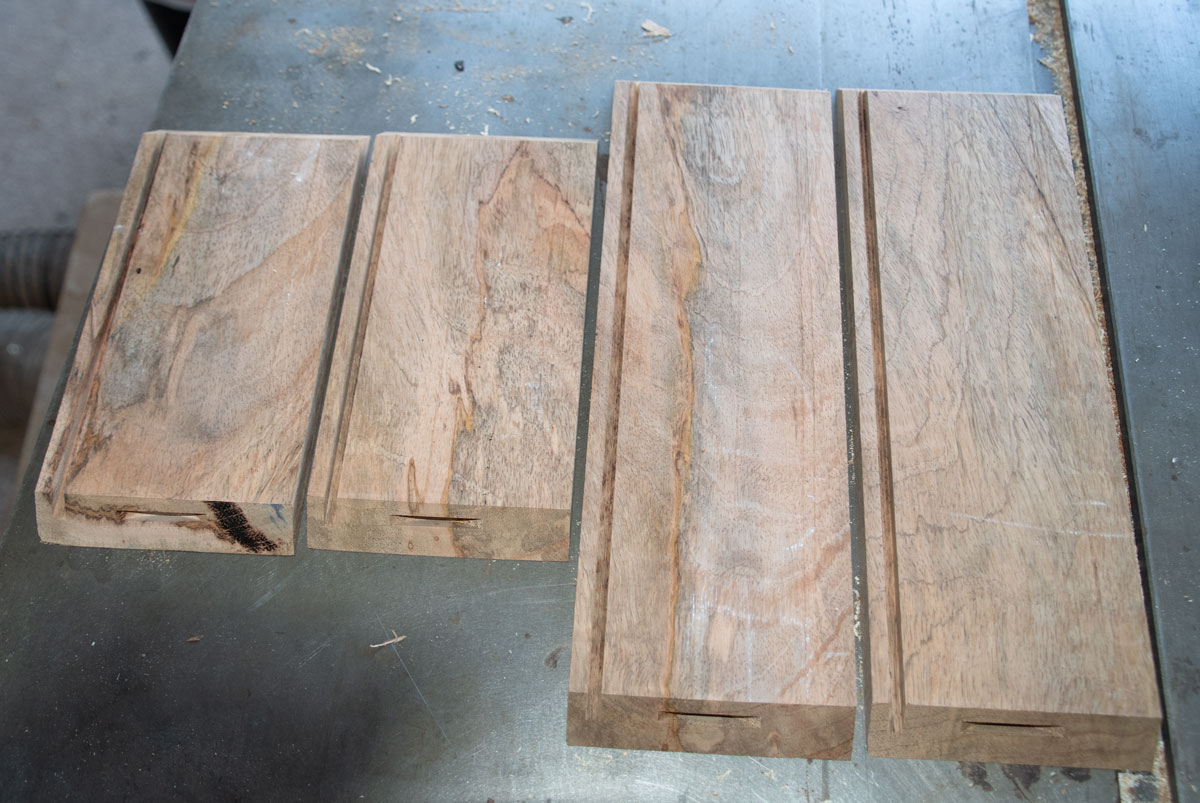
Now run the sides through the blade, again being careful to keep the sides oriented properly. This is what the sides will look like.
The tutorial continues here.